The best subtitle generator delivers the output your project needs: an editable SRT file or captions embedded in the video. For an existing YouTube upload, YouTube Studio is a practical free SRT file generator. This guide covers that workflow and three alternatives for different editing needs.
Fast speech, accents, and background music can leave you correcting a transcript that looked finished. To me, a completed progress bar marks the start of proofreading. Consider a short interview that needs both a caption track and a social cut. I'll follow that project from choosing its output through generating, correcting, and exporting usable subtitles.
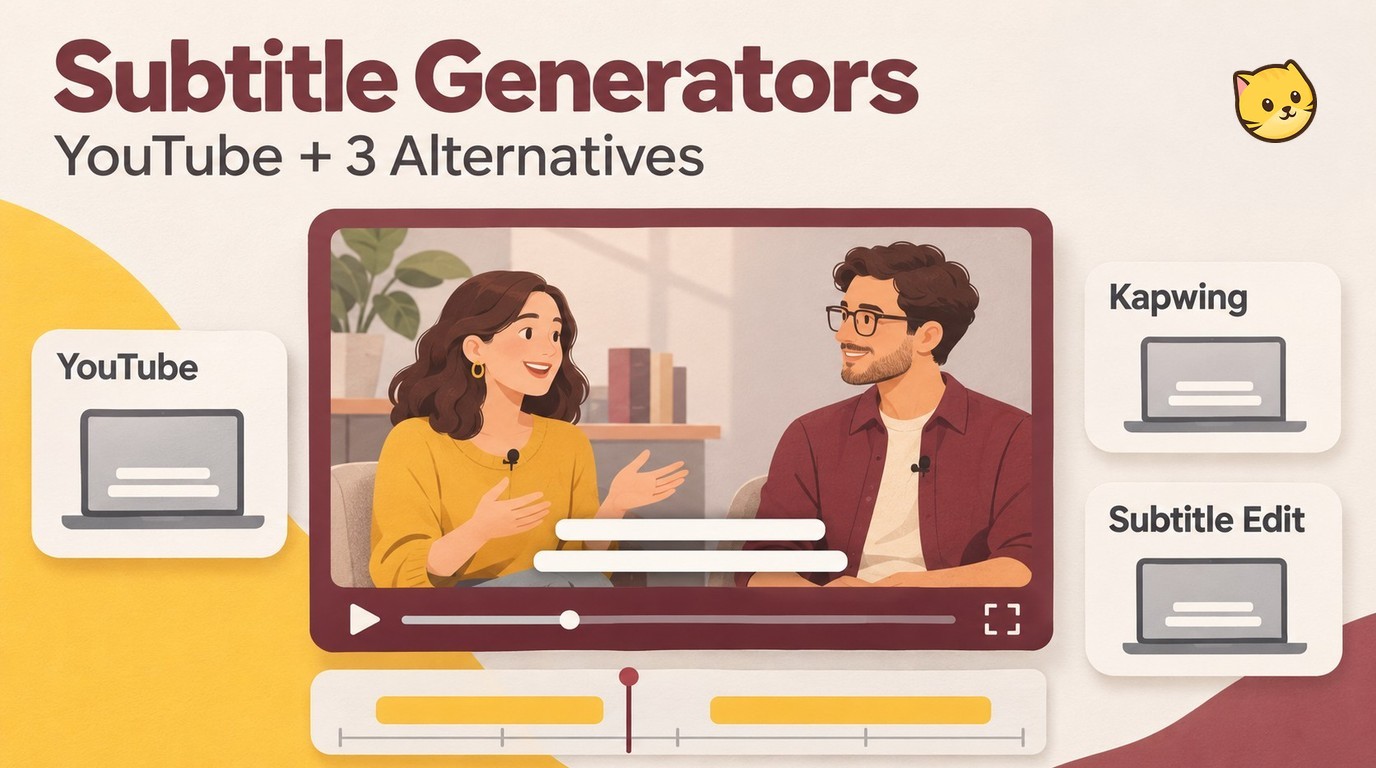
Choose SRT Files or Burned-In Captions Before You Start
Choose SRT when you need timed text that stays editable and separate from the video. Choose burned-in captions when the words must remain visible in the exported picture, such as a styled social clip.
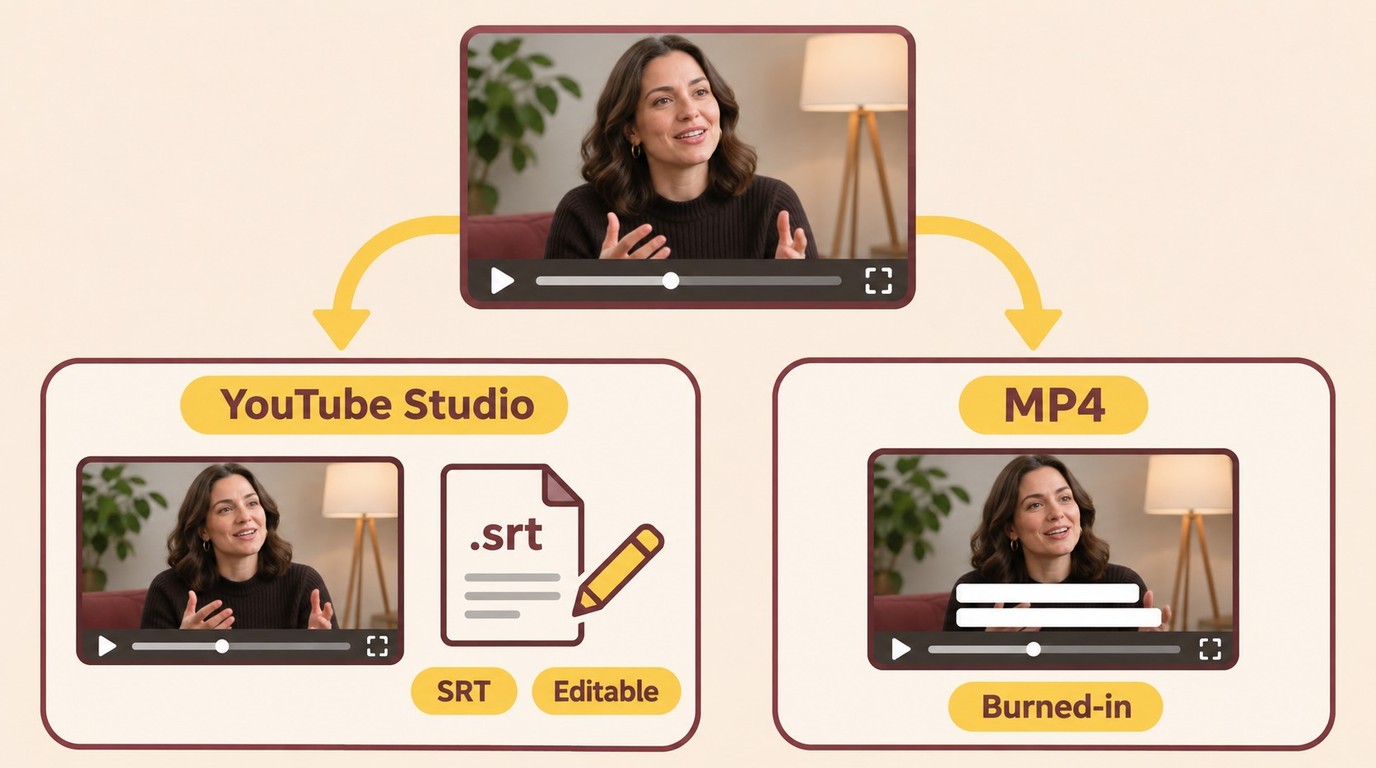
What an SRT File Preserves, and What Burned-In Captions Change
An SRT file preserves words and timing without repainting the video. Each entry contains a sequence number, start and end times, and subtitle text. You can revise a misspelled name or replace a language track while keeping the video file. The destination player or platform controls how those captions appear.
Burned-in captions become part of the picture. Their placement, color, and font travel with the rendered video, but changing a line means editing and exporting the video again. A captioned MP4 and an SRT are different deliverables. Keeping the editable subtitle file alongside the finished social cut gives you a way to make later corrections.
The confusion is practical, not just terminology. One poster in r/aitubers asked, “Just wondering what the best tools are for adding subtitles on screen, transcribed from the audio.” That describes a visible caption result; it does not tell you whether the editor also needs a reusable text file.
Your publishing destination decides which output is useful. YouTube accepts basic SRT files in UTF-8 and ignores their style markup, so decorative text in an editor will not automatically carry into its caption track. I would keep the interview's corrected text as an SRT and make the social styling a separate finishing task. A higher video resolution does not fix a wrong name.
Prepare the source before generating anything. Use a video you own or have permission to process, identify its spoken language, and make sure the dialogue is audible. Decide whether you are delivering a file for upload or a captioned video for direct posting. Those choices prevent a polished preview from becoming the wrong final asset.
How to Generate and Download an SRT File in YouTube Studio
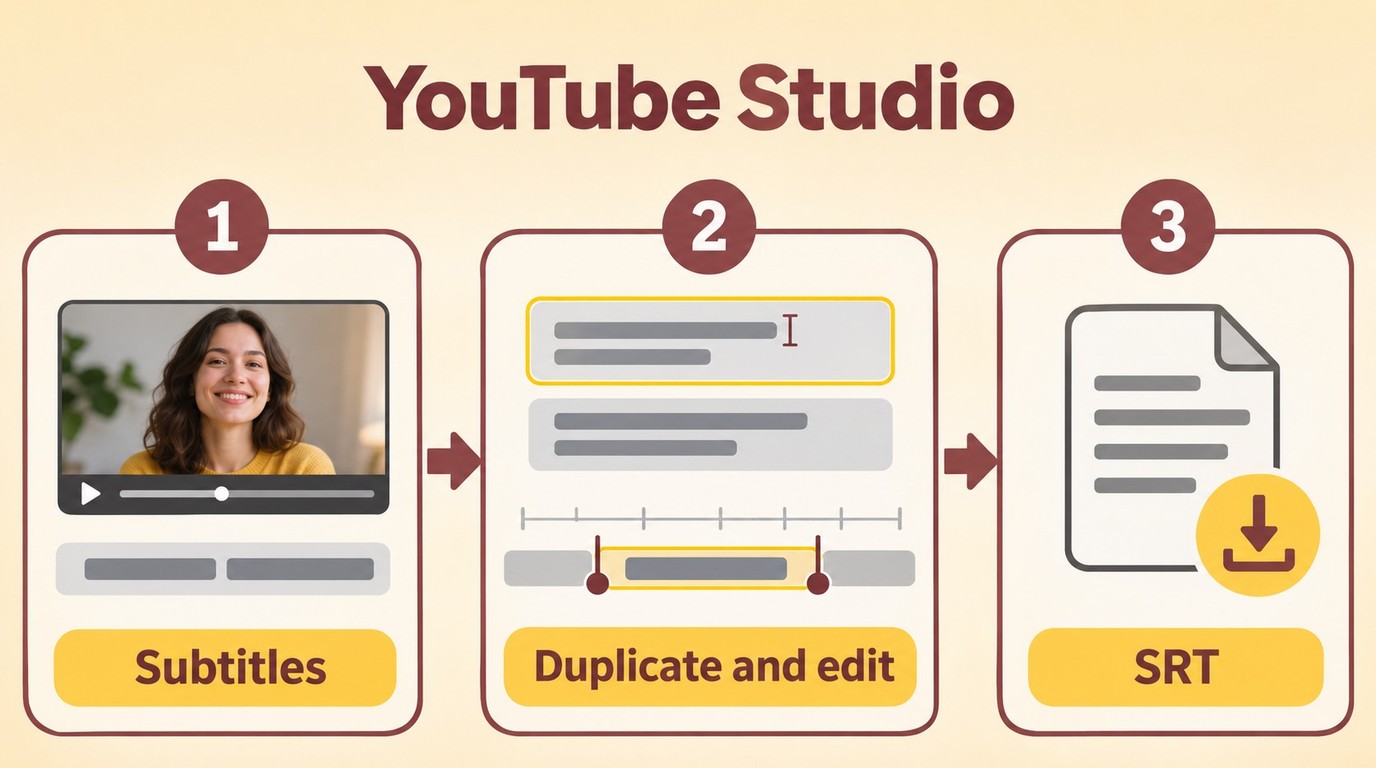
YouTube Studio lets you generate a caption track, correct its text and timing, and download subtitles from the editing screen. You need access to manage the uploaded video; automatic captions require processing and are not an instant result.
Prepare Your Video and Generate the Caption Track
This route fits a video already in your channel. Have your Google account, video-management access, and original video language ready. For the interview example, use the same edit that you intend to caption. Removing an introduction afterward changes where the spoken lines fall.
Start with the uploaded video's subtitle settings:
- Sign in to YouTube Studio, open Subtitles, and select your video.
- Set or confirm the video's original language and inspect the available language tracks.
- Open the automatic caption track when it appears. Allow time for processing after upload.
- If no automatic track is available, add captions manually or use Auto-sync with a transcript in the same language as the speech.
YouTube's caption-creation instructions explain manual entry and transcript synchronization. Auto-sync places supplied words against the recording; it is useful when you already have a transcript. It is not a way to turn a transcript in another language into a matching original-language track.
Missing captions call for an audio check before another upload. YouTube's automatic-caption guidance identifies poor sound, overlapping speakers, accents, and pronunciation as sources of trouble. With multiple language audio tracks, automatic captions use the default language. Listen to that track first, especially if your interview file also includes commentary or an alternate dub.
I would use the official path for an existing channel upload because the caption track belongs directly to that publishing workflow. It is less convenient when your task starts and ends with local files. Either way, leave room for correction; a track appearing in Studio does not make it ready to publish.
Correct the Text, Download SRT, and Reuse the File
Correct meaning before polishing line breaks. Names, specialist terms, and small words such as “not” deserve a listening pass because an ordinary-looking sentence can still say the wrong thing. In the interview, check the guest's name against the approved spelling rather than trusting the transcript.
Continue in YouTube Studio:
- Open the language track's Edit view. For automatic captions, choose Duplicate and edit to create a revised track.
- Correct the words, then use Edit timings where needed to adjust caption starts and ends. Publish the revised track.
- Open its editing options, choose Download subtitles, and select .srt when the format choices appear. Save the file with your video assets.
- Preview the downloaded SRT against the same video edit. To return an externally corrected file to YouTube Studio, use Upload file and choose With timing.
YouTube's editing instructions cover text changes, timestamps, and subtitle downloads. If the downloaded file has a different extension, open it as text and identify its format before importing it elsewhere. Renaming an extension does not convert the timestamps.
Check the saved file itself, not just Studio's preview. Confirm that the text opens correctly, the first spoken line starts at the right moment, and the final exchange still lines up. Keep the original export before making changes. A matching video filename plus a clear language label makes the handoff easier to follow.
Reuse depends on the destination accepting a separate caption track. Uploading an SRT attaches timed text; it does not permanently draw those words onto the picture. When the social cut needs visible captions, adding subtitles to a video becomes the rendering stage after the text is corrected. I would finish the reusable file first so both deliverables start from the same approved wording.
Kapwing vs. Subtitle Edit: Browser Editing or Local Control?
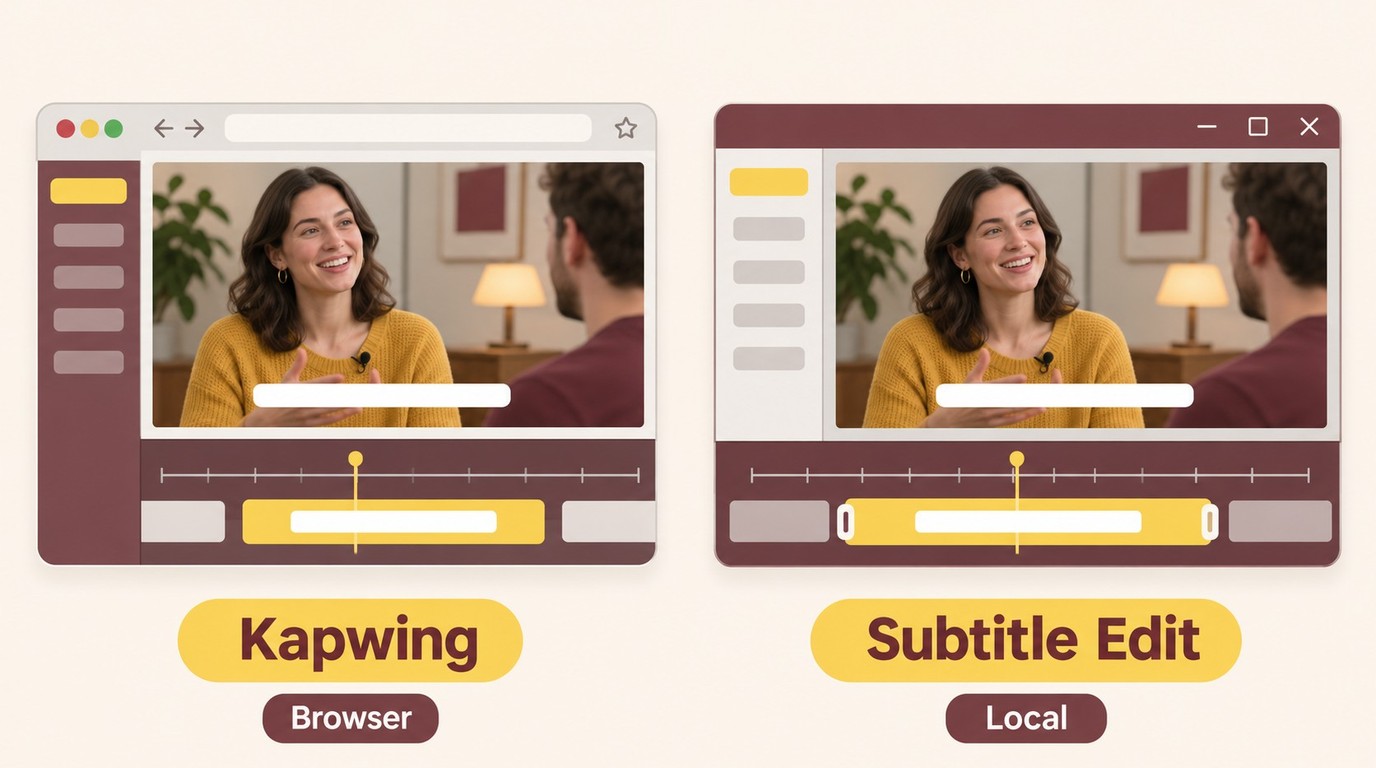
Kapwing fits a browser project that needs styled captions and a finished video. Subtitle Edit fits local transcription and detailed subtitle-file work, with speech-engine setup as part of the job.
| Tool | Good Fit | Environment | Output | Main Trade-Off |
|---|---|---|---|---|
| YouTube Studio | Existing channel uploads | Browser | Downloadable caption track | Upload and caption availability |
| Kapwing | Styled social captions | Browser | SRT, VTT, captioned video | Free video exports watermarked |
| Subtitle Edit | Local subtitle-file control | Desktop | SRT | Engine setup and review |
| UniFab Subtitle Generator AI-Fabcloud | SRT projects with source-track choice | Windows, macOS | SRT | Separate file needs a player or editor |
For the interview's social cut, browser styling addresses the visible result. For its reusable caption track, local text and timing controls address the handoff. Neither task is settled by an advertised accuracy score.
Kapwing: Browser-Based Caption Editing and Styled Video
Kapwing combines automatic captions with text, timing, and style editing in a browser. It offers subtitle-file output and rendered video with captions. That makes it a fit when you want to correct the words and arrange the social cut in the same workspace.
Use its caption workflow this way:
- Upload the video to Kapwing and open its automatic-caption tool.
- Generate captions, correct the text and timing, and apply your chosen appearance.
- Choose a subtitle-file export for reuse or a video export for the captioned picture.
The distinction at export matters. Free rendered videos carry a watermark, and generation allowances are separate from video-export limits. The allowance details appear in the next section. An SRT option and a video-download button serve different needs.
I would choose this browser workflow for a short social edit with caption styling. It is less suited to a project that must stay in a local file workflow, because your media enters an online editor. For the interview, it handles the social cut after the wording has been settled.
One r/AI_Agents poster put their priority plainly: “Accuracy is the priority over editing features.” That is a useful need statement, not an accuracy result for Kapwing or any other tool. Styling helps your presentation; listening still settles the words.
Subtitle Edit: Local Whisper Transcription and SRT Control
Subtitle Edit gives you a local route from speech recognition to editable subtitle text and timestamps. Its speech-to-text options include local Whisper engines. You choose the engine and language instead of assuming every transcription option uses the same processing path.
Follow the desktop workflow:
- Open your video in Subtitle Edit and select Video → Speech to text.
- Choose a local Whisper engine, its model, and the spoken language; download the required components and transcribe.
- Correct the resulting captions and save them in SubRip (.srt) format.
Setup is the trade-off for that control. Engine support differs by operating system, so choose an engine offered for your installation. Whisper CPP supports Windows, macOS, and Linux. A cloud speech service listed in the same menu is a different option from local Whisper.
I would choose this free subtitle generator software when file correction is the main task and you are comfortable setting up an engine. It is less convenient for someone who wants to start editing in a browser immediately. For a folder of recordings, its documented Batch mode produces SRT files beside the source videos; the resulting text still needs review.
The developer's speech-to-text documentation explains the engine choices and batch output. For the interview, local timing control is useful when a line needs to move without changing the underlying video.
Free Subtitle Generators: Export Limits and Correction Costs
A free subtitle generator is useful when its allowance covers your recording and its export gives you the file you need. Account requirements, transcription minutes, subtitle-file access, and rendered-video limits are separate conditions.
Generation Allowances Are Different from Export Rights
Kapwing's free plan illustrates why the export deserves attention. As of November 2026, it includes up to 10 minutes of automatic subtitling, while free video exports are limited to 4 minutes, 720p, and a watermark. A recording fitting the transcription allowance does not automatically fit the rendered-video allowance.
A watermark on a video is not a watermark on timed text. SRT stores caption text and timing rather than a video image. When you need a free subtitle generator with no watermark, ask whether you mean a downloadable text file or a clean rendered MP4. The free-video limit above describes the latter.
No signup and unlimited use are separate promises, too. An editor might let you start a project before asking for an account at export. A local speech engine avoids an online account for that transcription step, but still needs its software and model files. Do not treat “free to start” as confirmation of the full delivery path.
I would inspect the intended export before spending time on decorative captions. For your short interview, the useful outcome is an SRT you can reopen or a video you can post, not merely a preview with corrected words. Keeping a copy of the corrected text also makes switching the finishing step less costly.
Long Recordings Need a Correction Plan
Long videos magnify review work. An r/VideoEditingTips poster described the problem as “accuracy drops when people talk fast, or there’s an accent, or background noise”. That is one person's experience, but it names useful places to inspect in your own recording.
Choose a difficult excerpt rather than judging from a clean introduction. Include the guest's name, a quick exchange, or dialogue under background music. Review whether the generator preserves meaning and whether you can repair a line without disrupting nearby timing. Use that sample to judge the editing workload, not to claim an accuracy percentage for the whole film.
Human review needs a structure even when generation is free. Keep an approved spelling list for names and technical terms, mark uncertain passages for another listen, and compare synchronization near the beginning and end. For a movie or a long interview, use the full runtime when assessing a transcription allowance. Splitting the work into files does not reduce the amount of speech.
Changes to the video create another cost. If you remove a question or shorten the opening after transcription, the old SRT no longer matches that cut automatically. Keep each caption file paired with the video version it describes. My preference is to lock the spoken edit before detailed subtitle correction, then make the social captions from that corrected text. Fast generation helps most when it does not create a second correction job.
When UniFab Subtitle Generator AI-Fabcloud Fits an SRT Workflow
Subtitle Generator AI-Fabcloud fits you if a video project needs source-audio selection, reusable SRT subtitles, and a way to collect completed files. On Windows and macOS, those capabilities support a subtitle-file handoff to your editor or player.
SRT Export, Source-Track Choice, and Batch Downloads
I would use the source-track choice to keep the interview's intended dialogue at the center of the task. Choosing an audio-track language identifies the source you want to work with. SRT export keeps the resulting words and timestamps available for later correction, while batch downloads bring completed subtitle results together for the handoff.
The workflow is short:
- Open UniFab, select Subtitle Generator, and import your video.
- Choose the source audio-track language you need and start subtitle generation.
- Download the SRT result, using batch downloads to collect completed files, and review it against the video.
The output is a separate subtitle file rather than a finished captioned video; continue with the subtitle-import and rendering workflow when the words need to appear permanently in the picture.
New FabCloud users receive 30 cloud credits to explore the workflow. Paid FabCloud access starts at 199.99 USD per year.
Start a short video project with Subtitle Generator AI-Fabcloud and carry the corrected SRT into your publishing workflow.
Frequently Asked Questions
Audio-only recordings, translation, upload permissions, and live events have different requirements from captioning an existing video. I would settle the relevant requirement before using the same workflow for another kind of project.
Can I Generate a Timed SRT File from an MP3 Recording?
Yes, with a tool that accepts audio and exports timed subtitles. A plain transcript is not enough: an SRT also needs start and end times for each caption. In an audio-capable subtitle workflow, use the recording as the timing reference and save the result as SRT. For a podcast, include speaker changes in your review so the text remains understandable without a picture. Free transcription minutes and free subtitle-file export remain separate conditions.
Does Automatic Transcription Also Translate My Video?
Not automatically. Transcription writes down speech in its original language; translation creates text in another language. Selecting an audio track tells the generator which source to process and does not itself establish translation support. For a bilingual interview, generate and correct the source-language text before reviewing a translated version. An online video translation workflow addresses that additional task; the translated captions still need a timing and meaning check.
What Permission Do I Need Before Uploading a Video?
You are responsible for the content you upload and for having permission to process it with the chosen service. Read that service's official terms, follow the terms that apply to your use, and obtain the content owner's approval where required.
Can These Tools Generate Captions for a Live Event?
This guide's file-generation steps are for existing recordings, not a live caption feed. A live event needs a workflow that accepts incoming audio and displays captions during the session. Uploading the recording afterward produces a different deliverable. If the event also needs an archive, keep its post-event SRT task separate from the live display so you can correct names, timing, and speaker changes before publication.
Choose Your Next Step by the Subtitle Output You Need
Use YouTube Studio for an existing channel upload, a browser editor for a styled social cut, or a local subtitle workflow when you need direct file control. Keep an SRT master when the captions will be revised or reused, and render a captioned video when the words must stay in the picture. For the interview project, I would finish the corrected text before styling the social version. The job is complete when the exported words and timing work with the actual video, including its difficult passages.