Premiere Pro is Adobe's video editor for arranging clips, refining sound and color, adding captions, and exporting finished videos. If you're staring at a folder of footage without a starting point, make a short project first; Adobe's subtitle generator fits into that same workflow.
I would judge a first project by whether you can finish and reopen it, rather than how many tools you learn. A screen full of panels gives you choices without giving you a lesson order. That leaves a beginner deciding what to study before making a cut. I'll keep the route tied to a small video, from organizing its media to checking the exported captions.
What Is Premiere Pro, and What Do You Need to Start?
Premiere Pro lets you edit video and audio on a timeline, then export the result for your audience. Before starting, you need a compatible computer, access through Adobe, source clips, working storage, and a destination for the finished video.
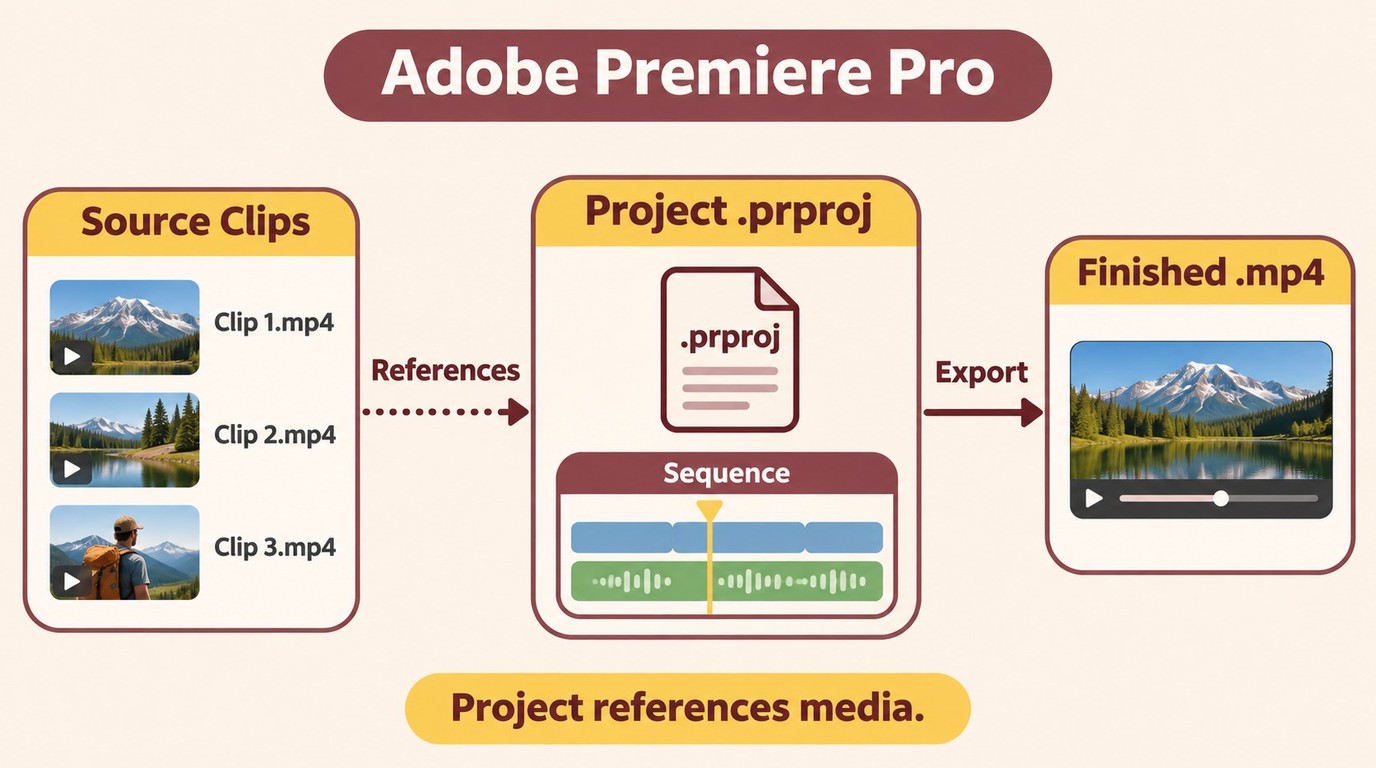
The timeline is your assembly area. Premiere uses non-linear editing, which means you can rearrange and trim clips without changing their original files. A project stores your editing decisions and references to media. A sequence is the timeline inside that project, with its own frame size and frame rate. An export is the separate video you deliver.
Keep those files together. A project file alone is not a backup of your camera footage, music, or graphics. Give the project and its source media a clearly named folder before importing anything. Leave room for previews and the final export, too.
Computer requirements deserve more attention than a successful installation. Adobe's technical requirements distinguish minimum specifications from recommendations for more demanding work. Windows and macOS have separate compatibility requirements, so use the section for your computer. I would treat the minimum as an entry threshold, never a promise of responsive editing with effects and large footage.
As of November 2026, Adobe's US individual Premiere plan costs US$22.99 per month on an annual contract, billed monthly. That is an annual commitment with monthly payments, rather than a cancel-anytime monthly plan.
The first creative decision is simpler: where will this video play? Choose landscape or portrait before building the sequence. A short introduction with a spoken explanation and supporting shots gives you something concrete to finish.
One poster in r/premiere captured the starting problem: "I want to learn Premeire Pro although I do not know where to start." That is a request for direction. A small deliverable gives each new command a purpose.
How to Edit Your First Video in Adobe Premiere Pro
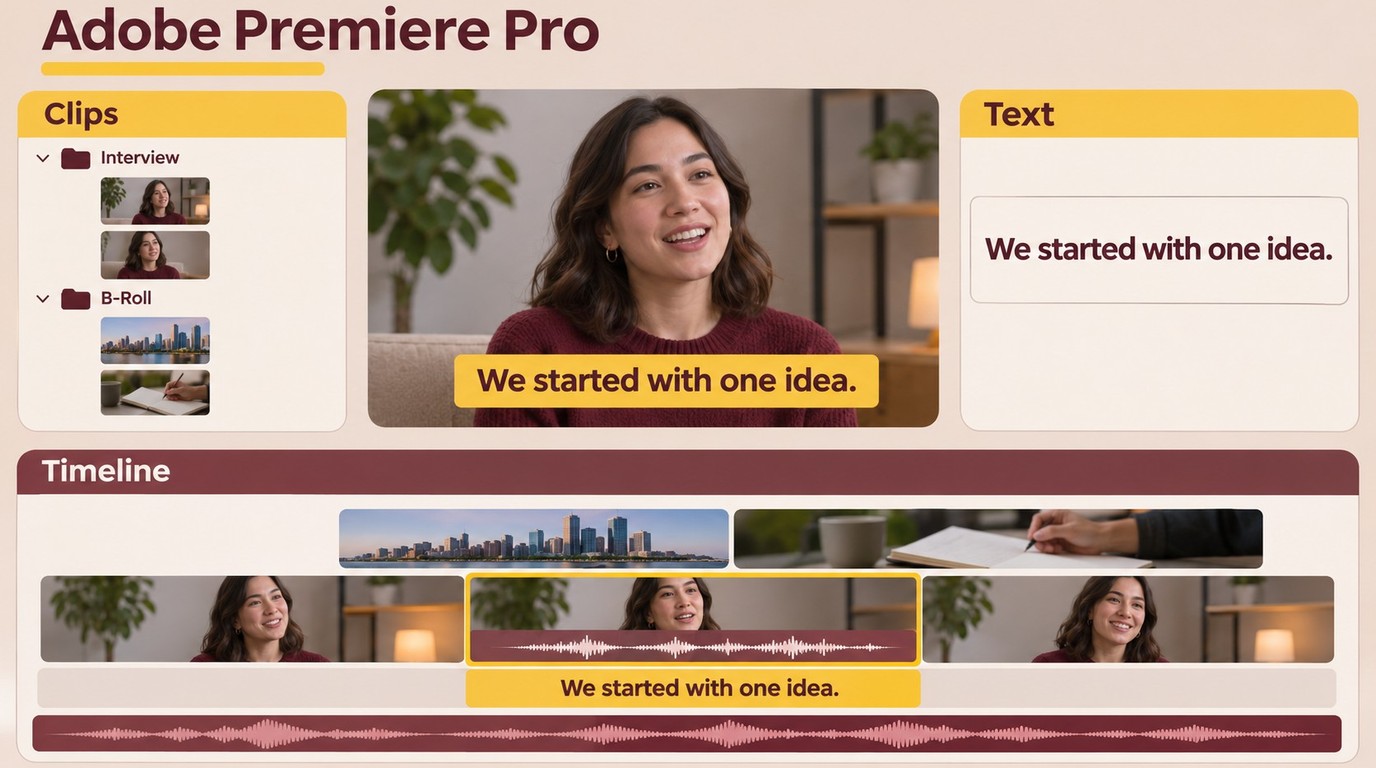
You can finish a first video in Premiere Pro with a small sequence containing your selected footage, balanced dialogue, corrected shots, and checked captions. Keep the project narrow enough to export and watch in full; the steps below follow that same video throughout.
Create a Project and Match the Sequence to Your Footage
- Create and save your project. Open Adobe Premiere Pro, create a new project, and give it a recognizable name and location. Use the project folder prepared above. Keep the source clips there so a later move does not leave Premiere looking for missing media.
- Import a small selection of footage. Bring your clips into the Project panel. Use bins, Premiere's organizational folders, to separate dialogue, supporting shots, and music. Review the clips before adding them to the timeline. Importing a file makes it available; it does not automatically include it in your edit.
- Create the sequence for your delivery. For a straightforward project whose output matches its footage, create a sequence from the main clip. If the destination needs a different frame shape, set that deliberately and reframe the shots. Frame size describes the image dimensions; frame rate describes how many frames play each second. Match the main footage's frame rate unless the delivery requires another choice.
This is where I would spend the first learning session. One r/premiere beginner wrote, "i feel i have skipped the basics such as frame sizes, sequences etc." Matching the sequence before decorating it prevents an avoidable rebuild at export.
Build a Rough Cut, Then Balance Audio and Color
- Arrange and trim the story. Put the chosen clips on the sequence timeline. Remove dead space and repeated points, then move supporting shots over the relevant dialogue. Keep useful context around each cut. Watch the rough cut from beginning to end before adding transitions; the sequence should make sense without them.
- Make speech easy to hear. Listen through the whole sequence and lower music where it competes with dialogue. Adjust clip levels while watching the audio meters, and avoid clipping, the overload that produces distortion. Compare neighboring clips by ear as well. A quiet sentence after a loud introduction still needs attention even if neither clip distorts.
- Match neighboring shots. Use the basic controls in Lumetri Color to correct exposure and white balance. Compare faces and neutral objects between cuts. Correct an obvious mismatch before applying a creative look. A filter across the sequence does not fix a shot that is much darker than the next.
I would stop polishing once the story is clear, speech is audible, and adjacent shots look consistent. Those are useful checkpoints for a first video. Extra effects add decisions without necessarily solving a problem.
Create Captions or Import an Existing SRT
- Transcribe the intended speech. Open Window > Text in Premiere Pro. In the Transcript tab, use the transcription options to choose the spoken language and the audio to analyze. For a sequence transcript, Adobe documents Generate static transcript, including analysis of a specific audio track. Transcribe the dialogue track rather than assuming the full mix is the right input. Adobe's Speech to Text instructions describe these settings.
- Correct the transcript and create captions. Check names, technical terms, and words masked by noise, then create captions from the corrected text. Review line breaks and timing against the spoken sentence. Captions should remain readable over the picture. Generating text is the starting point; checking what a viewer actually reads completes this stage.
- Import an SRT if you already have one. SRT is a plain-text subtitle format containing caption text and timecodes. Import the file as media into the Project panel, then drag it into your sequence. Premiere creates a caption track. Check the captions against the matching edit, especially if the file came from a longer or earlier version. Adobe documents this caption-file import path.
The built-in route is enough when it gives you captions you can correct in the project. An external SRT is another input, useful for a supplied transcript or a separate subtitle handoff. It is not a requirement for captioning in Premiere.
Export for Your Destination and Watch the Result
- Choose the delivery format and preset. Open Premiere's Export workspace and select an output location. Choose a format and preset suited to your destination. The saved project remains editable; this export becomes the file you share.
- Inspect the output settings. Confirm the frame shape, resolution, and frame rate. Decide whether captions should be visible in the picture or delivered separately for the destination. Burned-in captions become part of the image; a separate subtitle file gives the recipient a distinct caption asset. Avoid increasing resolution simply because the menu offers it.
- Export and play the actual file. Watch it outside Premiere from the opening to the final frame. Listen for uneven sound, check caption timing and spelling, and look for a clipped ending. Reopen the project if something needs correction, then replace the export with the corrected version.
My finish line is a checked delivery file. A timeline that looks finished inside Premiere is still only the working version.
Is Premiere Pro the Right Editor for Your Projects?
Premiere Pro fits projects that need repeated revisions, layered audio, and consistent delivery. Its learning and subscription commitment is harder to justify for an occasional trim or quick assembly with no need to revisit the edit.
A Good Fit for Projects You Will Revise and Reuse
Recurring work gives the project structure a purpose. An interview series, for example, needs repeatable framing, music balance, caption styling, and export choices. A saved sequence keeps those decisions available when you replace a shot or shorten an answer. You are revising an organized edit instead of reconstructing the finished video.
The payoff is especially clear when feedback changes the story. A request to remove a sentence affects the picture, sound, and captions around that cut. Keeping those elements together in an editable project makes the relationship visible. You still have to inspect the edit, but you have a place to make the correction.
I would choose Premiere for work I expect to reopen. That is a more useful reason than wanting a professional label on the software. The first project above helps you discover whether timeline control and revision are needs you actually have.
Caption delivery is part of that choice. A visible title and a timed subtitle file serve different jobs: one is a graphic in the frame, while the other carries dialogue and timing. Planning how to add text to video around the intended result keeps an opening title from being mistaken for an accessible caption track.
A Poor Fit When You Only Need a Quick One-Off Edit
A one-off clip has a different cost balance. If you need to remove an unwanted opening and share the result, learning bins, sequences, audio controls, and export settings adds work to a small task. A simpler editor is enough when it covers the required cut, framing, and output. It becomes insufficient when the project needs revision control over several connected elements.
More complex software does not automatically improve the video. In r/premiere, one creator explained the hope behind switching: "i feel like my videos could be performing way better if i started editing in bigger and better software like Premiere." That is one person's expectation. It is not evidence that changing editors improves audience response.
I would separate an editing obstacle from a storytelling obstacle. Missing control over a sound layer is an editing problem; an unclear opening is a story problem you still have to solve in any app. Use your first export to identify which one is holding the video back. That gives your next learning session a specific target, instead of another list of features to explore.
When UniFab Subtitle Generator AI-Fabcloud Fits an SRT Workflow
Subtitle Generator AI-Fabcloud fits you when a project needs a separate SRT file for a caption handoff or reuse outside the editing timeline. It supplies a subtitle asset for Premiere Pro, while the editor remains the place for assembling and delivering your video.
UniFab Subtitle Generator AI-Fabcloud supports Windows and macOS, accepts video up to 4K, and exports SRT subtitle files, with audio-track language selection and batch subtitle downloads.
Where It Fits, and What Still Needs Human Review
A separate file has value when the recipient needs captions apart from the picture. Think of a collaborator preparing subtitles before the editing project arrives, or a delivery package containing both the video and its caption file. Generating subtitles from video in a separate tool lets that work produce an asset the editor can import. An SRT subtitle generator serves that handoff; it does not replace the timeline.
| Workflow Check | Supported Capability |
|---|---|
| Desktop systems | Windows and macOS |
| Video input ceiling | Up to 4K |
| Subtitle output | SRT |
| Audio-track language selection | Supported |
| Download options | Subtitles and batch downloads |
UniFab Subtitle Generator AI-Fabcloud product specifications, as of November 2026.
Those capabilities connect to a concrete delivery. The SRT output gives you editable caption text and timecodes for the import route above. Audio-track language selection lets you specify the speech to transcribe. Batch downloads help collect subtitle outputs; they are not a promise of batch transcription.
I would add a separate subtitle-file source when the file itself is part of the handoff, rather than simply because the video contains speech. If Premiere's built-in transcription already covers the project, you do not need another tool. The separate route makes sense when caption preparation needs to happen outside that project and the result must come back as a file.
An SRT handoff still needs a human check of wording and time alignment. Use the caption review and import checks above to correct the file against the matching video before delivery. Keeping that review in the editing workflow also keeps later cuts and subtitle timing connected.
You can start that file-based workflow with Subtitle Generator AI-Fabcloud.
Premiere Pro FAQ
Confirm desktop compatibility, use Adobe's official download, and understand the trial's billing terms before planning the edit. A course is optional for your first small project, and speaker labels still require a check of the final caption arrangement.
Do I Need a Course Before Using Premiere Pro?
Answer: No. Start with a project small enough to finish, and use a lesson to solve the next obstacle. Adobe provides free tutorials and a workshop through its learning resources. A structured course makes sense if you need guided exercises or feedback. I would avoid watching lesson after lesson without applying anything: knowing where a command lives is different from making an edit with it.
Where Should I Download Premiere Pro for a MacBook?
Answer: Use Adobe's official download route and sign in with the Adobe account that provides your access. The Premiere trial and download page is an official entry point. If your school supplies access, use that account rather than starting an unrelated purchase. An unofficial browser editor with a similar name is not the desktop installation covered by this guide.
What Happens After the Seven-Day Premiere Pro Trial?
Answer: Adobe's seven-day trial becomes a paid membership unless you cancel before it ends. If you do not want to continue, cancel through your Adobe account within that period. I would put the end date on your calendar when you begin. A limited trial is time to complete a project, not ongoing access without payment; the billing commitment is the one attached to the plan you select.
Does the Premiere Pro Trial Include a Mobile Download?
Answer: Adobe's trial FAQ describes the downloadable trial as desktop-only, even though its broader marketing also mentions mobile and web experiences. Use a compatible computer for the workflow here. Do not treat the desktop trial as a promise that the same application and controls are available on your phone.
Can Speaker Labels Automatically Put Captions on Separate Tracks?
Answer: Speaker labels identify voices in a transcript. They do not by themselves establish a finished arrangement of caption tracks. Adobe documents speaker labeling and audio-track selection as transcription settings; importing an SRT creates a caption track. If your delivery needs separate speaker tracks, plan that arrangement explicitly and inspect it in the sequence rather than assuming the labels completed it.
Choose Your Next Editing Step
Finish the short project before deciding what to learn next. I would keep using Premiere when revisions, audio layers, and repeatable delivery justify its learning effort; an occasional simple cut does not carry the same needs. Let the exported file reveal the next skill to practice, and keep caption proofreading in that final review.
Use these examples for lawful personal projects, follow applicable service terms when using third-party tools, and take responsibility for the rights to the material you process and share.