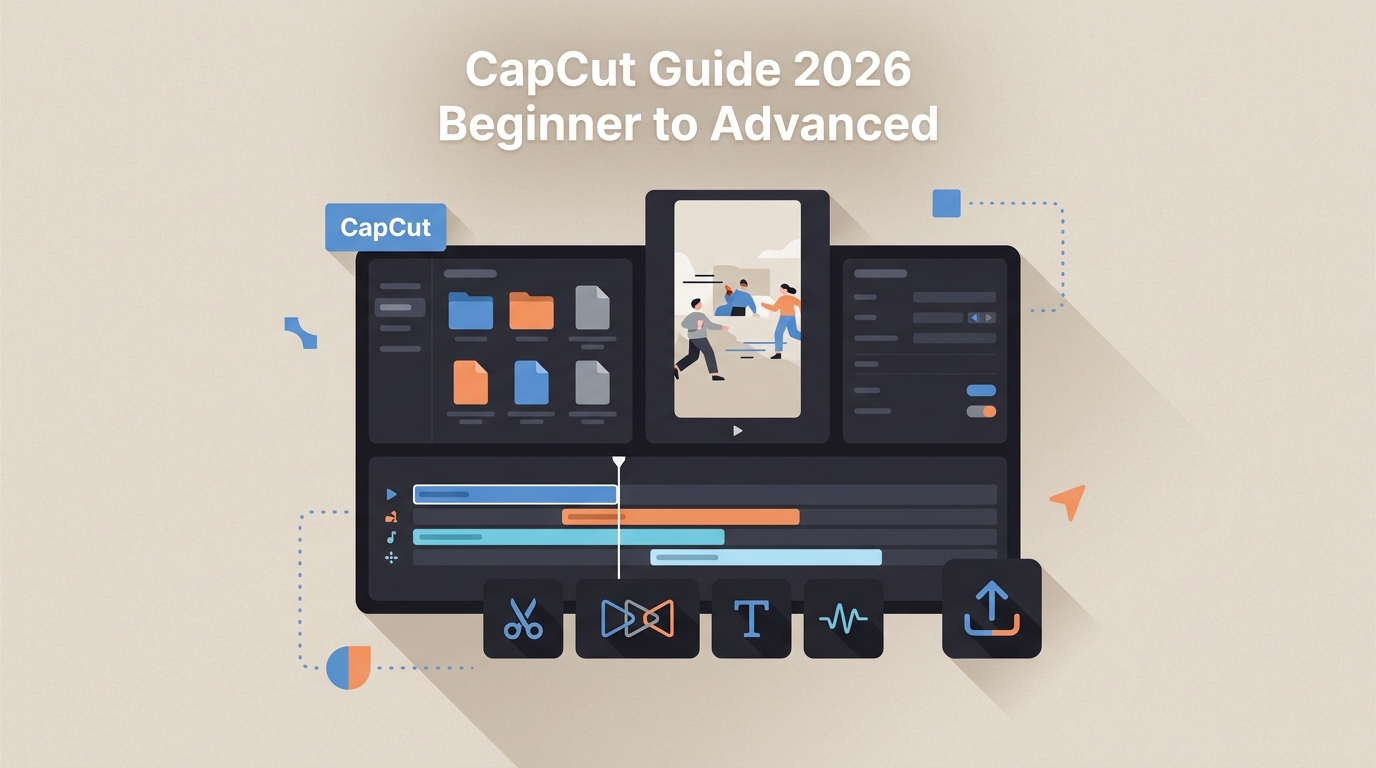
In short, use CapCut by choosing mobile, desktop, or web, creating a project, importing and arranging clips, adding text and audio, then exporting the finished video. The detailed steps below follow that same beginner-friendly path from first edit to saved file.
- Choose mobile, desktop, or web.
- Create a project and import your media.
- Arrange and trim the clips.
- Add text, captions, and audio.
- Choose export settings and save the video.
What Is CapCut?
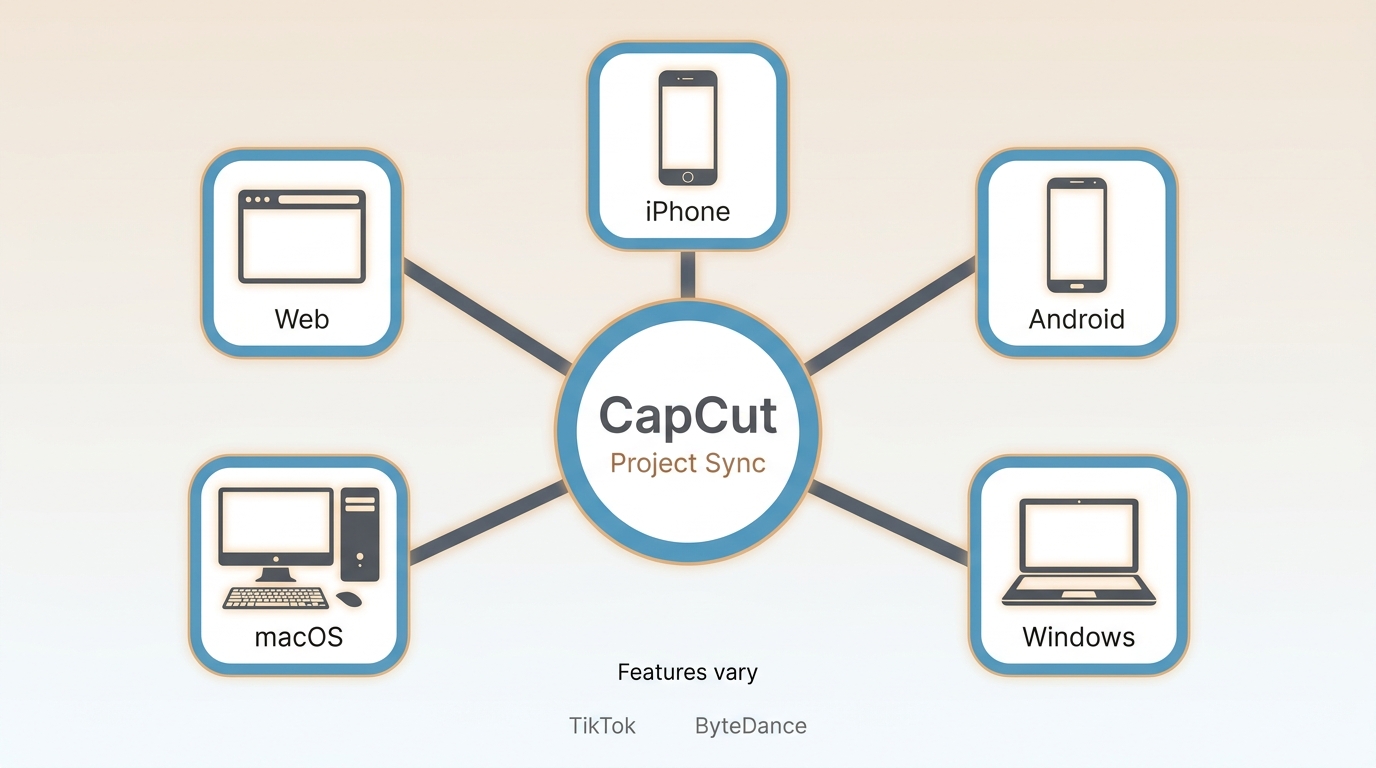
CapCut is a video editing platform developed by ByteDance, the same company behind TikTok, and launched globally in 2020. It now includes mobile apps for iOS and Android, desktop software for Windows and Mac, and a web editor. Free and Pro feature availability can differ by platform, region, account, and project settings.
It is best known for auto captions, a large template library tied to social trends, and AI-assisted features such as background removal, speech enhancement, and auto reframing. Its timeline and toolbar are approachable for beginners, although the available controls and their locations differ across mobile, desktop, and web.
Getting Started with CapCut
Choose Mobile, Desktop, or Web
Use CapCut mobile for touch-first social editing and direct access to your phone's camera roll. Choose CapCut desktop when you want a larger timeline, keyboard and mouse control, or easier file management. The CapCut web editor is useful when you cannot install software, but browser performance and cloud-dependent features may vary.
Map the Workspace
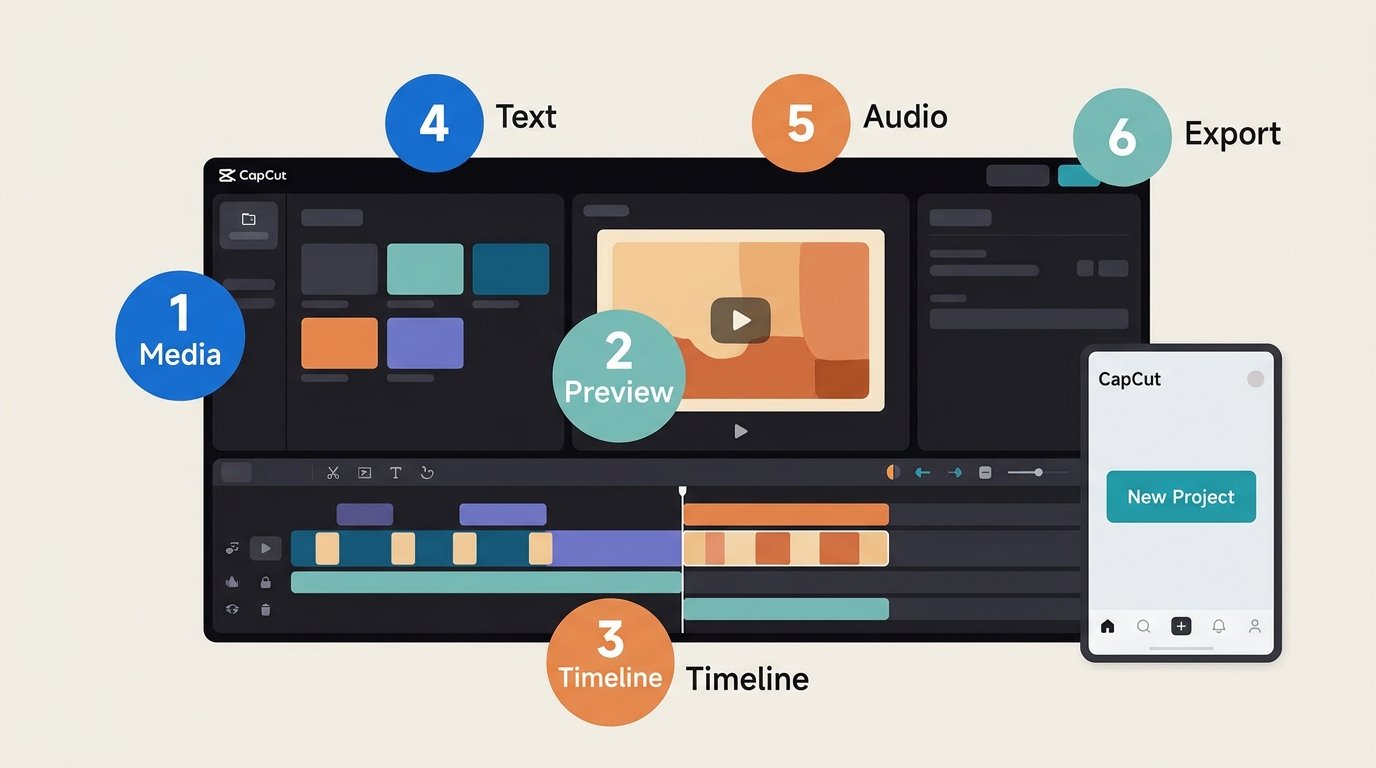
On mobile, the preview sits above the timeline and most tools appear in the bottom toolbar after you select a clip. On desktop and web, media, text, audio, and effects are generally organized in side or top panels, while the multi-track timeline runs across the bottom. Selecting a clip reveals its available controls.
Build Your First Project
Before jumping into editing techniques, prepare footage that you own or are authorized to use, then follow this path:
- Install or open CapCut from the App Store, Google Play, capcut.com, or the desktop installer.
- Sign in if you want to use account-based features or sync supported projects across devices.
- Grant permissions for photos, videos, and the microphone if you plan to record a voiceover.
- Create a new project and select the clips and images you want to edit.
- Arrange the media on the timeline, make a simple cut, add text or audio, and export a short draft before building a more complex edit.
I recommend learning the timeline with a short project first. It makes platform-specific control differences easier to understand without turning the first edit into a troubleshooting exercise.
CapCut Basics: Trim, Resize, Text, and Audio
Beginners should master five controls first: trim, split, aspect ratio, text, and audio. Those tools cover the core cut-caption-export workflow before effects or AI features add complexity.
1. Trim and Arrange Clips
- Step 1: Tap the video clip on the timeline to select it.
- Step 2: Drag the white Edge handle inward to shorten the clip.
- Step 3: Adjacent clips automatically slide in to close the gap. To remove a section in the middle, use Split first, then delete the middle segment.
2. Resize and Set the Aspect Ratio
- Step 1: Tap Format at the bottom toolbar.
- Step 2: Pick an aspect ratio — 9:16 for TikTok/Reels/Shorts, 1:1 for Instagram feed, 16:9 for YouTube landscape.
On desktop and web, look for aspect ratio, canvas, or resize controls near the preview or project settings rather than in a bottom toolbar. The labels can vary, but the goal is the same: match the canvas to the destination platform before positioning the clip.
3. Mirror Videos in CapCut
Mirroring flips a clip horizontally — useful for fixing selfie orientation or building symmetrical split-screen shots.
- Step 1: Select the clip and tap Edit in the toolbar.
- Step 2: Inside Edit, tap the secondary Edit button (between Extract Audio and Filters).
- Step 3: Tap Mirror.
4. Rotate Videos in CapCut
Tap the clip, go to Edit → Rotate. Each tap rotates 90°. To rotate only part of a clip, split the footage first, then rotate the target segment.
5. Adjust Speed and Smooth Motion
CapCut offers two speed modes — Normal (constant speed from 0.1× to 100×) and Curve (non-linear ramping for bullet-time and hit-stop effects).
- Step 1: Tap the clip and select Speed → Normal (or Curve for pre-made ramps like "Hero", "Bullet", or "Jump Cut").
- Step 2: Drag the slider to your target speed.
- Step 3: Toggle Pitch on to keep voices natural when slowed down, or off for chipmunk/slowed-and-reverb effects.
CapCut's speed ramps are usually enough for short social edits, but strong slowdowns can expose repeated or uneven frames when the source lacks enough motion information. I would use the built-in tool for timing and style, then consider a dedicated AI frame smoother only when the final export needs newly interpolated frames.
6. Add Text in CapCut
- Step 1: From the main timeline, tap Text in the toolbar.
- Step 2: Tap Add Text, type your message, and pick a font, color, stroke, shadow, or animation.
- Step 3: Drag the text block's edges on the timeline to control how long it stays on screen.
7. Edit Audio in CapCut
CapCut provides built-in music, sound effects, voiceover tools, and the ability to extract audio from imported videos. Check the license attached to each track and use extracted audio only when you have permission, since permitted uses can differ by asset, platform, account, and destination.
- Step 1: Tap Audio in the toolbar.
- Step 2: Choose Sounds (CapCut library), Extracted (from a video you import), Voiceover (record directly), or Effects (SFX).
- Step 3: Tap the audio clip on the timeline to trim, split, fade, or adjust volume.
8. Auto Captions in CapCut
- Step 1: Tap Text in the toolbar.
- Step 2: Tap Auto Captions.
- Step 3: Select whether to caption the original audio, a voiceover, or both. Pick the spoken language.
- Step 4: Once processing finishes, tap Batch Edit to correct names, punctuation, and misheard words. Auto-caption availability and controls can vary by platform, region, account, and project.
Advanced Effects and AI Tools
1. Adding Effects in CapCut
- Step 1: Tap the clip, then tap the star-shaped Effects icon.
- Step 2: Choose Video Effects (glitch, VHS, blur, light leaks) or Body Effects (skin smoothing, slim, make-up).
- Step 3: Browse presets. Applied effects appear as a purple strip above the main clip. Tap the strip to adjust intensity or remove.
2. Green Screen / Chroma Key in CapCut
- Step 1: Tap Overlay → Add Overlay and import your green-screen clip.
- Step 2: Resize and position the overlay over your background.
- Step 3: Tap Chroma Key, drop the color picker on the green area, then tune Intensity until the green disappears.
- Step 4: Use Shadow to soften Edge halos. If uneven lighting, fine hair, or motion blur makes chroma keying difficult, compare the result with Background Remover and keep the option that preserves cleaner edges.
- Step 5: Preview, then export.
CapCut also includes stabilization for mild handheld shake, although stronger correction may crop the frame or create Edge distortion. See the CapCut Stabilizer guide for the full workflow and limitations.
CapCut Export Settings, MP4, and Save Locations
Choose MP4, Resolution, Frame Rate, and Quality
- Step 1: Select Export in the top-right corner.
- Step 2: Choose MP4 and H.264 when those controls are available and broad playback compatibility is the priority. Some versions manage the container and codec automatically.
- Step 3: Match the resolution and frame rate to the source and destination. CapCut states that exports can reach up to 8K, but the options shown vary by platform, region, account, device, and project.
- Step 4: Set quality or bitrate higher when the source contains fine detail or fast motion, while remembering that a larger file cannot restore detail missing from the original footage.
- Step 5: Export the file and review the saved copy rather than judging final quality from the lower-resolution editing preview.
Use Presets for TikTok, Reels, and YouTube
Use a 9:16 canvas for TikTok, Instagram Reels, and YouTube Shorts, and a 16:9 canvas for standard YouTube video. A 1080p export is a practical baseline for most social projects. Choose a higher resolution or frame rate only when the source, destination, and account support it, since social platforms compress uploaded files again.
Find the Saved File on Each Platform
On iPhone or Android, a completed local export normally appears in Photos or the device gallery after CapCut receives media permissions. On desktop, check the destination folder shown in the export window. In the web editor, the file usually goes to the browser's Downloads folder unless the browser asks you to choose a location.
Fix Export Failures and Quality Loss
If an export fails, confirm that you are signed into the correct account, check whether the project contains a Pro asset or locked setting, free storage space, update CapCut, clear its cache, and retry with a lower resolution or simpler codec. Persistent launch, crash, or project problems are covered in the CapCut Not Working guide.
Matching the displayed resolution does not guarantee identical output across devices. Source quality, codec, bitrate, repeated exports, HDR handling, and platform compression can all change the result. I recommend keeping the original media, exporting once from the finished timeline, and reviewing that file before uploading it elsewhere.
For a focused explanation of CapCut's enhancement limits and available workflows, see the CapCut Video Upscaler guide.
Using CapCut Templates
CapCut's template library is a major reason creators use the app: you select a template, add the requested clips, and CapCut applies the preset timing and effects. For example, the popular CapCut slow motion template creates a preset speed-ramp sequence. Template names, controls, and availability can vary by region and app version.
Option 1: Built-in Templates
- Step 1: From the CapCut home screen, tap Templates.
- Step 2: Browse by category (Trending, Vlog, Travel, Anime, Beauty, Birthday, etc.) or search by keyword.
- Step 3: Tap a template to preview, then tap Use Template.
- Step 4: Select your clips in the order requested — CapCut fills in the blanks and exports instantly.
Option 2: Templates from TikTok's For You Page
- Step 1: On TikTok, look for the "CapCut · Try this template" sticker on a video you like.
- Step 2: Tap the sticker → Use template in CapCut.
- Step 3: CapCut opens the exact template that creator used. Add your media and export.
When CapCut Needs a Desktop Finishing Step
CapCut is well suited to quick cuts, captions, templates, and social exports. A local desktop finishing step becomes more relevant when an exported video needs denoising, deinterlacing, detail recovery, SDR-to-HDR conversion, smoother slow motion, or repeat processing across multiple files. It is not necessary for readers who only need fast social edits.
UniFab All-In-One is a local Windows and Mac application for finishing exported video through enhancement, denoising, deinterlacing, frame interpolation, HDR conversion, and format conversion. Its relevance here is post-production quality recovery rather than replacing CapCut's editing and template workflow.
- Quality recovery: The desktop workflow can use an AI Video Upscaler, video denoising, and deinterlacing for low-resolution, noisy, or interlaced exports, with upscaling advertised up to 16K.
- HDR and motion finishing: UniFab supports local SDR-to-HDR10 or Dolby Vision conversion and frame-rate enhancement up to 120 FPS.
- Local workflow: Processing runs on Windows or Mac without uploading the video, and supported tasks can be queued for batch processing.
Choose CapCut or UniFab by Project Fit
| Comparison | CapCut | UniFab All-In-One |
| Best use | Editing, captions, templates, and social publishing | Desktop enhancement and restoration after editing |
| Platforms | iOS, Android, Windows, Mac, and web | Windows and Mac |
| Output availability | Up to 8K where supported; options vary by platform and region | Upscaling advertised up to 16K |
| Quality recovery | Editing adjustments and AI tools that vary by account | Dedicated upscaling, denoising, and deinterlacing workflows |
| SDR-to-HDR output | HDR options depend on source, platform, and account | HDR10 and Dolby Vision conversion |
| Frame interpolation | Speed ramps and account-dependent AI tools | Frame-rate enhancement up to 120 FPS |
| Batch workflow | Designed primarily around individual editing projects | Supports queued batch processing |
| Processing location | Mix of local editing and cloud-dependent features | Local desktop processing |
| Pricing model | Free access plus Pro options; export eligibility depends on the project and assets | Desktop licensing with a lifetime-license option |
CapCut availability reflects published information as of July 2026 and can differ by platform, region, account, and project.
My practical rule is to stay in CapCut when the job is primarily editing and publishing. A separate finishing step makes sense when the exported pixels or motion need reconstruction rather than another filter.
Use UniFab All-In-One
UniFab All-In-One provides separate modes for conversion, upscaling, denoising, deinterlacing, motion smoothing, object removal, and audio upmixing.
Step 1: Open UniFab and pick a mode — for example, HDR Upconverter.
Step 2: Import your video and adjust output format, quality, audio, and subtitle settings.
Step 3: Click Start. UniFab states that its current generation can process up to 3× faster than the previous generation.
CapCut Questions Beginners Ask
Is CapCut beginner-friendly if I have never edited a video?
Yes. Start with one short project and learn trim, split, aspect ratio, text, and audio before adding effects. Mobile uses a bottom toolbar, while desktop and web place more controls around the preview and timeline, so the exact clicks differ even when the editing logic is the same.
Which CapCut features are free, and why do I see a Pro prompt?
As of July 2026, CapCut's free access, watermark-free export, and locked export settings can vary by platform, region, project length or resolution, and whether a project uses premium assets or Pro-only settings. A prompt usually means the project contains an asset or export option that is not included for that account.
Can I export from CapCut without a watermark?
Often, yes, if the project and selected export settings are eligible for your account. Premium assets, certain templates, locked settings, or account-specific conditions can trigger a watermark or Pro prompt, so review the project for marked assets before exporting.
Does CapCut work offline?
Many local editing functions can work offline after installation, including trimming, arranging clips, adding local media, and exporting supported projects. Templates, stock downloads, account sync, auto captions, and some AI services require an internet connection.
Why does CapCut fail to export on desktop?
Confirm that CapCut recognizes the correct account, remove or replace marked Pro assets, update the app, clear its cache, check available storage, and retry with simpler export settings. If CapCut also crashes, fails to launch, or cannot open the project, use the broader troubleshooting guide linked in the export section.
How can I reduce CapCut lag without lowering final quality?
Lower the editing preview resolution or enable proxy media on desktop when available; this does not lower the final export setting. Closing background apps, clearing cache, freeing storage, and converting unusually complex source codecs can also make timeline playback smoother.
Final Editing Checklist
- Choose mobile, desktop, or web based on the project and available hardware.
- Set the aspect ratio before positioning text and overlays.
- Trim and arrange clips before adding captions, audio, and effects.
- Check the project for premium assets or locked export settings.
- Match resolution and frame rate to the source and destination.
- Review the saved file before uploading it to a social platform.
CapCut is the practical choice for quick editing, captions, templates, and publishing. Use a local desktop finishing workflow only when the exported video needs restoration, denoising, deinterlacing, HDR conversion, or smoother interpolated motion.