Common Causes of Shaky Video
To fix shaky video you have already recorded, import the clip into stabilization software, adjust the strength, preview the framing, and export. This post-production repair can reduce distracting jitter and bounce by repositioning frames to compensate for camera movement.
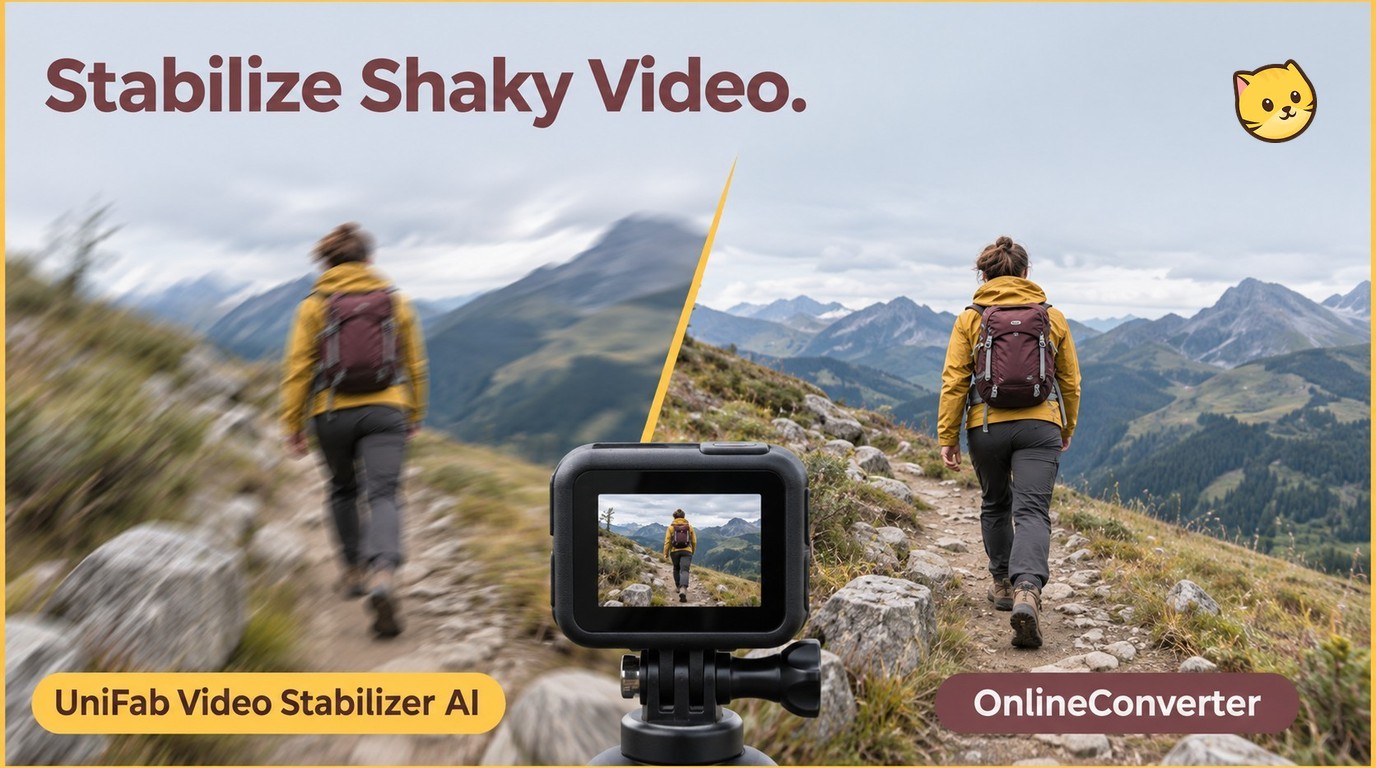
If you are learning how to stabilize a shaky video, start with mild correction: stronger settings can crop the frame or soften the output, so inspect the preview before increasing strength. Changing camera stabilization settings affects future recordings, not footage already saved. Common causes of shake include:
- Handheld shooting without support: Hand tremor creates high-frequency micro-shake
- Walking or running while filming: Body motion adds vertical bounce and horizontal sway
- Fast-moving subjects: Following moving targets without smooth tracking technique
- Action camera vibration: Mounting on bikes, helmets, or vehicles transfers road vibration
- Wind and environmental factors: Strong wind pushing against the camera or operator
Start with the mildest correction and increase it only if the remaining shake is distracting, checking for cropping and warping at each step. Once you know your shake type, learning how to stabilize shaky video is mostly about picking the right tool for your platform and skill level.
Stabilize Shaky Video: 3 Tools and a Browser Fix
- UniFab Video Stabilizer AI: Automatic AI motion correction, GPU acceleration, and batch processing for a desktop workflow. Motis and Statys are separate stabilization models; Motis offers Mild, Moderate, and Strong settings.
- Adobe Premiere Pro: Available on Windows and Mac, with Warp Stabilizer analysis and manual adjustments. It supports GPU acceleration and timeline-based processing of multiple clips, making it suitable for an existing editing project.
- CapCut: Available on iOS, Android, desktop, and the web for casual editing. Its web offering includes free stabilization through Basic > Stabilize; phone access and strength controls depend on the installed app. GPU acceleration is limited, and batch processing is not supported.
For more no-download options, 8 Best Online Video Stabilizer Tools to Fix Shaky Videos in 2026 compares browser-based alternatives, while desktop tools offer more control over quality and strength.
Method 1: UniFab Video Stabilizer AI on Desktop
UniFab Video Stabilizer AI is a standalone desktop application that uses AI to automatically detect and correct camera shake. It provides automatic motion correction with selectable strength and output settings, plus GPU acceleration for processing. The 30-day trial includes three trial uses per module and no-watermark output.
Key Features
- AI-driven motion analysis and correction
- Motis and Statys are separate stabilization models. Motis provides three strength options: Mild, Moderate, and Strong.
- GPU acceleration for video processing
- Quality retention without over-processing
- Flexible output settings (MKV, MP4; customizable codec, bitrate, resolution)
- Built-in editing (trim, crop, audio adjustment)
- Compatible with footage from phones, drones, GoPros, and DSLRs
Stabilize and Export Your Clip
Step 1: Open UniFab and select Stabilizer from the left panel. Click the "+" button or drag-and-drop to add your shaky video. For Motis, choose Mild, Moderate, or Strong. Start with Mild and increase the strength only if needed, previewing the framing before export.
Step 2: Optionally adjust output settings (codec, bitrate, format). Default settings work well for most footage. Click Start to begin AI processing.
When to use UniFab: Choose UniFab for a straightforward desktop workflow: import the clip, choose a stabilization strength, set the output, and start processing. It is especially good for batch processing multiple clips at once. If you want a broader roundup of desktop and mobile options, see our guide to the best video stabilization software.
Method 2: Warp Stabilizer in Premiere Pro
Adobe Premiere Pro's Warp Stabilizer is the industry-standard tool for professional video stabilization. It offers more manual control than AI tools but requires a Premiere Pro subscription and some editing experience.
Step-by-Step Tutorial
Step 1: Import your shaky video into Premiere Pro and add it to the timeline.
Step 2: Select the working clip on the timeline. If Warp Stabilizer reports a clip-size mismatch or an incompatible effect combination, right-click the clip, select Nest, name the sequence, and click OK.
Step 3: Open the Effects panel (Window > Effects). Search for Warp Stabilizer under Video Effects > Distort. Drag and drop it onto the selected clip.
Step 4: Premiere Pro automatically analyzes the footage. Wait for the analysis to complete — this can take several minutes for long clips.
Step 5: Fine-tune settings in the Effect Controls panel: - Smoothness — Higher values = more aggressive stabilization (more cropping) - Result: Smooth Motion (keeps some movement) or No Motion (tripod lock) - Method: Position; Position, Scale, Rotation; Perspective; or Subspace Warp - Framing — How to handle edges after stabilization
Step 6: Render the effects: Sequence > Render Effects In to Out.
When to use Premiere Pro: Choose Premiere Pro when you are already editing your project in a professional NLE and need granular control over stabilization parameters. More detailed Premiere Pro stabilization settings let you adjust how Warp Stabilizer handles camera movement and frame edges.
Method 3: CapCut Stabilization on Your Phone
CapCut lets you stabilize shaky video directly on your iPhone or Android phone. Read any in-app access or subscription prompt before applying stabilization; CapCut's free web offering does not establish free access in the mobile app. Its one-tap stabilization works well for moderate shake and is perfect for social media content.
Step-by-Step Tutorial
Step 1: Open CapCut and create a new project. Import your shaky video from your camera roll.
Step 2: Tap the clip on the timeline, then scroll through the bottom toolbar to find the Stabilize option.
Step 3: Use the stabilization strength control shown in your installed app, starting with mild correction. Confirm the setting using the on-screen control.
Step 4: Preview the result. Click Export > Save Video to download the stabilized clip.
When to use CapCut: Choose CapCut when you need to stabilize a video on your phone quickly, especially for social media posts on TikTok, Instagram, or YouTube Shorts. Additional CapCut stabilization settings can help you refine the correction; other video stabilizer apps offer alternative phone-based workflows.
Browser Stabilization Without Installing an App
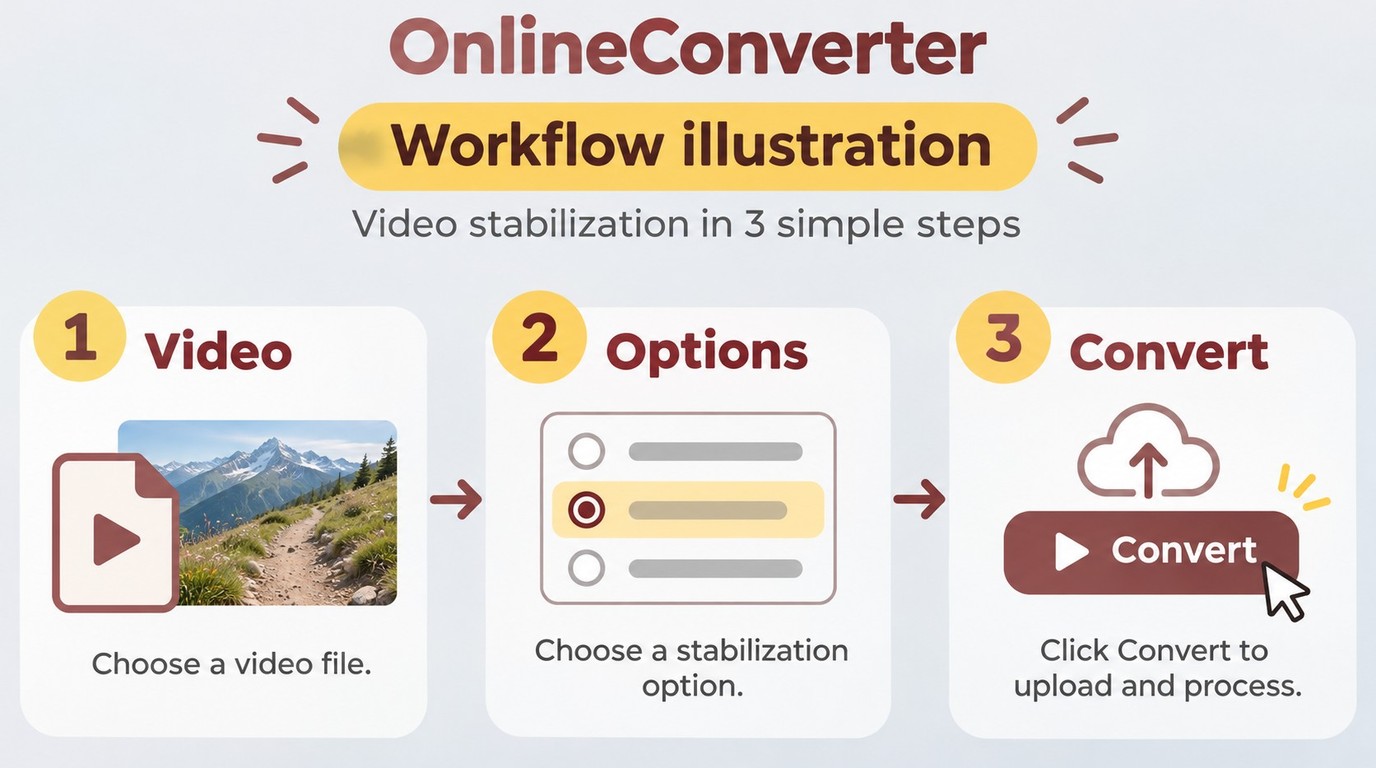
For a small, one-off repair, OnlineConverter provides a browser workflow without installing an editor. As of November 2026, its video stabilizer accepts uploads up to 200 MB and produces MP4 output.
- Click Choose File and select your shaky recording.
- Select a stabilization level, starting with a mild correction.
- Click Convert and wait for processing to finish.
- Download the resulting file and play it locally to review the framing and camera motion.
- If edges or movement look unnatural, reduce the stabilization level and repeat with the original clip.
Uploading sends your clip to an online service; use a local desktop workflow for footage you cannot share. Process only footage you own or are authorized to use, for lawful personal purposes, and follow the third-party service's terms. You are responsible for securing the necessary content permissions.
The Right Tool for Your Footage
I recommend UniFab Video Stabilizer AI for a straightforward desktop workflow, Premiere Pro when the clip is already in an editing timeline, and phone or browser stabilization for a small one-off task. UniFab's desktop workflow brings importing, strength selection, output settings, and processing into one place.
| Your Situation | Suggested Tool | Why |
|---|---|---|
| Quick desktop fix, no editing experience | UniFab | Automatic AI motion correction |
| Premiere timeline or detailed control | Premiere Pro | Adjustable method, smoothness, framing |
| Editing on phone only | CapCut | Mobile workflow; access varies by plan |
| Batch processing many clips | UniFab | Queue-based batch support |
| Severe shake from action camera | UniFab | Start mild; preview before increasing strength |
| No install, quick one-off fix | Online stabilizer | Runs in the browser, nothing to download |
Tips for Better Stabilization Results
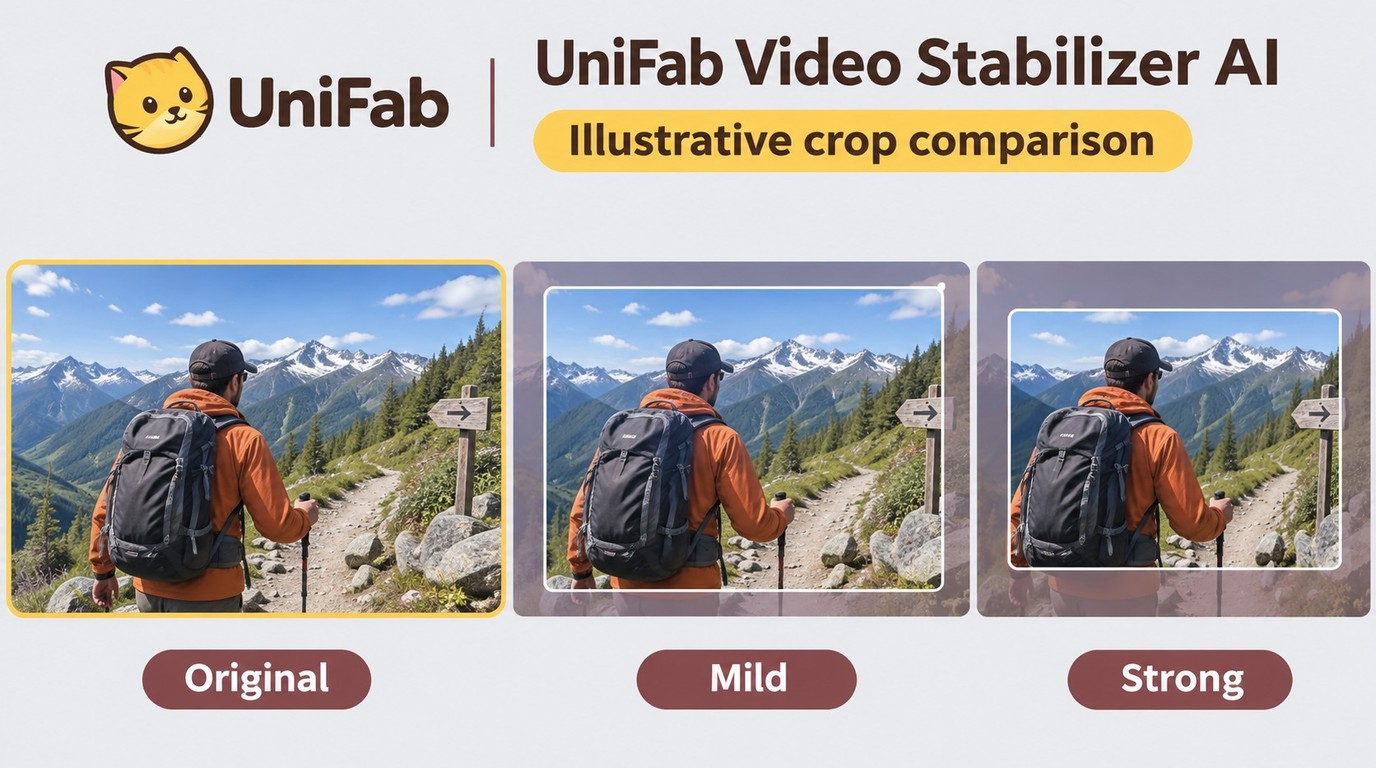
- Start with the mildest setting — Over-stabilization looks worse than mild residual shake. Increase intensity only if needed.
- Shoot at higher resolution — 4K footage stabilized and exported at 1080p gives the stabilizer more pixels to work with after cropping.
- Split long clips — Different sections may have different shake levels. Stabilize segments individually with appropriate settings. Processing time depends on clip length, resolution, settings, and hardware, so allow extra time for longer or higher-resolution footage.
- Preview before exporting — Check for warping, over-cropping, or unnatural "floating camera" effects before final export. Lower smoothing if the background wobbles. For excessive cropping, reduce correction strength or inspect the moving edges with Premiere Pro's Stabilize Only framing option. If the camera looks unnaturally locked in place, choose Smooth Motion under Result.
- Prevent shake at the source — When you can, use a two-handed grip with elbows tucked in, a tripod, or a gimbal. Preventing shake while filming always beats fixing it later; for a fuller primer see how to stabilize a video end to end.
- Combine with enhancement — After stabilizing, consider using video enhancement tools to sharpen or upscale the slightly cropped output.
Frequently Asked Questions
Can I stabilize a shaky video for free?
Yes. CapCut offers free web stabilization; its documented browser workflow starts with account signup and uses Basic > Stabilize. DaVinci Resolve stabilization in the free version includes professional-grade tools. UniFab Video Stabilizer AI offers a 30-day trial with three trial uses per module and no watermark. For a quick one-off, some browser-based stabilizers offer free processing.
Will stabilizing a shaky video reduce its quality?
Stabilization can require cropping because frames must be repositioned to compensate for movement. Stronger stabilization can require more cropping, reducing the effective frame area. Rescaling the cropped frame can soften the exported image. To minimize impact, shoot at a higher resolution than needed (4K for 1080p output) and use the mildest stabilization level that produces acceptable results.
Can AI stabilization fix extremely shaky footage?
Stabilization can reduce severe camera shake, but it cannot recover a subject that has left the frame or detail lost to extreme motion blur. Trim unusable sections and apply mild correction to the remaining footage. In UniFab, use an available trial use to inspect a representative clip's framing before increasing the strength. For best results on extreme shake, accept some residual instability rather than over-stabilizing.
Should I stabilize video before or after editing?
Trim to the footage you will keep, stabilize that working clip, then finalize text, graphics, and framing. Stabilization can crop the frame, which affects composition. If you edit first (add text, graphics, transitions) and then stabilize, the crop may cut off elements you positioned near frame edges. Make final compositional decisions based on the stabilized framing to avoid rework.
What is the difference between OIS, EIS, and software stabilization?
OIS (optical image stabilization) moves lens elements or the sensor to counteract movement during recording. EIS (Electronic Image Stabilization) digitally crops and shifts the frame during recording, trading field-of-view for stability. Software stabilization (post-production) analyzes an existing recording and adjusts frames to reduce visible shake. Changing a recording-time stabilization setting does not repair a video already saved.
Can I stabilize a video without cropping?
Premiere Pro's Stabilize Only framing option displays the full frame, including its moving edges, without automatic cropping. You can minimize cropping by using the mildest stabilization setting, shooting at a wider angle than needed, recording at a higher resolution than your output target, and — in Premiere Pro — using the "Stabilize Only" framing option to see the full uncropped result and manually crop as needed. An edge-to-edge export may still require cropping or another framing treatment.
Browser Stabilization Without Installing an App
For a small, one-off repair, OnlineConverter provides a browser workflow without installing an editor. As of November 2026, its video stabilizer accepts uploads up to 200 MB and produces MP4 output.
- Click Choose File and select your shaky recording.
- Select a stabilization level, starting with a mild correction.
- Click Convert and wait for processing to finish.
- Download the resulting file and play it locally to review the framing and camera motion.
- If edges or movement look unnatural, reduce the stabilization level and repeat with the original clip.
Uploading sends your clip to an online service; use a local desktop workflow for footage you cannot share. Process only footage you own or are authorized to use, for lawful personal purposes, and follow the third-party service's terms. You are responsible for securing the necessary content permissions.
How do I stabilize shaky video in Premiere Pro?
Apply the Warp Stabilizer effect: go to Effects > Video Effects > Distort > Warp Stabilizer and drag it onto your clip. Premiere Pro automatically analyzes the footage. Adjust Smoothness (higher = more stable, more crop) and Method (Smooth Motion or No Motion) in Effect Controls. For best results, nest the clip before applying, then render the timeline after stabilization is complete.
Can AI stabilization fix extremely shaky footage?
Stabilization can reduce severe camera shake, but it cannot recover a subject that has left the frame or detail lost to extreme motion blur. Trim unusable sections and apply mild correction to the remaining footage. In UniFab, use an available trial use to inspect a representative clip's framing before increasing the strength. For best results on extreme shake, accept some residual instability rather than over-stabilizing.
How long does video stabilization take?
Processing time depends on the tool, video length, and resolution. UniFab with GPU acceleration processes a 60-second 1080p clip in under 30 seconds. Premiere Pro analysis takes 1-3 minutes for the same clip, plus rendering time. CapCut on a phone takes 30-60 seconds depending on the device. 4K footage takes roughly 2-4x longer across all tools, so plan extra time for high-resolution projects.
Should I stabilize video before or after editing?
Trim to the footage you will keep, stabilize that working clip, then finalize text, graphics, and framing. Stabilization can crop the frame, which affects composition. If you edit first (add text, graphics, transitions) and then stabilize, the crop may cut off elements you positioned near frame edges. Make final compositional decisions based on the stabilized framing to avoid rework.
What is the difference between OIS, EIS, and software stabilization?
OIS (optical image stabilization) moves lens elements or the sensor to counteract movement during recording. EIS (Electronic Image Stabilization) digitally crops and shifts the frame during recording, trading field-of-view for stability. Software stabilization (post-production) analyzes an existing recording and adjusts frames to reduce visible shake. Changing a recording-time stabilization setting does not repair a video already saved.
Can I stabilize a video without cropping?
Premiere Pro's Stabilize Only framing option displays the full frame, including its moving edges, without automatic cropping. You can minimize cropping by using the mildest stabilization setting, shooting at a wider angle than needed, recording at a higher resolution than your output target, and — in Premiere Pro — using the "Stabilize Only" framing option to see the full uncropped result and manually crop as needed. An edge-to-edge export may still require cropping or another framing treatment.