What Premiere Pro Upscaling Actually Does
The 30-Second Answer
Here's the short answer: Premiere Pro can change a clip's output resolution three ways — Sequence Settings for a whole timeline, the Scale value in Effect Controls for one clip, or the Detail-Preserving Upscale effect via After Effects for cleaner edges. None of them adds detail that wasn't in the source. If a 1080p master lands on a 4K sequence and looks soft after upload, the fix usually starts with the sequence and export settings, not a sharpening filter.
Choose by goal: mixed-resolution timeline going to 4K, use Sequence Settings; a single clip that needs a controlled push, use Effect Controls; a hero shot where Edge quality matters most, send it to After Effects. For repeated batch enhancement on low-resolution footage, a dedicated AI tool outside Adobe generally does more than any native scaler can.
Scaling Changes Pixels, Not Source Detail
When you upscale, Premiere Pro uses interpolation to estimate new pixels from neighboring ones. That produces a higher-resolution file, but text can look softer, edges lose definition, and textures flatten. In my experience reviewing exports from readers, the most common disappointment isn't the scaler itself — it's expecting a 480p source to look native at 4K.
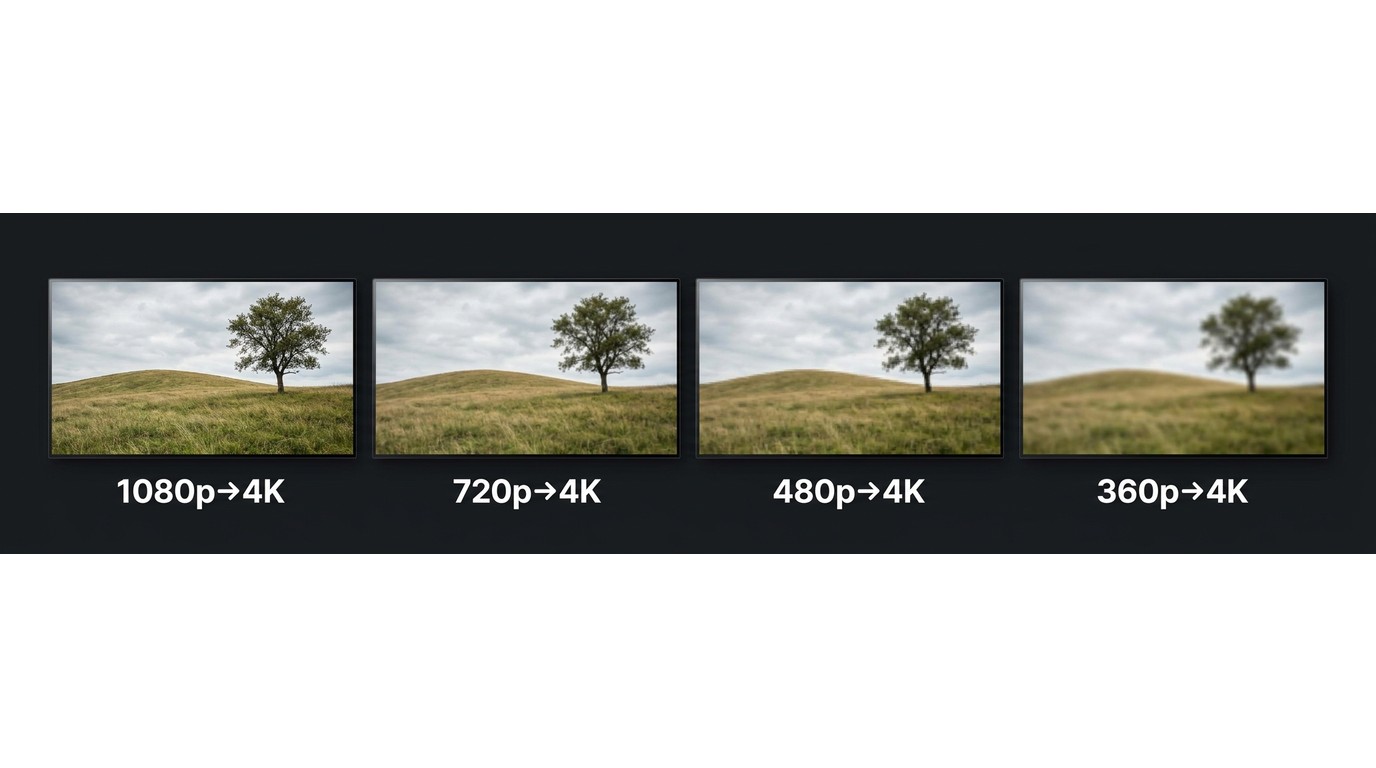
Moderate jumps (1080p to 4K) usually hold up. Larger jumps do not: 720p to 4K softens visibly, and 480p or 360p to 4K tends to show blur and Edge artifacts no matter which method you pick. Treat the resolution number as a container size, not a promise about clarity.
Method 1: Upscale Video Using Sequence Settings
This is the simplest and most commonly used method for upscaling video in Premiere Pro. It works best when you need to bring multiple clips of different resolutions into a single high-resolution timeline.
📺 Prefer to follow along visually? in about 2 minutes Watch the Upscale Video Premiere Pro (2026): 3 demo below:
Go Beyond Basic Resizing
- AI-powered upscaling for low-resolution footage
- Restore detail in old, blurry, or compressed videos
- Upscale to 4K with a more natural look
UniFab Video Upscaler AI
Go Beyond Basic Resizing
- AI-powered upscaling for low-resolution footage
- Restore detail in old, blurry, or compressed videos
- Upscale to 4K with a more natural look
UniFab Video Upscaler AI for Mac
Step 1: Create a New Sequence at Target Resolution
Go to File > New > Sequence (or press Ctrl+N / Cmd+N). Select a preset that matches your desired output resolution. For 4K output, choose a preset like RED R3D > HD 4K > 4K HD 16×9 23.976 (adjust the frame rate to match your footage).
Step 2: Set Default Media Scaling
Navigate to Edit > Preferences > Media (Windows) or Premiere Pro > Preferences > Media (Mac). Under "Default Media Scaling," select "Set to frame size." This ensures all imported clips automatically resize to fill your sequence frame.
Step 3: Import and Add Clips to Timeline
Import your video files into the project bin and drag them onto the timeline. Each clip will automatically scale to fill the 4K frame, regardless of its original resolution.
Step 4: Fine-Tune Individual Clips (If Needed)
If any clips show black bars or don't fill the frame properly, right-click the clip and select "Set to Frame Size." You can also manually adjust scaling through Effect Controls > Motion > Scale.
Step 5: Render and Export
Go to Sequence > Render In to Out to preview the results, then export via File > Export > Media. Make sure your export resolution matches your sequence settings (3840×2160 for 4K).
Method 2: Upscale Video Using Scale in Effect Controls
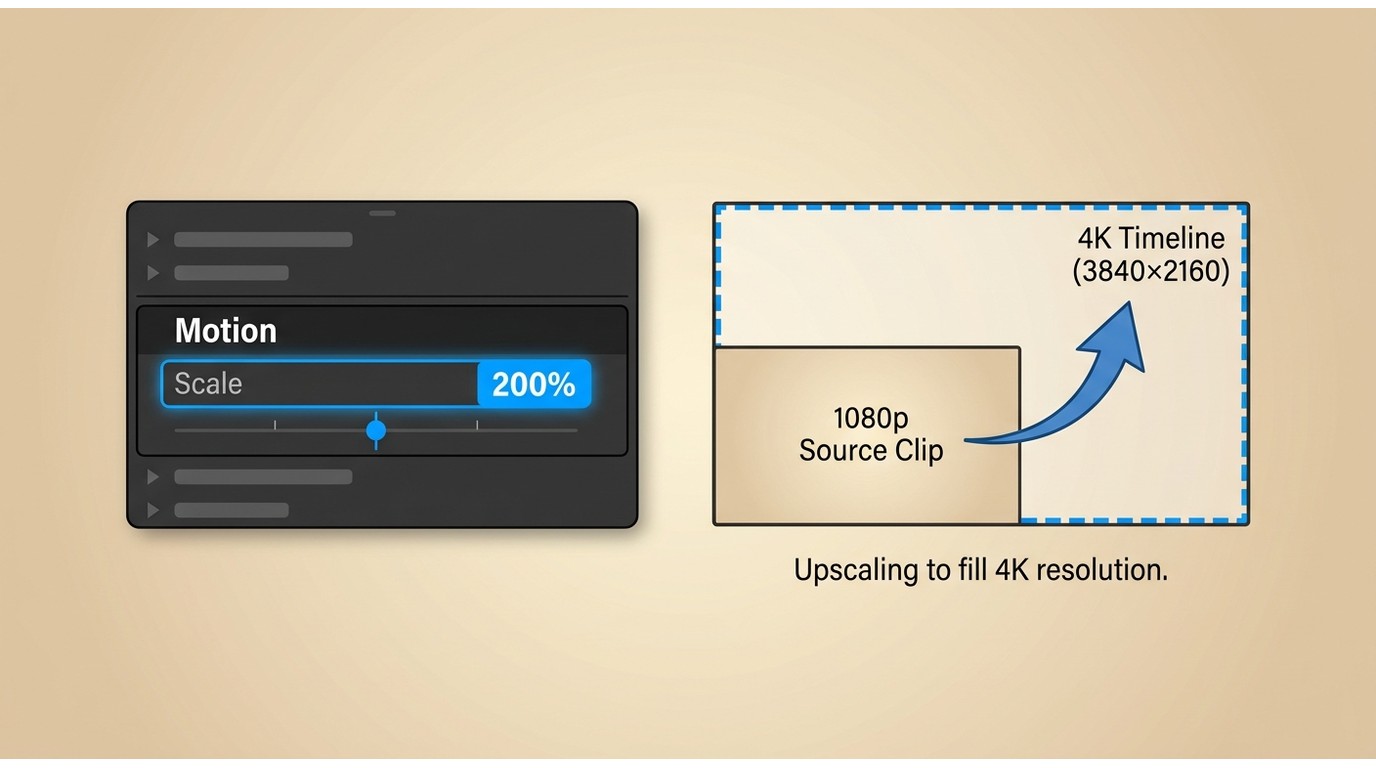
This method gives you precise manual control over the upscaling amount for individual clips. It's ideal when you only need to upscale specific clips rather than your entire timeline.
Step 1: Select Your Clip on the Timeline
Click on the clip you want to upscale in the Premiere Pro timeline.
Step 2: Open Effect Controls Panel
Go to Window > Effect Controls to open the panel (if it's not already visible).
Step 3: Adjust the Scale Value
Under Motion, find the Scale parameter. Change the value to increase the clip's resolution:
- 150 = 150% of original size
- 200 = 200% (doubles resolution, e.g., 1080p to approximately 4K)
- 300 = 300% (triples resolution, e.g., 720p to approximately 4K)
Step 4: Reposition If Necessary
After scaling up, the clip may shift. Use the Position parameters in Effect Controls to center the footage or frame it as desired.
Step 5: Preview and Export
Render a preview to check quality, then export with settings matching your target resolution.
Tip: This method simply stretches pixels without any intelligent detail preservation. For better quality results, combine it with sharpening filters like Unsharp Mask (found under Effects > Video Effects > Blur & Sharpen).
Method 3: Detail-Preserving Upscale in After Effects
Within the Adobe ecosystem, this is the method I reach for when Edge quality matters most on a specific shot. After Effects' Detail-Preserving Upscale uses smarter interpolation than a plain scale, holding edges and texture together better than Method 1 or 2 — at the cost of a heavier setup.
Step 1: Send Clip to After Effects
In your Premiere Pro timeline, right-click on the clip you want to upscale and select "Replace with After Effects Composition." Save the After Effects project when prompted.
Step 2: Apply the Detail-Preserving Upscale Effect
In After Effects, open the Effects & Presets panel (Window > Effects & Presets). Search for "Detail-preserving Upscale" and double-click it to apply it to your clip.
Step 3: Configure Upscale Settings
In the Effect Controls panel:
- Click "Fit to Comp Width" to automatically scale the footage to fill your composition
- Or set the Scale percentage manually: 200% for 1080p→4K, 300% for 720p→4K
- Increase the Detail slider beyond the default 50% — try values between 60-80% for optimal sharpness
- Use the "Reduce Noise" option to minimize digital noise that becomes more visible at higher resolutions
Step 4: Return to Premiere Pro
Save the After Effects project (Ctrl+S / Cmd+S). Switch back to Premiere Pro — your timeline clip automatically updates with the upscaled version through Dynamic Link.
Step 5: Render and Export
Render your sequence and export at the target resolution. Ensure export settings match your sequence resolution for the best results.
Note: This method requires both Premiere Pro and After Effects running simultaneously, so it demands significant system resources. It also doesn't support batch processing — each clip must be processed individually.
Set to Frame Size vs Scale to Frame Size
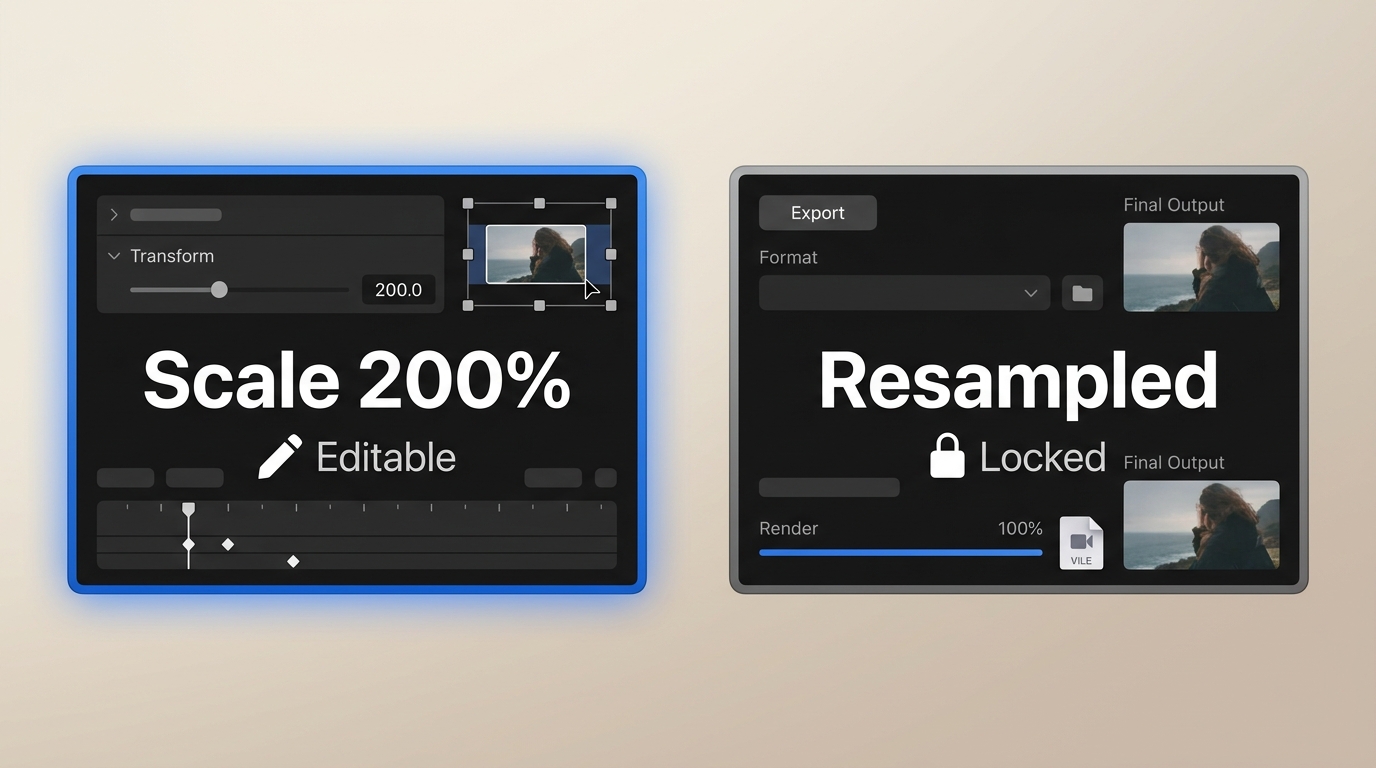
These two options sound alike but behave differently. Getting them mixed up is one of the more common reasons a clip refuses to re-scale cleanly later.
| Feature | Set to Frame Size | Scale to Frame Size |
| How it works | Adjusts the Scale value in Effect Controls; the clip keeps its original frame data | Resamples the footage to the sequence frame size on the timeline |
| Reversibility | You can change the Scale value later without re-importing | Later Scale changes work on the resampled version, not the original pixels |
| Quality impact | Keeps source frame data available for downstream reframing | Locks in a resampled version that is not ideal for further enlargement |
| Best fit | Editing workflows that may reframe or re-scale clips later | Quick layouts where you won't need to re-scale |
| My default | Set to Frame Size for anything I might revisit | Reserve for one-off layouts |
Pro Tip: Go to Edit > Preferences > Media and set "Default Media Scaling" to "Set to frame size" so all imported footage uses the non-destructive option by default.
Fix Blur, Cropping, and Export Quality
Video Looks Blurry After Upscaling
Cause: Pixel stretching without real detail recovery, or a soft source that no scaler can rescue.
Fix: Switch to the After Effects Detail-Preserving Upscale in Method 3, or add an Unsharp Mask for Edge definition — for a deeper walk-through of native sharpening controls and their limits, our guide on how to sharpen video quality goes further than what fits here. If the source is already soft or heavily compressed, no filter will pull it back to sharp; that's a source problem, not an export problem.
Video Appears Cropped or Zoomed In
Cause: The Scale value was increased, but the sequence resolution wasn't changed to match.
Fix: Ensure your sequence settings match the target resolution. If you scaled a 1080p clip to 200%, your sequence must be set to 3840×2160 (4K), not 1920×1080. Go to Sequence > Sequence Settings to verify.
Black Bars Around Footage
Cause: Footage resolution is smaller than the sequence resolution, and no scaling has been applied.
Fix: Right-click the clip and select "Set to Frame Size", or manually increase the Scale value in Effect Controls to fill the frame.
Rescaling a Completed 1080p Project to 4K
Problem: You've finished editing a 1080p project but now need 4K output. Simply changing sequence settings breaks effects and positioning.
Fix: Create a brand new 4K sequence via File > New > Sequence. Then copy all clips and effects from your 1080p timeline and paste them into the new 4K sequence. Apply "Set to Frame Size" to clips as needed.
Export Settings That Preserve the Upscale
Cause: Export settings drift from the sequence, or the bitrate is too low to carry the extra resolution.
Fix: In the Export dialog, confirm resolution and frame rate match the sequence (enable Match Sequence Settings to sync). Set Render at Maximum Depth and Use Maximum Render Quality when the resolution jump is significant. Give 4K H.264 a generous bitrate so YouTube's re-encode has enough data to work with — undersized bitrates are one of the most common reasons an upscale looks fine locally and mushy after upload. No bitrate rescues a weak source, though; if the master is soft, the upload will be too.
Premiere Upscaling Limits and Realistic Results
What Native Scaling Cannot Restore
Premiere Pro has no native built-in AI upscaler; its scaling relies on interpolation. Third-party machine-learning plug-ins for Premiere and external AI enhancers exist as separate options, but they are not part of the stock Adobe workflow. Native scaling cannot invent detail that wasn't captured, and compression artifacts, banding, and noise tend to become more visible after enlargement. From reviewing plenty of reader exports, I only leave the native workflow when the source is genuinely low-resolution or when I need to enhance many clips at once — the extra setup isn't worth it for moderate jumps on clean 1080p.
Realistic Results From 360p, 480p, and 720p
- 1080p to 4K: usually acceptable with Method 1 or Method 3; the biggest wins come from correct export settings.
- 720p to 4K: noticeably softer than native 4K; edges give it away.
- 480p to 4K: visible blur and blockiness — a dedicated AI enhancer helps more than Premiere's scalers here.
- 360p to 4K: expect a smoother, larger version of the source, not a clearer one.
- Batch loads: Method 1 can resize many clips on one timeline, but that is resizing — not per-clip enhancement — and each frame still passes through interpolation.
For projects that genuinely need reconstruction rather than resizing, dedicated AI video resolution upscaler tools tend to do more than any native scaler can.
Premiere Native, Plug-In, or External AI?
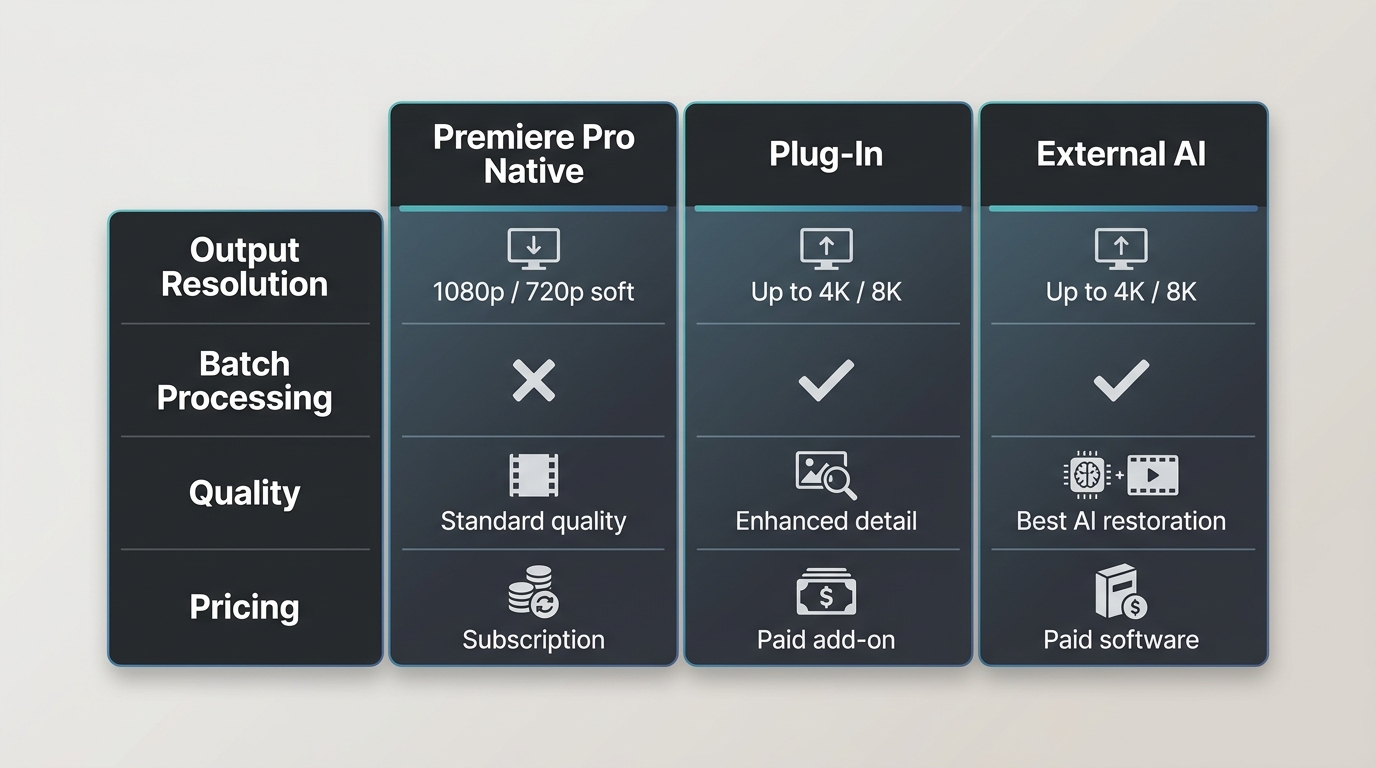
Quick Decision Matrix
Once you've tried the three native routes, the practical question is when to stay in Premiere and when to step outside. The matrix below compares the options I actually reach for; pick by workload, not by which tool sounds strongest. As of August 2026, plug-in and external-tool details can change — treat the specifics as current, not permanent.
| Route | Best fit | Runs inside Premiere | Detail-recovery approach | Batch handling | Main limitation |
| Premiere Sequence Settings | Mixed-resolution timeline going to one output size | Yes | Interpolation via Scale | Multiple clips share one sequence, but each frame is still interpolated | Does not add real detail |
| Premiere Effect Controls | Fine control on a single clip | Yes | Interpolation via Scale | One clip at a time | Softer edges on large jumps |
| After Effects Detail-Preserving Upscale | Hero shots where Edge quality matters | Via Dynamic Link | Detail-preserving interpolation | Per composition | Heavier setup; both apps open |
| Third-party Premiere ML plug-in | Staying in the Adobe timeline for ML output | Yes | Plug-in ML model | Varies by plug-in | Separate license and system load |
| UniFab Video Upscaler AI | Batch enhancement of low-resolution footage before editing | No — external app | AI model inference (GPU-accelerated) | Folder-level batch queue | Runs outside the Premiere timeline |
If you want to compare standalone upscalers more broadly, see our general guide on how to upscale video, or the wider round-up of a video quality enhancer across desktop and online tools.
When UniFab Fits
UniFab's AI Video Enhancer sits outside Premiere and is worth reaching for when you have a folder of low-resolution clips to prepare before an edit — old home footage, DVD rips you're authorized to edit, low-bitrate mobile captures. It runs GPU-accelerated AI inference locally, handles folder-level batch queues, and can output up to 16K when your delivery calls for it.
Best for: repeated batch enhancement on low-resolution footage.
Not ideal for: a single hero shot inside an active Premiere timeline — for that, Method 3 keeps you in Adobe and avoids a round-trip. Suitability and visible gains depend on the source and the workload.
Conclusion
Back to the 1080p-to-4K scenario the article opened with: use Sequence Settings when you're bringing a mixed-resolution timeline up to one output size, Effect Controls when a single clip needs a controlled push, and After Effects when a hero shot has to hold its edges. A third-party Premiere ML plug-in makes sense when staying on the Adobe timeline matters, and an external AI tool earns its keep when there's a folder of low-resolution footage to prepare before the edit begins. None of these are the right answer for every job — if the master is clean 1080p going to 4K, native scaling plus a careful export usually gets there without extra software. If you'd rather compare standalone options side by side, our guide to the best video quality upscaler tools breaks down the leading AI choices.
Premiere Pro Upscaling FAQs
Does Premiere Pro have native AI upscaling?
No — Premiere Pro has no native built-in AI upscaler; its Scale and Set to Frame Size behavior relies on interpolation. Third-party machine-learning plug-ins for Premiere and external AI video enhancers do exist, but they are separate products, not part of Premiere itself. Treat those three routes (native, plug-in, external) as distinct choices rather than one workflow.
How far can Premiere Pro upscale low-resolution footage?
Technically any resolution can be placed on any sequence, but perceived quality drops as the jump grows. 1080p to 4K generally holds up. 720p to 4K looks noticeably softer than native 4K. 480p and 360p to 4K show visible blur and Edge artifacts regardless of which native method you use — for those, a dedicated AI enhancer tends to give a bigger visible gain than any Premiere setting.
Can a 4K export improve playback on a 1080p screen?
Sometimes, and mainly for platform reasons. A 4K master gives YouTube's encoder more data to work with, which can result in a cleaner 1080p stream after its re-encode. It won't add source detail, and it can't undo softness in the original clip. Judge the outcome by how the uploaded video looks at the viewer's playback resolution, not by how the local export looks.
Can Premiere Pro batch-upscale several clips?
Not in the sense of a dedicated batch enhancement queue. You can drop many clips onto a 4K timeline and use Set to Frame Size to resize them together, but that's shared resizing — every frame still goes through interpolation. When the workload is enhancing many low-resolution clips at once rather than editing them together, a folder-level batch tool outside Premiere fits the job better.