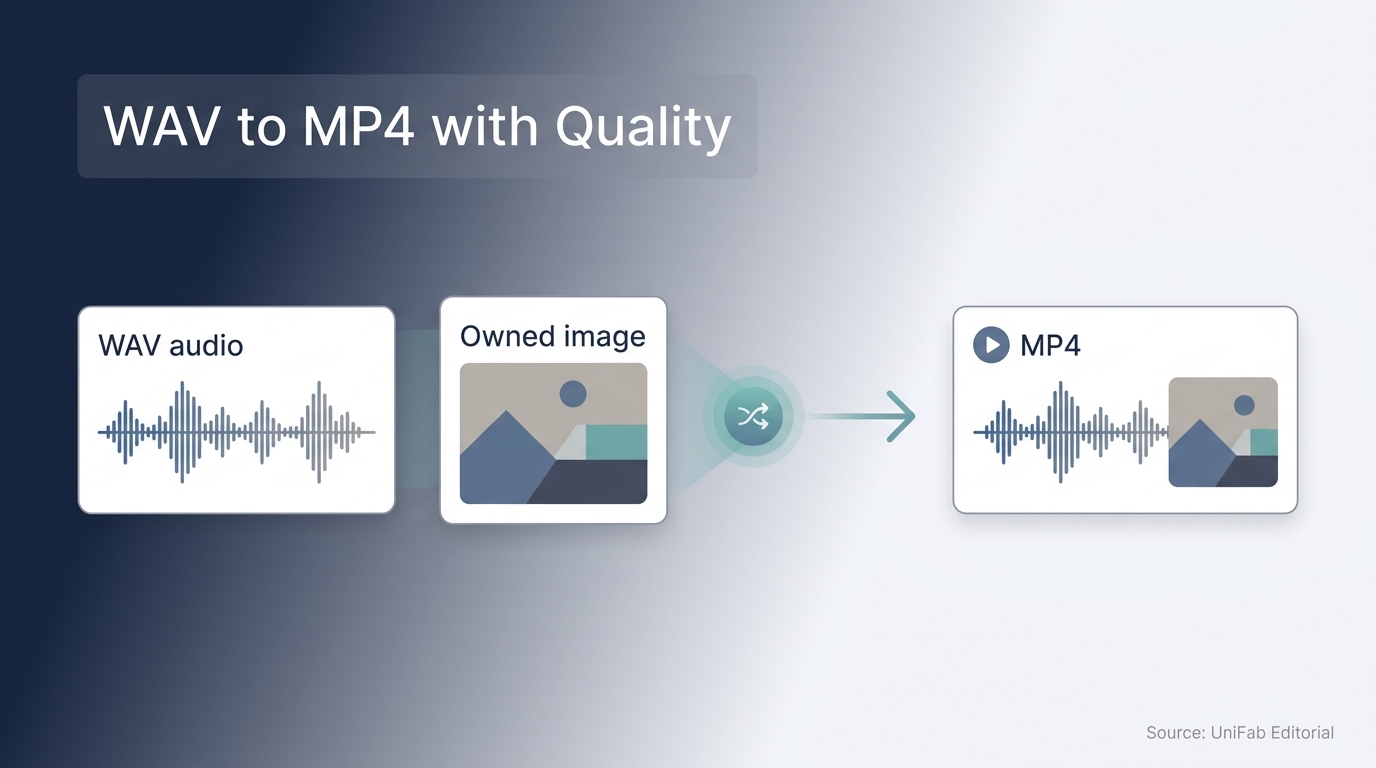
If a clean WAV sounds quieter or less detailed after a YouTube upload, conversion may be only part of the cause. To convert WAV to MP4, add owned artwork or a plain background as the visual track, export once, and avoid unnecessary intermediate conversions before uploading.
That distinction matters because a file can convert successfully and still miss the real goal: a clear, publishable video with sensible audio handling. My editorial view is that the image is the easy part; the avoidable quality loss comes from repeated encoding before YouTube applies its own transcode. Start with the online route for a small, non-sensitive file, but use a controlled local timeline when privacy or repeated work matters. The sections below compare those routes and end with a scenario-based decision.
How to Convert WAV to MP4 Online in Four Steps
For a small, non-sensitive file, a WAV to MP4 online converter can be a convenient option because it requires no installation. If you need to convert WAV to MP4 free online, use a browser service only for small, non-sensitive files. Work through these steps in order:
- Upload the WAV file.
- Add an image or background if the service requires a video track.
- Select MP4 and start the conversion.
- Download the MP4 and check it before sharing.
Use responsibly: Follow the online service's terms, and process only audio and images you own or have permission to use. For personal recordings or confidential work, consider whether uploading the source file is appropriate.
Prerequisites: Your WAV, an Output Goal, and a Visual Plan
Prepare the WAV, decide where the MP4 will be used, and choose a visual. A YouTube upload normally needs an image, a solid-color background, or another video track. Also check the service's file limit and privacy terms before sending a large master or an unreleased recording.
As one HomeRecording.com member asked, “If I use a site like freeconvert.com, is there a chance my personal files could be stolen?” The question is more useful than any “secure” badge: an online workflow means a remote service receives the file. It supports a practical rule: reserve browser conversion for low-sensitivity material rather than choosing it only for convenience.
1. Upload the WAV File
Open the converter, choose the audio-to-video or WAV-to-MP4 tool, and select the WAV from your device. Do not rename the extension first. Upload the original file so the converter can read its audio stream correctly.
2. Add a Background or Image When Required
If the converter offers an image field, upload artwork you are authorized to use. If it creates a plain background automatically, preview that result before continuing. A WAV is audio-only, so the image is what gives the MP4 a visible video track.
3. Choose MP4 and Start the Conversion
Select MP4 as the output. For a one-off conversion, keep the controls simple. Choose the highest practical audio setting offered, avoid applying volume changes unless needed, and do not add another conversion stage between the WAV and final MP4.
4. Download and Check the Result
Play the downloaded file from beginning to end. Confirm that the duration matches the WAV, the image remains visible, the audio level is stable, and the ending is not cut off. Check the MP4 locally before publishing; a completed download is not proof that every track was encoded as intended.
Convert WAV to MP4 with an Image for YouTube
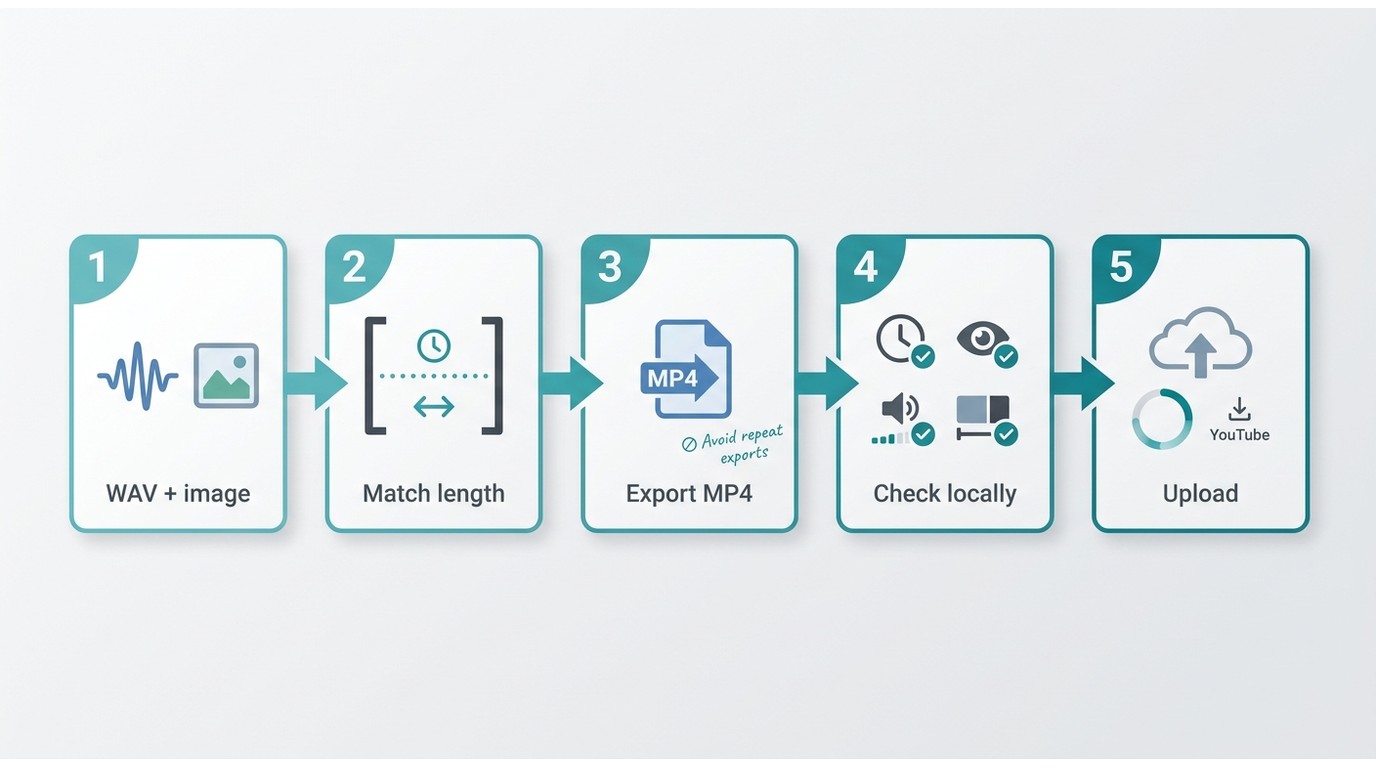
A WAV to MP4 with image workflow for YouTube is straightforward: place the WAV and permitted artwork on the same timeline, extend the image to the full audio duration, set the canvas, and export once. The image is a required video track, not a decorative extra, while the audio settings determine how much avoidable loss occurs before YouTube re-encodes the upload. For anyone searching “convert WAV to MP4 YouTube,” the practical workflow is one permitted image, one WAV, and one final export.
Why an Audio-Only WAV Needs a Visual Track
WAV stores audio, while MP4 is a container that can hold audio, video, and related tracks. Putting a WAV into an MP4 workflow does not create pictures by itself. A static image, color field, waveform animation, or video clip supplies the visual track expected by a normal video upload.
A Reddit user in r/DJs summarized the practical need: “So if I’ve ripped a nice clean piece of wax to WAV/MP3/Whatever, how can I make it a video file (like those ones that just have a static image) so I can upload to YouTube?” This is exactly why the static image belongs in the workflow rather than being treated as optional decoration. The shortest answer is to combine the audio and image in a timeline, then export them together.
Prepare the Artwork and Timeline
Use artwork you created, licensed, or have permission to publish. Choose a canvas shape that fits the intended YouTube presentation, and start with an image large enough to stay sharp at that size. A square album cover can sit inside a wider frame. Filling the empty space with a deliberate background usually looks cleaner than stretching the cover.
Set the project duration from the WAV, not by guessing how long the image should remain. Optional fades can help the opening and ending, but they should be intentional. The practical editing judgment here is restraint: a static-image upload rarely benefits from effects that create another opportunity for timing or export errors.
Build the Static-Image Video Step by Step
The exact buttons vary by editor, but the workflow is consistent:
- Create a new video project and set the canvas for the target platform.
- Import the artwork and place it on the video track.
- Import the WAV and place it at the start of the audio track.
- Extend the image until it matches the full WAV duration.
- Preview the beginning, a middle section, and the ending for sync and clean fades.
- Export a single MP4 from the completed timeline.
Do not export a temporary video, reopen it, and export again unless another edit is necessary. Each additional lossy audio encode can move the result farther from the WAV source.
Set Audio and Video Options Before Export
MP4 commonly carries AAC audio, so the WAV source may be encoded to a lossy audio track during export. Choose the strongest practical audio quality setting available. Keep the source sample rate when the editor permits it, and avoid automatic loudness changes unless you understand what they will alter. These choices reduce avoidable damage, but they do not make the MP4 lossless or prevent YouTube from transcoding it again.
The video side can be modest because a still image compresses efficiently. Use a standard, widely supported video codec and a stable frame rate. Raising video complexity will not improve the sound.
As one r/handbrake user put it, “The original mixes are in .wav and sound amazing, converting to MP4 and uploading to YouTube, the sound quality is nowhere near as good, particularly the volume being much lower.” That complaint points to two separate stages: the editor's MP4 export and YouTube's later processing. Judge the local MP4 first, then compare the uploaded version after processing finishes.
Check the File Before You Upload
Before publishing, verify these items:
- The MP4 duration matches the WAV.
- The image is sharp and remains on screen throughout.
- Speech or music is not clipped, unexpectedly quiet, or altered by an automatic effect.
- Fades begin and end where intended.
- You have permission to publish both the audio and visual.
Converting a format does not grant distribution rights. YouTube publication must still comply with its terms, copyright rules, and any license attached to the recording or artwork.
High-Quality WAV to MP4 Conversion with UniFab
A local app fits sensitive files, repeat conversions, or batch work. For WAV to MP4 high quality workflows, UniFab Video Converter is a Windows and Mac desktop app that processes files locally, supports 1000+ formats and MP4 output up to 4K, handles batch queues, and includes an editor.
Where a Local Workflow Fits
Use personal or authorized content under applicable terms and law.
| Detail | UniFab Video Converter |
| Price and output | Free; watermark-free |
| Limits | Desktop installation required; no browser or mobile workflow |
Convert, Add the Visual, and Export
- Add the WAV.
- Place the image with the audio.
- Match their durations.
- Choose MP4 and export.
- Queue more files when needed.
Choose Settings That Protect the Source
Keep the source sample rate when the output profile permits it, and avoid repeated lossy exports. UniFab cannot prevent YouTube's later transcode.
Online, Editor, or UniFab: A Scenario Decision
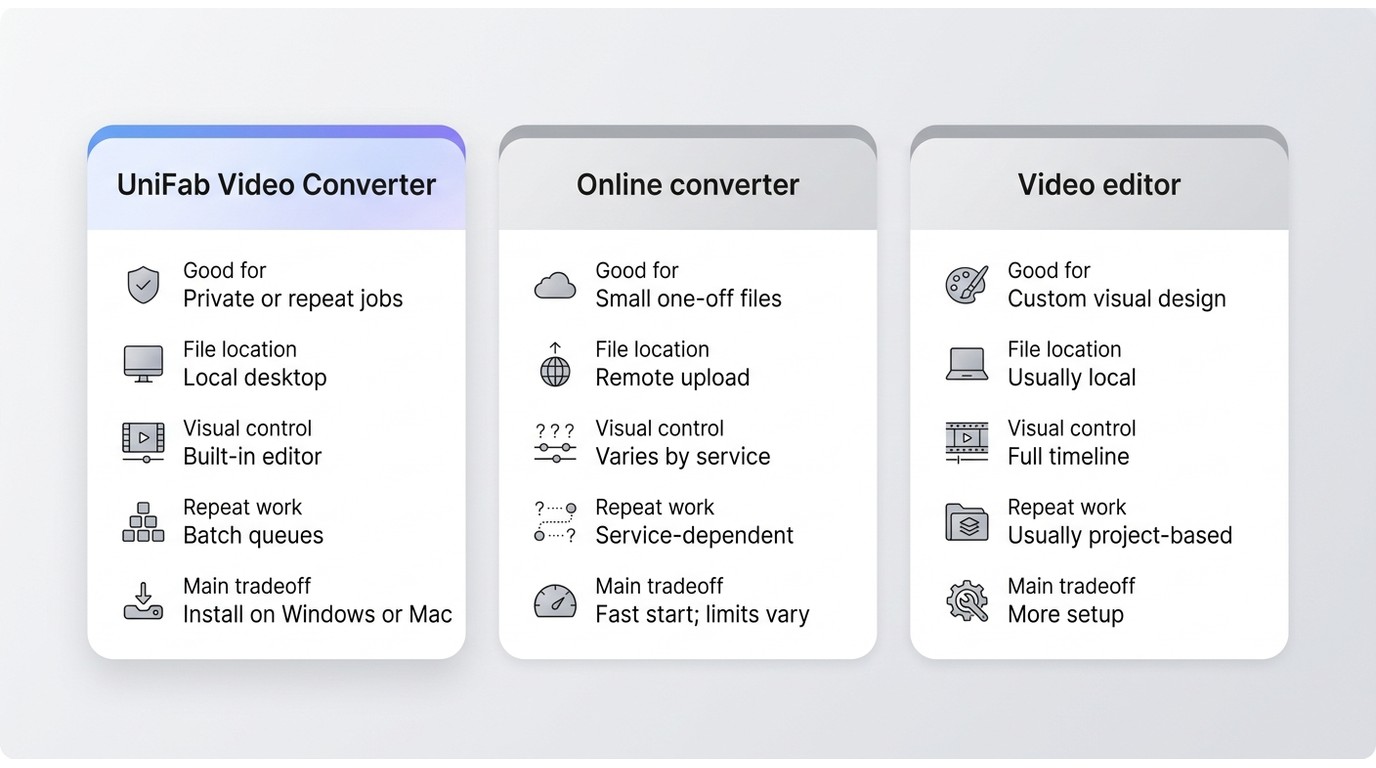
| Workflow | Best for | Main tradeoff |
| Online converter | Small, non-sensitive, one-off files | Remote upload; limits vary |
| General video editor | Custom motion, text, or design | More setup |
| UniFab Video Converter | Private files, repeat jobs, batch queues | Windows or Mac install; no browser or mobile workflow |
I would not upload an unreleased master to a browser converter merely to save setup time; for confidential or repeat work, the local desktop route is the better trade. Choose online for a quick low-sensitivity file, an editor for custom visuals, or UniFab for repeat local batch work.
WAV-to-MP4 FAQ
Most unusual results come from confusing the file extension, container, audio track, and video track. The answers below address edge cases rather than repeating the main conversion steps.
Can I Convert WAV to MP4 by Renaming the File Extension?
No. Renaming .wav to .mp4 changes the filename, not the file structure. A converter or editor must create an MP4 container and encode or package the required tracks.
Why Is My MP4 Much Larger Than the Original WAV?
The MP4 adds a video stream, even when the picture never changes. Canvas size, frame rate, video codec, and video bitrate can make the result larger than the source audio. Use restrained video settings for a static image rather than treating it like fast-moving footage.
Do I Need Adobe Software to Convert WAV to MP4?
No. For the WAV to MP4 Adobe route, Premiere Pro or another Adobe video editor can combine the audio and image. Adobe software is not required. A browser converter suits a simple one-off file, while a desktop converter or general editor gives more control over the visual track and export.
Can a Converted MP4 Go Out of Sync?
Yes. Sync problems can appear when the image timeline ends early, a project handles audio timing poorly, or an export changes timing unexpectedly. Match the timeline to the WAV and preview the full file, especially the ending.
Can I Upload Any Converted WAV File to YouTube?
No. You need the right to publish the audio and every visual asset. Conversion changes the technical format; it does not change ownership, licensing terms, or YouTube's rules.
How Do I Convert WAV to MP4 with a Static Image for YouTube?
Place the permitted image and WAV on one timeline, extend the image to the end of the audio, select a suitable canvas, and export MP4 once. Keep important text away from the image edges so it remains readable across different screens.
Does Converting WAV to MP4 Reduce Audio Quality?
It can. WAV is commonly uncompressed or lossless, while MP4 often uses lossy AAC audio, and YouTube performs another transcode. To keep quality as high as practical, start from the original WAV, choose a strong audio setting, avoid repeated exports, and inspect the local MP4 before upload.
Should I Use CloudConvert, Another Online Tool, or a Desktop App?
Use an online service such as CloudConvert for a small, non-sensitive, occasional file when its terms and limits fit your needs. Choose a desktop app for confidential material, repeat jobs, or batch work. The useful meaning of “best free WAV to MP4 converter” is therefore scenario-based. Check file location, upload limits, image support, output controls, watermarks, and how often you will use it.