Converting MOV to MP4 preserves quality only when you either remux compatible video and audio streams or transcode with settings matched to the source. Check the codecs first, then choose a local, Apple-supported, command-line, or online workflow based on file size and privacy.
My practical rule is simple: decide whether the file needs a new container or a new codec before choosing software. That prevents unnecessary re-encoding and makes the rest of the workflow much easier to judge. Use these methods only for footage you own or are authorized to process.
Choose the Right MOV-to-MP4 Path
The right way to convert MOV to MP4 depends on codec compatibility, device, file size, and whether an upload is acceptable. A free MOV converter can be enough for a small job, while local MOV conversion is usually the better fit for large or sensitive footage.
| Scenario | Recommended path | Where to continue |
| H.264 or HEVC video with MP4-compatible audio | Try a stream-copy remux to convert without quality loss | Remux when the codecs already fit MP4; Method 6 |
| Simple Mac conversion | Use an Apple-supported export workflow | Method 2 or Method 3 |
| Windows 11 or cross-platform desktop job | Use UniFab, VLC, HandBrake, or FFmpeg | Methods 1, 4, 5, or 6 |
| Large files, private footage, or batch queues | Process locally without uploading | Methods 1, 5, or 6 |
| Small, non-sensitive, one-off file | Use an online MOV converter if upload time is reasonable | Method 7 |
| Android or a device where software cannot be installed | Use a browser service for a small file, or move the file to a desktop for more control | Method 7 or a local desktop method |
Remux when the codecs already fit MP4
To remux MOV to MP4, copy compatible video and audio streams into a new container without changing their encoded data. This is the cleanest route when the source already uses a codec combination accepted by MP4.
Check both streams, not just the filename. H.264 video may be suitable for stream copy, but an incompatible audio track can still require audio conversion. Method 6 shows the inspection and remux commands.
Pick a path for your device and file size
For MOV to MP4 on Mac, use Apple's documented export options or iMovie. For MOV to MP4 on Windows 11, a desktop GUI or FFmpeg is more direct. An online MOV converter is convenient for a small file, but upload time and cloud handling matter as files grow.
What is the MOV format?
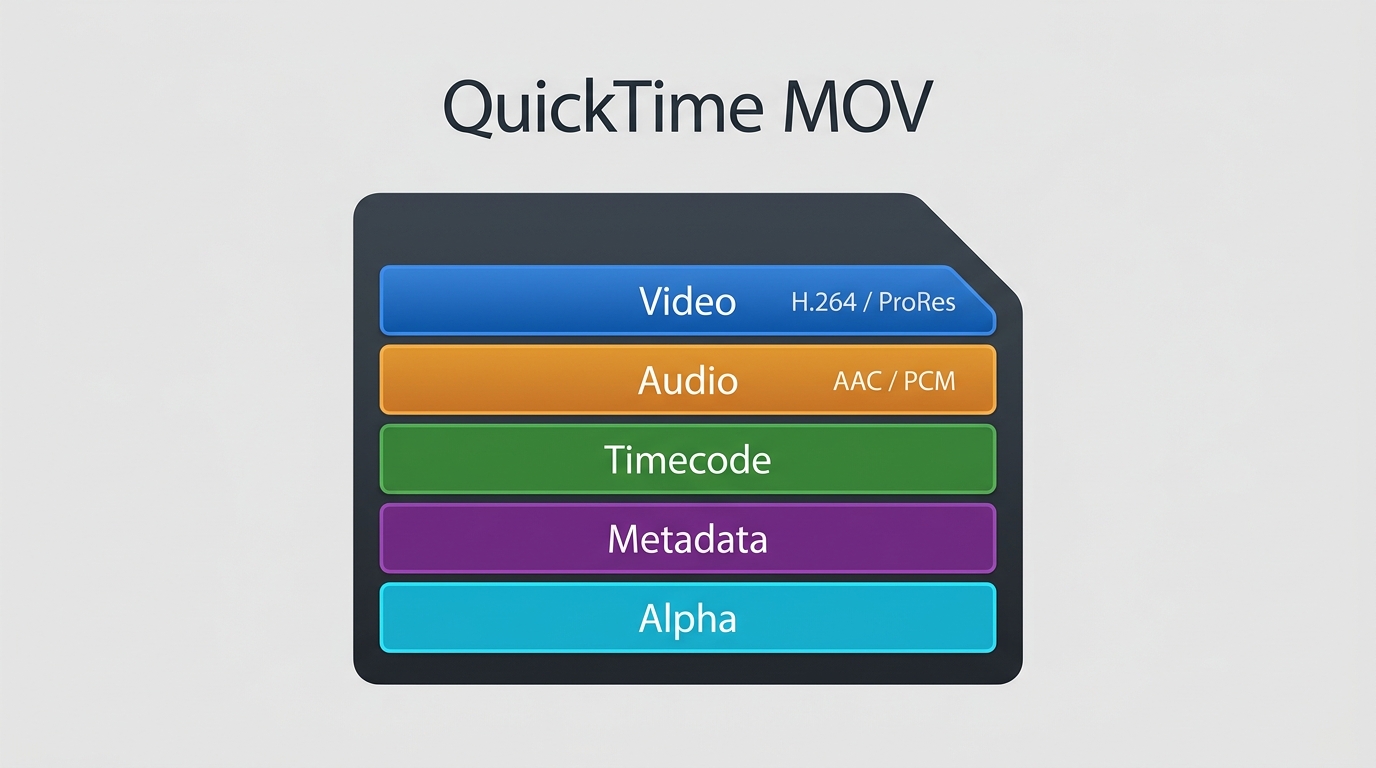
MOV is Apple's track-based media container. Its main value in this decision is that it can hold delivery codecs such as H.264 as well as editing-focused media, so the filename alone does not reveal whether a simple remux will work.
Strengths of MOV files
MOV quality depends on the codecs inside, but the container is well suited to editing workflows that need multiple audio tracks, timecode, metadata, high bit depth, or transparency.
- Common in camera, phone, screen-recording, and editing exports.
- Can hold production-oriented video and multiple media tracks.
- Can preserve alpha-channel workflows that a conventional MP4 delivery file may not support.
The practical advantage is flexibility: keep the MOV master when the project still needs editing data, then create an MP4 copy for delivery.
Weaknesses of MOV files
MOV compatibility varies because two files with the same extension can contain very different codecs. Large editing masters may also be inefficient for email, browser playback, or routine sharing.
- Some Windows apps and web services reject the contained codec even when they recognize the MOV container.
- Editing-focused codecs can produce files that are much larger than delivery-oriented MP4 exports.
- Converting an alpha-channel MOV to an ordinary MP4 can discard transparency.
What is the MP4 format?
MP4 is a delivery-focused container widely used for playback, sharing, and web distribution. It works well when paired with compatible video and audio codecs, but changing the container does not automatically make every source stream playable.
Strengths of MP4 files
MP4 compatibility is strongest when the file uses a broadly supported combination such as H.264 video and AAC audio. That makes it a practical target for browsers, presentation software, mobile playback, and many editing apps.
- Broad device and application support.
- Suitable for progressive web playback and routine uploads.
- Efficient delivery sizes when the output codec and quality target are chosen carefully.
Weaknesses of MP4 files
MP4 limitations become important with 10-bit, HDR, editing codecs, multiple production tracks, or transparency. The container can support more than basic H.264, but the receiving app may not.
I treat MP4 as a delivery target, not an automatic replacement for the source master. If a project depends on alpha, edit-friendly media, or preserved production metadata, keep the original MOV alongside the converted file.
Why convert MOV to MP4?
MOV to MP4 conversion is mainly about making a file easier to play, share, upload, or store. The benefit comes from the final codec-and-container combination, not from the .MP4 extension by itself.
Compatibility across platforms
MOV compatibility can fail when an app recognizes the container but not the video or audio stream. A well-formed MP4 with supported codecs is more likely to open on Windows, macOS, mobile devices, browsers, and presentation software.
For a reproducible check on a Windows 11 24H2 PC, inspect the file with a media-information utility before conversion, then open the output in both the target editor and the system player. If both picture and sound load, the delivery combination fits that workflow.
Storage and bandwidth efficiency
MOV file size is determined mostly by codec, bitrate, frame rate, resolution, and duration. Converting a production codec to a delivery codec can reduce size substantially, while remuxing compatible streams changes overhead rather than the encoded picture.
Avoid promising one compression percentage for all files. Compare the output against the source at the intended viewing size, and keep the original when the converted file is a delivery copy rather than a new master.
Smoother sharing and uploads
An MP4 upload is often easier for websites and collaboration tools to process when it uses a supported video-and-audio pair. A smaller delivery file can also shorten transfer time, although the result depends on the chosen quality settings.
If the real task is broader sharing rather than conversion, keep that workflow separate: create one suitable MP4 here, then use a dedicated sharing process instead of repeatedly recompressing the file.
Container vs codec: what conversion changes
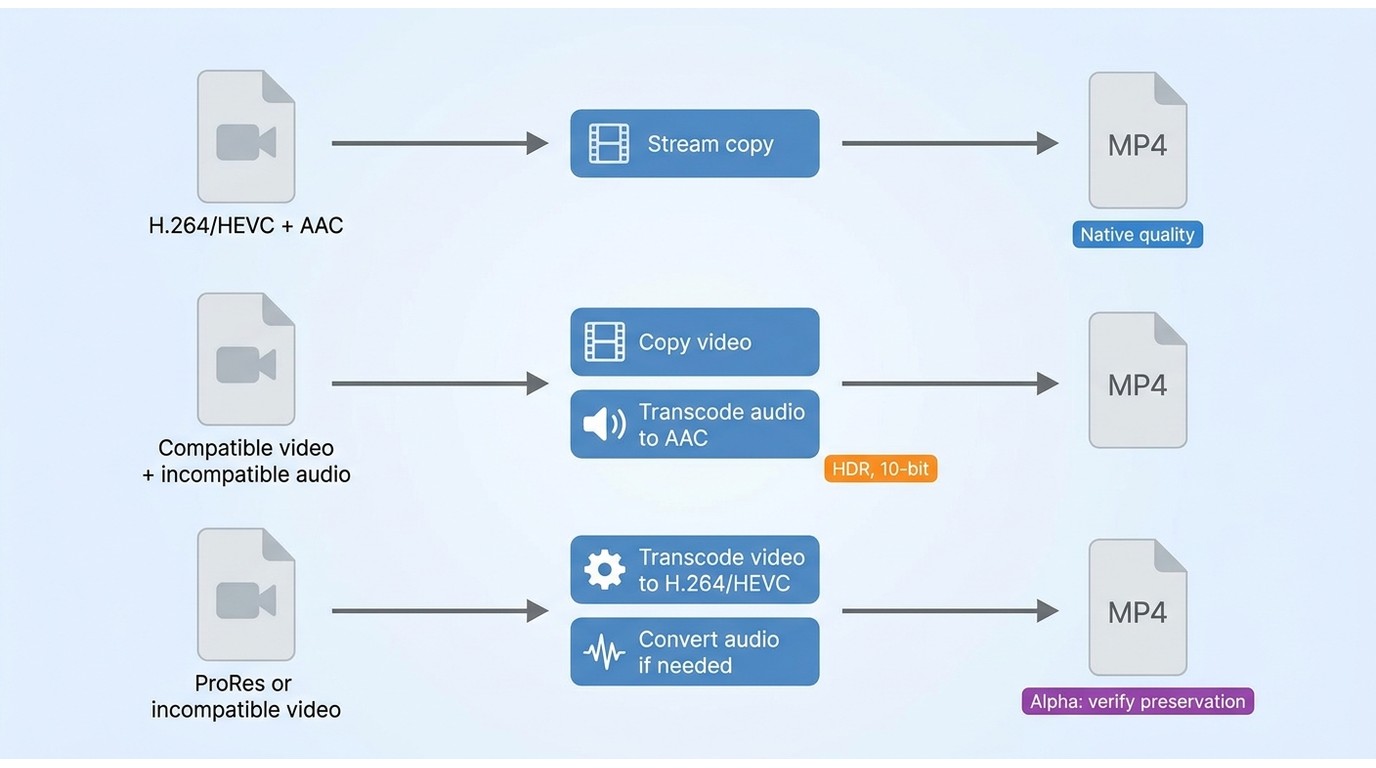
To convert without quality loss, separate the container decision from the codec decision. Remuxing changes the wrapper; transcoding decodes and re-encodes at least one stream, so output settings then affect quality, compatibility, and size.
Check codecs before choosing a method
A codec check is more reliable than choosing a MOV to MP4 converter by brand name alone. Inspect the source video and audio, identify the receiving app, then choose remux or transcode.
| Source video | Source audio | Fits MP4? | Action | Expected quality result | Suitable method |
| H.264 | AAC | Usually | Remux | Encoded streams remain unchanged | FFmpeg stream copy or a verified no-reencode workflow |
| HEVC | AAC | Often, but app support varies | Remux if the destination supports it | Encoded streams remain unchanged | FFmpeg after inspection |
| H.264 or HEVC | Audio not accepted by the target | Partly | Copy video and transcode audio | Video remains unchanged; audio is re-encoded | FFmpeg custom command |
| ProRes or another editing codec | Compatible or incompatible audio | Not for a conventional delivery MP4 | Transcode video; convert audio if needed | Quality depends on output settings | UniFab, HandBrake, or FFmpeg |
| Alpha-capable source | Any | Transparency may not carry over | Keep an alpha-capable master or choose another delivery format | Avoids losing transparency | Editing application or format-specific workflow |
On a MacBook Air with Apple silicon running macOS 15, the useful verification sequence is to inspect the codec, create the candidate MP4, and review the file's resolution, frame rate, color information, and audio tracks before deleting nothing from the source folder. The observable goal is matching media properties, not a faster progress bar.
Preserve 4K, HDR, 10-bit, and alpha
4K MOV conversion should retain source resolution and frame rate unless you deliberately want a smaller delivery version. HDR and 10-bit sources also need an output codec, pixel format, and app workflow that preserve their color information.
- 4K: match the source dimensions and avoid selecting a lower-resolution preset.
- Frame rate: preserve the source rate unless variable timing is causing sync trouble.
- HDR and 10-bit: confirm that the encoder, container settings, and destination app support the required color depth and metadata.
- Alpha: do not force transparency footage into a conventional MP4 if the alpha channel is required.
With iPhone 15 Pro footage on iOS 18, check the clip's HDR and frame-rate details in Photos before export, then compare those fields in the converted file. If the destination reports an 8-bit standard-range file when the source was HDR, the chosen preset changed more than the container.
7 ways to convert MOV to MP4
These seven MOV to MP4 converter methods cover local batch work, simple Apple workflows, free desktop apps, command-line remuxing, and browser conversion. Choose by file characteristics and destination requirements rather than by a universal ranking.
Method 1: UniFab for local batch conversion
UniFab Video Converter is a Windows and Mac desktop tool for local MOV conversion and batch MOV conversion. It supports 4K output, broad format conversion, hardware acceleration, queue processing, and watermark-free use without sending source footage to a cloud service.
Best fit: repeated desktop conversions, folders of MOV files, large footage, and users who want a graphical workflow. Not ideal for: Linux systems, terminal-first remuxing, or a one-file task where an already installed Apple tool is sufficient.
Two practical limits are worth stating clearly: it requires a desktop installation, and it is not available for Linux. Its wider converter interface may also be more than a user needs for a single compatible file that FFmpeg can remux directly.
- Install UniFab Video Converter, open the Converter module, and add one MOV file or a folder.
- Choose MP4, then match the source resolution and frame rate. Select an output codec that the destination supports.
- Start the queue, open the result, and verify picture, audio, duration, and color behavior in the target app.
If the source needs a separate visual cleanup or upscale after the format decision, Video Enhancer AI covers that different task. Do not add enhancement merely to change the container.
Method 2: Apple-supported Mac options
For MOV to MP4 on Mac, use an Apple-supported workflow rather than assuming QuickTime Player's Export As command creates an MP4. Apple's current paths include a compatible filename-extension change, iMovie, Final Cut Pro, or Compressor.
Best fit: Mac users who already work in Apple software and need a simple, documented export. Not ideal for: large cross-platform batches or users who need a transparent stream-copy decision.
- If the contained media is already MP4-compatible, changing the extension may be accepted in the documented compatible case, but it does not transcode or repair incompatible streams.
- Use iMovie for a simple consumer export.
- Use Final Cut Pro or Compressor when the project needs controlled export settings or an editing workflow.
The key distinction is whether the media streams remain unchanged or are re-encoded. Check the resulting codec and file behavior instead of judging by the new extension.
Method 3: iMovie on Mac and iPhone
iMovie offers a free MOV converter path on Apple devices when the clip also needs trimming, titles, or a straightforward share export. It re-encodes, so source and output properties must be compared when quality preservation matters.
Best fit: a small number of Mac or iPhone clips that need light editing. Not ideal for: scripted batches, stream-copy remuxing, or footage whose HDR, 10-bit, or frame-rate requirements are not supported by the chosen export.
- Create a project and import the MOV clip.
- Make any required trim or title changes.
- Choose the available share or file-export option and select the closest suitable resolution.
- Inspect the exported MP4's resolution, frame rate, color behavior, and audio before treating it as the delivery copy.
For 4K iPhone footage, do not assume that selecting 4K preserves HDR, bit depth, and frame rate. Those are separate checks, and the intended playback app is part of the decision.
Method 4: VLC Media Player
VLC can convert MOV to MP4 on Windows, macOS, and Linux through its Convert/Save or Convert/Stream workflow. It is useful when VLC is already installed and the file needs a conventional transcode.
Best fit: occasional cross-platform conversion with a familiar free app. Not ideal for: users who need detailed batch management, predictable stream copy, or careful HDR and 10-bit controls.
- Open VLC and choose Convert/Save on Windows or Convert/Stream on macOS.
- Add the MOV file and choose an MP4-compatible profile.
- Set a destination ending in .MP4 and start the conversion.
- Play the output and confirm that both video and audio work in the destination app.
If VLC is part of a broader playback or scaling workflow, this VLC upscaling guide covers that separate topic without expanding it here.
Method 5: HandBrake
HandBrake is a free, open-source transcoder for Windows, macOS, and Linux. It provides useful quality, frame-rate, audio, and queue controls, but it is a transcoding tool rather than the first choice for a no-reencode remux.
Best fit: users who want a free GUI, repeatable presets, or queue-based conversion. Not ideal for: pure stream copy, transparency preservation, or users who do not want to choose encoding settings.
- Open the MOV source.
- Select an MP4 preset close to the source resolution and frame rate.
- Review video quality, frame-rate behavior, audio tracks, and color requirements.
- Choose the output path, add more files to the queue if needed, and start encoding.
The detailed HandBrake Video Converter review covers the app beyond this MOV-specific workflow.
Method 6: FFmpeg
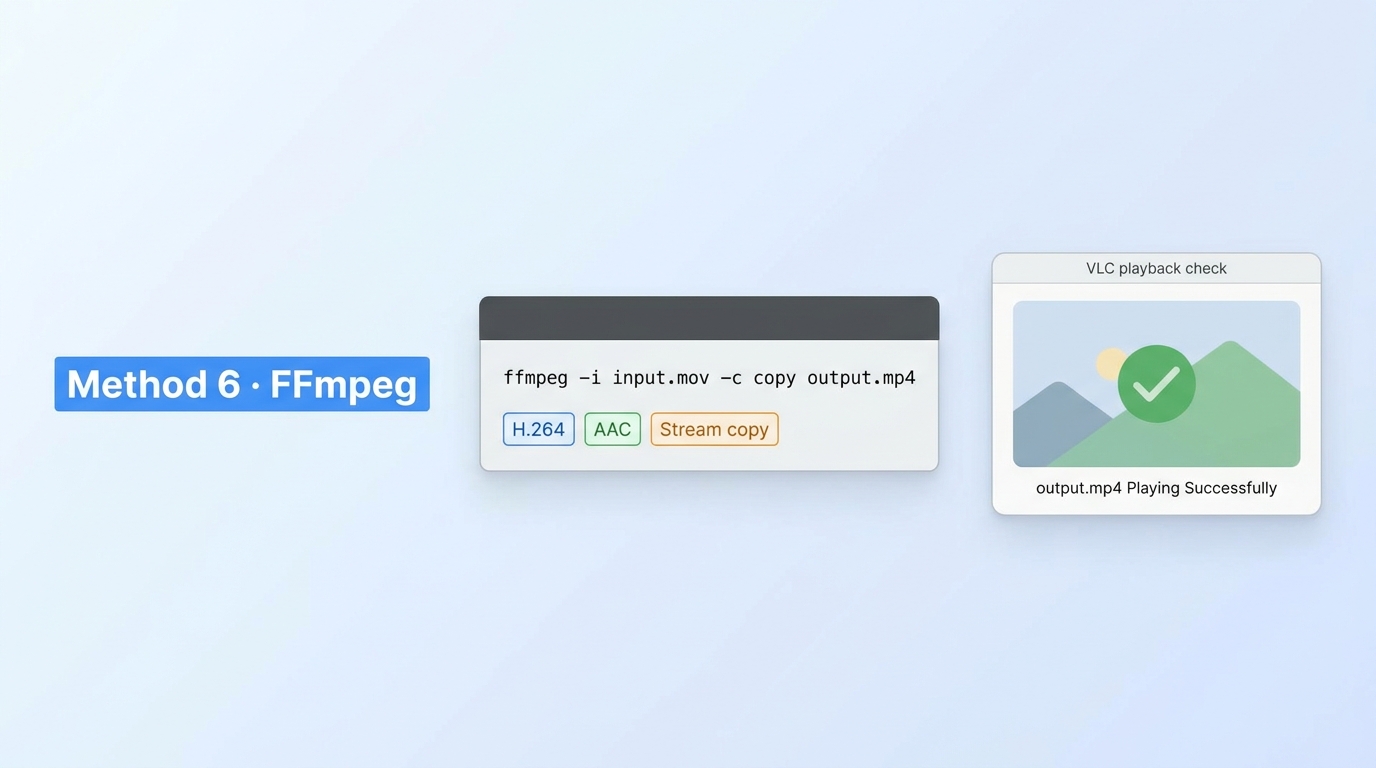
FFmpeg is the most direct way to inspect streams, remux MOV to MP4, or build a controlled transcode. The inspection step comes first because stream copy works only when the contained video and audio fit the target MP4 workflow.
Best fit: codec inspection, loss-preserving remuxes, custom audio handling, and scripted batches. Not ideal for: users who prefer a graphical interface or do not want to validate command-line output.
- Inspect the source with ffprobe -v error -show_streams input.mov.
- If the video and audio are compatible, remux: ffmpeg -i input.mov -map 0 -c copy output.MP4.
- If video can be copied but audio cannot, copy video and encode audio: ffmpeg -i input.mov -c:v copy -c:a AAC output.MP4.
- If the source uses an editing codec such as ProRes, choose a deliberate transcode: ffmpeg -i input.mov -c:v libx264 -crf 20 -c:a AAC output.MP4.
- Open the output in the target player or editor and confirm duration, audio, color, and sync.
For batch MOV conversion, place tested settings in a script only after one representative file passes review. That prevents a wrong preset from being repeated across a whole folder.
Method 7: Online converters
An online MOV converter can handle a small one-off file without software installation. Upload requirements, free allowances, queue features, and file limits vary by provider and account, so there is no useful universal size cap.
Best fit: small, non-sensitive files on a device where local software is unavailable. Not ideal for: multi-gigabyte footage, recurring batches, limited connections, or media that should not be uploaded.
- Choose a provider such as CloudConvert, Convertio, or FreeConvert.
- Review its current upload, retention, privacy, and account terms.
- Upload the MOV, select MP4, and avoid changing resolution or frame rate unless intended.
- Download the result and inspect it before deleting or moving the source.
As of July 2026, provider limits and free allowances differ and can change. For sensitive client media or large archives, local processing avoids the upload step and gives you more direct control over source and output files.
MOV-to-MP4 methods compared
This comparison summarizes the decision points without repeating the seven workflows. The useful distinction is whether a method can remux, how it handles large or batch jobs, and whether footage must leave the computer.
| Method | Best fit | Not ideal for | Operating systems | Remux or transcode | Upload required | Large-file suitability | Batch support | Quality controls | Free-limit variability | Local privacy |
| UniFab Video Converter | Local desktop queues and repeated MOV jobs | Linux, terminal-first remuxes, or a single trivial file | Windows, macOS | Converter workflow; verify settings for the source | No | Good when local storage is available | Yes | Resolution, codec, frame rate, and output settings | No cloud allowance | Files stay on the computer |
| Apple-supported Mac options | Simple Mac exports and Apple editing workflows | Cross-platform batch queues | macOS | Compatible extension case or transcode, depending on workflow | No | Reasonable, depending on app and storage | Depends on the Apple app | Ranges from simple export to professional controls | No cloud allowance | Files can stay local |
| iMovie | Light editing plus export on Mac or iPhone | Remuxing, scripting, or detailed batch control | macOS, iOS | Transcode | No | Better for a small number of clips | No practical folder queue | Simple resolution and share options | No cloud allowance | Files can stay local |
| VLC Media Player | Occasional free conversion on common desktop systems | Managed batches and nuanced HDR workflows | Windows, macOS, Linux | Mainly transcode through profiles | No | Usable, but workflow is basic | Limited | Profile-based controls | No cloud allowance | Files stay local |
| HandBrake | Free GUI transcoding and repeatable queues | Stream-copy remux or alpha preservation | Windows, macOS, Linux | Transcode | No | Good with enough local storage and processing time | Yes | Detailed video, frame-rate, and audio settings | No cloud allowance | Files stay local |
| FFmpeg | Inspection, remuxing, custom conversion, and scripts | Users who need a visual interface | Windows, macOS, Linux | Both | No | Good; limited mainly by local resources | Yes, through scripting | Detailed stream-level choices | No cloud allowance | Files stay local |
| Online converters | Small, non-sensitive, one-off files | Large, private, or recurring batch jobs | Modern browser | Usually transcode; provider-dependent | Yes | Often impractical as upload size grows | Provider- and account-dependent | Usually simplified presets | Limits and allowances vary | File is handled by a cloud service |
My editorial takeaway is that FFmpeg offers the clearest codec-level decision, HandBrake offers the most approachable free queue, and UniFab fits users who want a local graphical batch workflow on Windows or Mac. None is the right fit for all seven scenarios.
Troubleshooting MOV-to-MP4 problems
Most MOV conversion problems come from incompatible audio, timing behavior, color-depth changes, transparency loss, or an output setting that does not match the destination app. Diagnose the stream that failed before repeating the conversion.
Fix audio-only imports and sync drift
An audio-only import usually means the editor accepts the audio stream but not the video codec. Sync drift more often points to variable frame rate, irregular timestamps, or a conversion that changed timing behavior.
- Inspect the source and output video and audio codecs.
- Test the MP4 in both a player and the target editor.
- If the video codec is rejected, transcode it to a supported delivery codec.
- If sync drifts gradually, compare duration and frame-rate mode, then use a controlled constant-frame-rate export only when the destination requires it.
On a Windows 11 24H2 editing workstation, a useful observable check is to place the source and output on separate timeline tracks, align the first frame, and inspect a point near the end. A growing offset suggests timing conversion rather than a simple starting delay.
Handle 10-bit, HDR, and transparency
10-bit, HDR, and alpha-channel footage needs more than an MP4 extension. The selected codec, pixel format, metadata handling, and destination application must all support the property you want to preserve.
- If HDR becomes flat or washed out, compare color-transfer and range information rather than raising saturation.
- If 10-bit becomes 8-bit, choose an encoder and preset that retain the required bit depth.
- If transparency disappears, keep the alpha-capable MOV master or use a delivery format that supports alpha in the target workflow.
- If an editor rejects an otherwise playable file, use a codec profile the editor supports instead of repeatedly changing containers.
This is where I would keep the MOV master. Forcing MP4 is not safer when it removes a property the project still needs.
Reduce oversized outputs without guessing
An oversized MP4 usually reflects a high bitrate, an inefficient preset for the target, unnecessary resolution, or an output codec choice. Change one variable at a time and compare a representative scene.
- Confirm the required resolution and frame rate.
- Choose a delivery codec supported by the destination.
- Use a quality-based setting rather than copying an arbitrary bitrate from another file.
- Review motion, gradients, text, and dark areas in a short sample.
- Apply the accepted settings to the full file or batch.
Do not downscale 4K merely to solve a format problem. If the real goal is a 1080p delivery copy, treat that as a separate resolution decision, and keep the source master.
Conclusion
The most dependable MOV to MP4 workflow starts with codec inspection. Remux compatible streams first; transcode only when the destination requires a different codec, smaller delivery file, or corrected timing.
Use an Apple-supported option for a simple Mac job. Choose HandBrake or VLC for a free desktop GUI, FFmpeg for inspection and stream copy, and a local batch tool such as UniFab for repeated Windows or Mac conversions involving large or sensitive files. UniFab is not for Linux users or people who prefer a minimal terminal remux. Reserve online tools for small, non-sensitive files when upload time and provider terms are acceptable.
MOV-to-MP4 FAQ
Can MOV become MP4 without quality loss?
Yes, when the contained video and audio streams are compatible with the intended MP4 workflow. A stream-copy remux leaves those encoded streams unchanged. If either stream must be transcoded, quality depends on the selected output settings.
Which free method works on Mac or Windows?
On Mac, use an Apple-supported export option or iMovie for a simple job. On Mac or Windows, VLC and HandBrake provide free GUIs, while FFmpeg is the more direct free choice for inspection, remuxing, or scripted batches.
What settings preserve 4K, HDR, and 10-bit?
Match the source resolution and frame rate, then choose a codec and bit-depth setting supported by the destination. For HDR, confirm that the workflow retains the required color information and that the receiving player or editor interprets it correctly.
Should an alpha-channel MOV stay MOV?
Usually, if transparency is still required. A conventional MP4 delivery workflow may not preserve the alpha channel, so keep an alpha-capable master and create a separate delivery file only when the destination no longer needs transparency.
Why does converted audio drift out of sync?
Variable frame rate, irregular timestamps, or a frame-rate change can create gradual drift. Compare source and output timing, then use a controlled constant-frame-rate export only if the destination app requires it.
Are online converters suitable for large files?
They are usually less practical as file size grows because upload time, account allowances, and cloud handling become part of the job. For large batches or sensitive footage, a local desktop or command-line workflow is easier to control.