Here's the short answer: Filmora 15 is a capable beginner-to-intermediate editor, but unclear AI-credit costs, export watermarks, and uneven enhancer results can change its value. This Wondershare Filmora review covers the full editor, US pricing, Filmora video enhancer performance, and alternatives so you can match the tool to your workflow.
What Is Wondershare Filmora?
Wondershare Filmora is a cross-platform video editing software designed primarily for beginners and intermediate users. Available on Windows, Mac, iOS, and Android, Filmora 15 combines a user-friendly timeline editor with a growing library of AI-powered tools including auto-captioning, smart clip generation, AI music composition, and video enhancement.
The current release positions itself as an all-in-one solution for content creators, small businesses, and social media marketers, with 2.3 million+ creative assets and support for 4K editing. This review evaluates Filmora 15 as a full video editor first — its core workflow, AI tools, pricing, and exports — and then its AI Video Enhancer as one feature among many.
Filmora AI Video Enhancer?
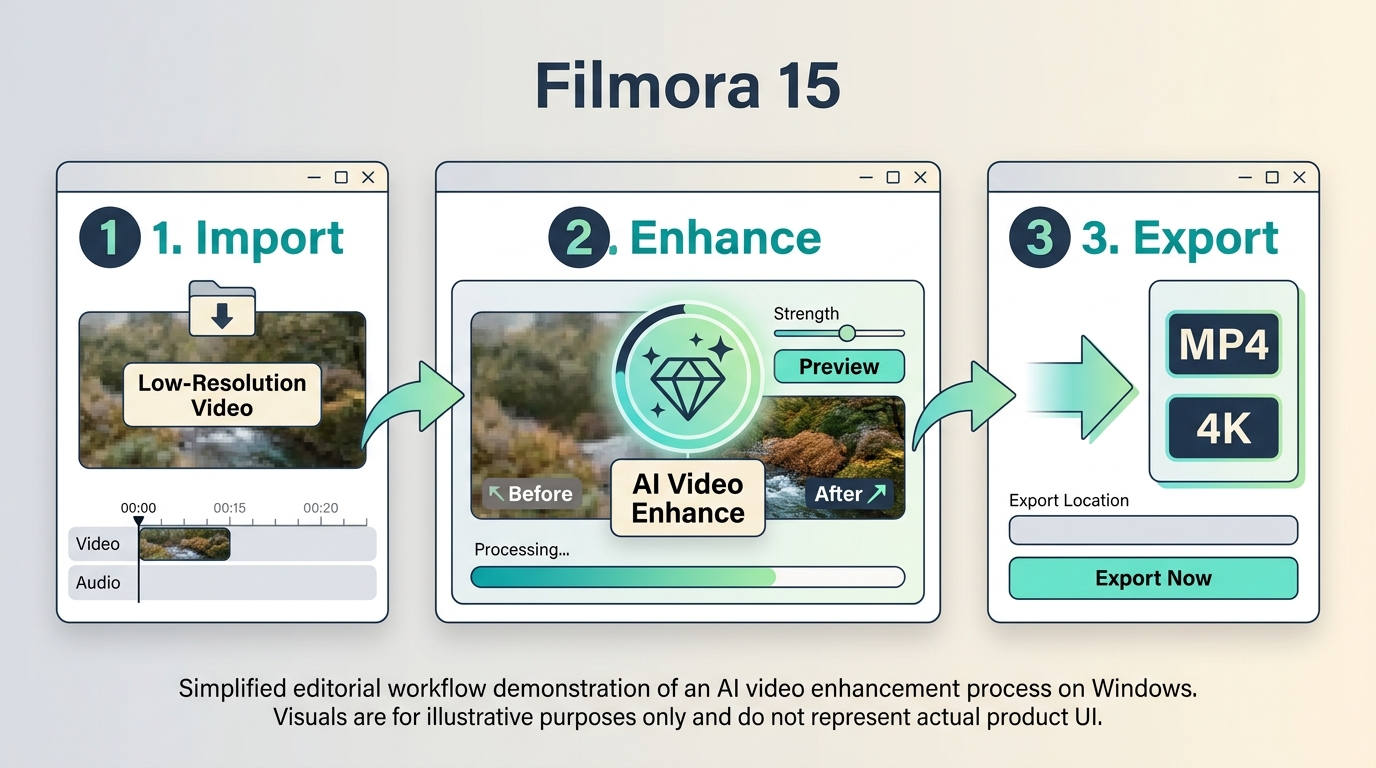
Wondershare Filmora AI Video Enhancer is available on Windows and Mac and uses AI-assisted processing to address blur, grain, and lower-resolution footage. Its available options and visible results depend on the source clip, selected mode, software build, and hardware.
It also handles footage shot in low light by balancing brightness and contrast, reduces visual artifacts caused by video compression, and can upscale video resolution. That said, results in Filmora 15 vary by source clip, processing mode, and build — I'll show what my named test build actually produced later in this review.
Filmora 15 Editing and AI Features
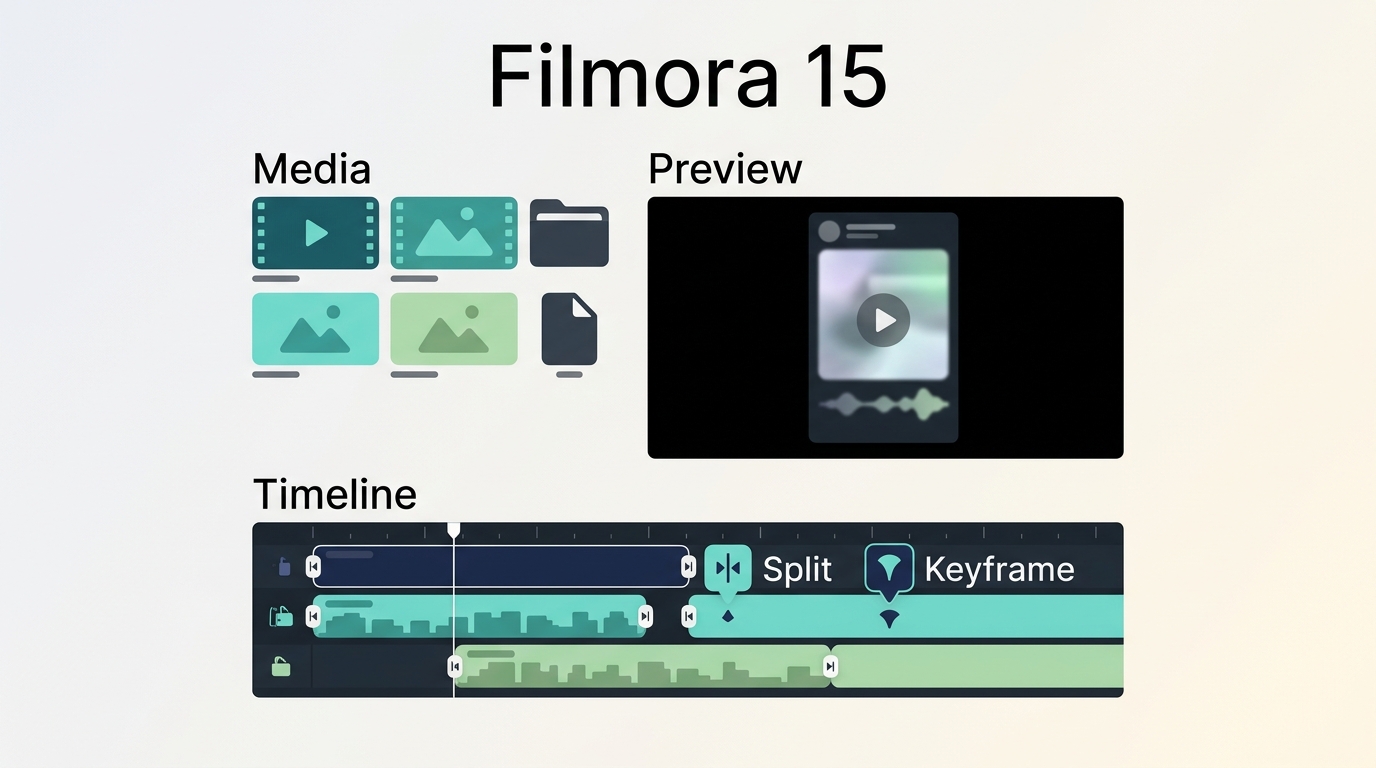
Before the enhancer, the timeline is what most buyers actually spend time in. Here's how Filmora 15 handles the core editor and its wider AI suite.
Core Editing Workflow
Filmora 15 keeps a familiar three-panel layout: media library, preview, and multi-track timeline. Trimming, ripple edits, and split cuts feel snappy on 1080p footage. Keyframes work on position, scale, rotation, and opacity for basic motion, and the masking tool covers rectangle, circle, and simple freeform shapes. Color controls include auto correction, basic curves, HSL sliders, and preset LUTs — enough for social-media polish but short of scopes or node-based grading.
Audio gets a dedicated mixer, a decent library of royalty-free tracks, and one-click background-noise removal. Titles and transitions draw from the 2.3M+ Creative Assets library, though most of the on-trend packs sit behind the paid Creative Assets subscription rather than the base editor plan.
Best for: short-form creators, YouTubers under 20-minute runtimes, and small businesses producing social ads.
Not ideal for: multi-cam interviews, professional color grading, or projects that need XML round-trips with a colorist.
AI Tools Beyond Video Enhancement
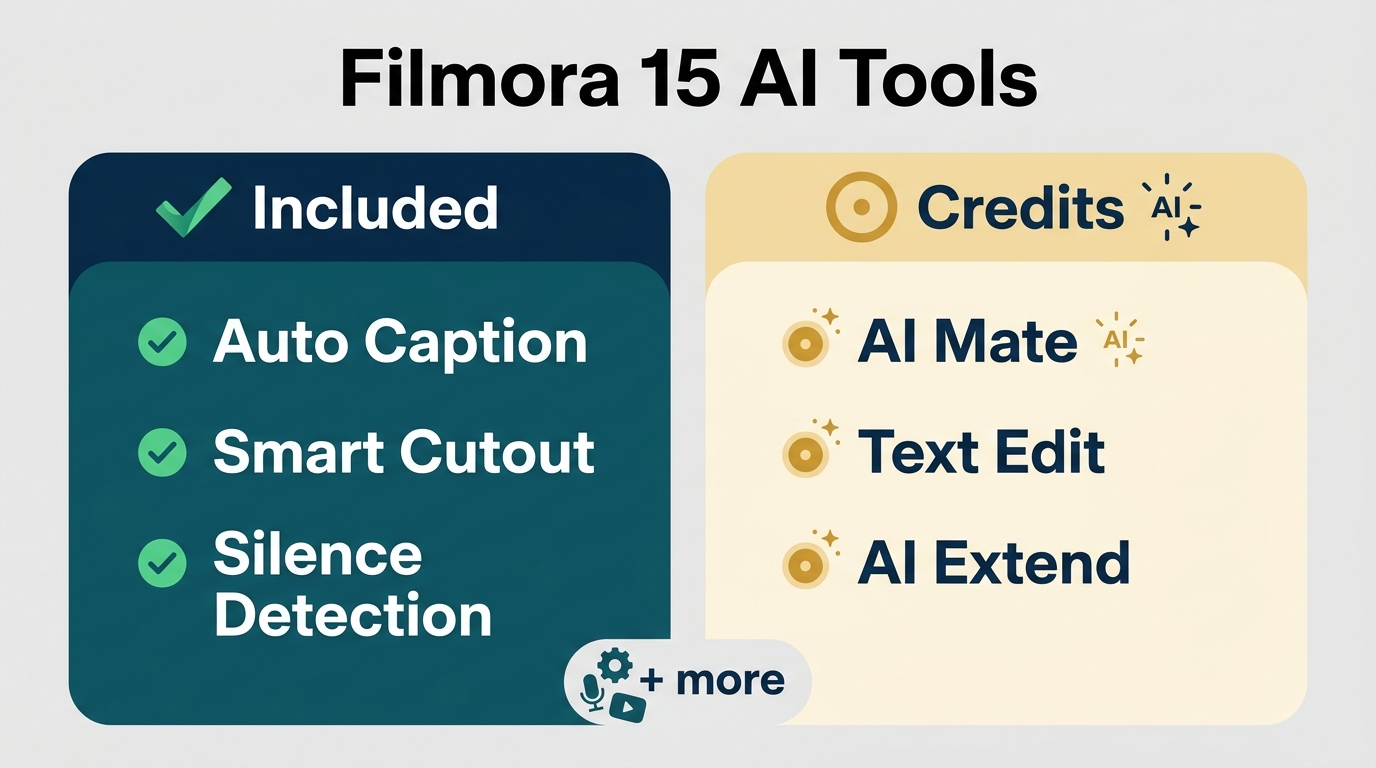
Filmora 15's AI menu has grown well past the Video Enhancer. Included in the standard editor (no extra credits on my build): auto-captioning, smart cutout, silence detection, and basic background removal. Credit-consuming or plan-dependent tools include AI Mate (chat-style editing prompts), text-based editing, smart short clips, AI Extend, and relighting.
The practical takeaway: the AI suite is broad, but the split between "included" and "burns credits" isn't obvious inside the app. Budget for extra credit packs if you plan to lean on the generative or transcription features regularly.
Key Features of Filmora Video Enhancer
While reading a Filmora review, you must understand the various dynamics of its attractive features, functions, and possibilities. Every feature of Filmora Video Enhancer adds a unique dimension to your video-enhancing experience.
- One-click enhancement presets: Filmora 15's AI enhancer offers preset modes that target blur, grain, noise, and discoloration without manual parameter tweaking. Options may vary by build, and results depend on the source clip.
- Add details and texture: While offering professional video enhancement support, Filmora AI video enhancer adds lost and fine details, builds texture, and enhances facial fine features and edges to generate sharpened video footage overall and let you achieve ultimate streaming satisfaction.
- Upscale Video Up to 4K: Wondershare Filmora Video Enhancer can upscale supported lower-resolution footage up to 4K, with the visible result depending on the source material, selected settings, and available hardware.
- Automatic Color Correction: To deliver vibrant, appealing, and well-balanced colored video footage, Filmora Video Enhancer analyzes every video footage automatically and corrects the colors, contrast, and brightness using ready-to-use filters within a few clicks.
- Multiple File Format Support without editing compulsion: To enhance video using Filmora Video Enhancer, you don't need any prior editing. Enjoy enhancement with huge file format support, including MKV, MP4, AVI, WebM, etc., to make the enhanced and upscaled video compatible with multiple platforms and devices.
- Broad user fit: Filmora serves online business owners, videographers, educators, YouTubers, and web designers. In my test build, the enhancer aimed to preserve source detail while adding sharpness, though outcomes on faces and low-light backgrounds varied case by case (see the performance section).
Filmora AI Video Enhancer: Performance Review
Since the enhancer is what most readers ask about, I ran hands-on tests on Filmora 15 (Windows 11, 16 GB RAM, RTX 3060). A 1080p 30 fps handheld clip, ~40 seconds, mixed indoor lighting. All screenshots below use the same fixed crop for a fair before/after comparison. This backs up the earlier point about billing complexity — the enhancer itself is where I'd expect Filmora's AI credits to actually earn their keep.
Filmora Video Enhancement Test Results
On low-resolution footage, results were mixed. The AI enhancement improved clarity in detailed areas, with fingerprints and palm lines becoming noticeably sharper. Backgrounds, however, stayed largely unchanged and the enhancement applied unevenly across frames. Skin tones came out slightly darker with a visible color shift. My take: the visible gain in fine detail is real, but the color shift and uneven coverage mean I'd think twice before spending AI credits on face-heavy footage — the credit cost only pays off when the source has enough detail to recover.
Filmora Video Denoise Performance Review
I tested Filmora's video denoise feature, which offers Weak, Normal, and Strong modes. On Strong, Filmora reduced visible noise and grain from low-light footage, but the denoising noticeably softened the image rather than preserving fine detail. Facial features lost definition and the warm color temperature shifted cooler. The tradeoff: real noise reduction, at the cost of image sharpness. Recent Reddit reports also flag post-update regressions on similar denoise workflows, so treat this as a version-specific signal, not a permanent verdict — always test on your own footage after a major update.
Enhancement Limitations:
- No batch processing for multiple files
- Limited to upscaling up to 4K resolution
- Processing speed is slow on older hardware
- AI credits are consumed for each enhancement operation
- No granular control over enhancement parameters
For users whose primary need is video enhancement rather than editing, a dedicated video quality video quality enhancer tends to preserve detail more consistently — but that's a purchase for one job, not a replacement for Filmora's timeline.
Filmora System Requirements and Export Limits
Before downloading Filmora, check that your system meets the minimum requirements, and note how import, editing, and final export differ across common video resolution targets such as MP4, 4K, and 8K — Filmora imports and edits 8K on capable hardware, but export options at 8K are more limited than at 4K. For a quick primer on what those video resolution tiers actually mean, this side reference helps.
| Specification | Windows | Mac |
| Operating System | Windows 10/11 (64-bit) | macOS 11 Big Sur or later |
| Processor | Intel i5 or later / AMD Ryzen 5 | Apple M1 or Intel i5 |
| RAM | 8 GB; 16 GB for 4K | 8 GB; 16 GB for 4K |
| GPU | Intel HD 5000+ / GTX 970+ | Intel HD 5000+ / Apple M1 |
| Storage | 10 GB free space | 10 GB free space |
| Internet | AI features and activation | AI features and activation |
Supported Formats: MP4, AVI, MOV, MKV, WMV, FLV, WebM, MPEG, 3GP, GIF, MP3, WAV, AAC, and 50+ additional formats.
Note: AI features such as Video Enhancer and some plan-dependent tools may consume AI credits and require an active internet connection for processing. For casual 1080p work, the minimum spec is usable; for smooth 4K editing and export, plan for 16 GB RAM and a dedicated GPU.
How Much Does Filmora Cost? Pricing Plans 2026
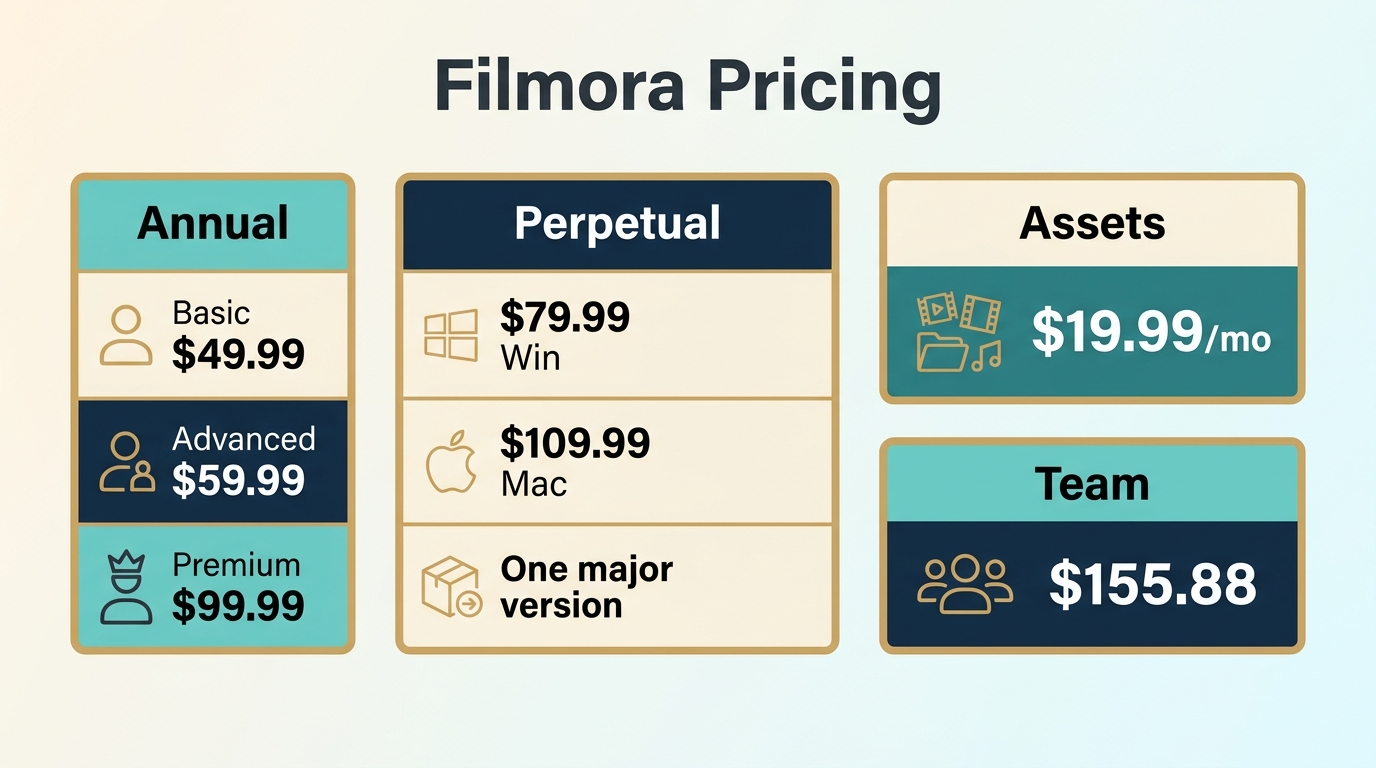
Filmora offers several pricing tiers to accommodate different user needs and budgets:
| Plan | Price (US) | Billing | Key Features |
| Basic Annual | $49.99/year | Yearly | 1 GB Cloud Storage, 4K Export, core editor |
| Advanced Annual | $59.99/year | Yearly | Extra AI credits, expanded effects access |
| Premium Annual | $99.99/year | Yearly | Full AI-credit allocation, priority features |
| Perpetual | $79.99 (Windows) / $109.99 (Mac) | One-time | Licenses one major version; excludes future major-version upgrades |
| Creative Assets | $19.99/month | Add-on | Full asset library after a 14-day trial |
| Team Plan | $155.88/user/year | Yearly | Centralized billing, team management |
Prices checked in August 2026.
What Free Use Includes
Filmora's unpaid mode lets you access editing features with two catches most buyers only discover after finishing an edit:
- Watermark: Every exported video carries a Filmora watermark
- AI Credits: Limited AI processing credits (around 10 video enhancements)
It's fine for kicking the tires. The pitfall — echoed repeatedly in community threads — is finishing a full edit and only seeing the watermark at export. Decide on a plan before you invest editing time, not after.
AI Credits, Assets, and License Limits
- Creative Assets: The full asset library requires the $19.99/month add-on after a 14-day trial — easy to confuse with a Filmora software trial at checkout
- AI Credits: Heavy use of AI Mate, text-based editing, or the enhancer may require additional credit packs; the in-app split between "included" and "credit-consuming" AI is not always obvious
- Auto-Renewal: On by default. Multiple community reports describe unexpected renewal charges and difficulty getting refunds outside the 30-day window on annual plans
- Perpetual Plan boundary: The one-time purchase licenses one specific major version. It does not include future major-version upgrades, and AI-credit needs persist regardless of license type
This is where Filmora's editor value gets muddled: strong timeline for the price, but the AI-credit and asset math can double what buyers thought they were paying.
Using Filmora AI Video Enhancer
Once you've picked a plan, using Filmora's enhancer to sharpen or upscale video from low-resolution sources takes only a few steps. Options may vary by build — the steps below match the Filmora 15 release used for this review.
{{STEP_GUIDE_1}}
Wondershare Filmora Review: User's Ratings & Experience
To understand Wondershare Filmora from a user’s perspective, it’s important to look at both the positive and negative feedback.
Trustpilot (filmora.wondershare.net profile): 1.6 / 5 as of August 2026; the US fallback did not expose a review count. A separate filmora.wondershare.com profile shows 4.2/5 across 15,617 reviews. These are two distinct profiles and shouldn't be blended into one Filmora rating. In my read, profile identity and the specific complaints under each one matter more than any single headline score.
What Users Praise
- Intuitive Interface: Consistently rated as one of the easiest video editors to learn
- Rich Effects Library: Users appreciate the variety of transitions, stickers, and templates
- AI Features: Auto-captioning and smart cut save real editing time on interview and vlog footage
- Approachable Pricing: Entry annual plan is friendly to beginners and small businesses
Common User Complaints
- Auto-Renewal Issues: The most frequent complaint on Trustpilot involves unexpected charges and difficulty canceling subscriptions
- Customer Support: Users report slow response times and unhelpful support interactions
- Performance with Large Files: Timeline lag and slow rendering with 4K footage on mid-range hardware
- AI Inconsistency: AI features like transcription and masking sometimes produce inaccurate results
- Export Limitations: Free version watermark frustrates users who want to test before buying
Filmora Pros, Cons, and Editor Alternatives
Zooming out to the full editor — not just the enhancer — here's how Filmora 15 stacks up, and how it compares to the editors readers actually cross-shop.
Well designed & intuitive interface
It provides multiple ready-to-use transition, overlays & effects
Various flexible & affordable subscription plans for versatile purposes
It is compatible with both Windows & Mac
Completely AI-automated tool without any manual intervention
Free version has a watermark & can process a very limited number of videos
There is no dedicated search option to locate transitions & effects
Motion tracking is not available
As compared to other tools, Filmora has limited features
| Editor | Best fit | Workflow | Platforms | Export and pricing |
| Filmora 15 | Beginners, social creators | Gentle, mid-depth, credit-based AI | Win, Mac, iOS, Android | Watermark unpaid; annual or perpetual |
| CapCut | Short-form, mobile-first | Very gentle, low–mid depth | Win, Mac, iOS, Android, Web | No free-tier watermark; Pro option |
| Canva | Marketers, brand teams | Gentle, template-first, low depth | Web, iOS, Android, Win, Mac | Some asset watermarks; Pro option |
| iMovie | Casual Apple users | Gentle, low–mid depth, minimal AI | Mac, iOS | No watermark; free |
| Adobe Premiere | Pro editors, agencies | Steep, deep editing and AI | Win, Mac | Subscription; trial access |
| DaVinci Resolve | Colorists, indie film | Steep, very deep, Studio AI | Win, Mac, Linux | Free tier; Studio one-time option |
My take: for readers coming from Premiere and wondering about scaling low-res timeline clips, there's a separate guide covering how to upscale video in Premiere Pro — worth a look before you switch tools solely for AI upscaling.
UniFab as a Filmora Enhancer Alternative
If your bottleneck is enhancement quality rather than editing, UniFab AI Video Enhancer is a dedicated option worth weighing. Judged on the same source clip and output settings I used for Filmora above, three things matter for readers of this review.
Verified UniFab Options and Fit
Local output supports up to 4K on capable hardware, while FabCloud handles output up to 4K without requiring a local GPU. The Kairo model targets anime footage specifically, which helps if your source is 2D animation rather than live action. And because processing runs locally on the desktop app, your source files don't leave your machine.
On the same low-light denoise test where Filmora softened facial detail, UniFab preserved more Edge information at similar output resolutions in my run.
Best for: dedicated enhancement and batch upscaling workflows.
Not ideal for: replacing Filmora's full timeline editor — UniFab isn't a general-purpose NLE. Budget-conscious readers can also compare against a free AI video upscaler before committing.
Using UniFab Video Upscaler
30-day Free Trial with full feature access! No watermark!
- Step 1
Launch and open the UniFab program on your Windows or Mac > Go to the "All Features" section and select the module that fits your needs > Select the “+” (Add Video) to upload your video for enhancement.
Pro Tip: Use the Autopilot Module for automated enhancement detection and optimized AI workflows, perfect for multitasking.
- Step 2
Customize the output profile parameters, such as resolution, codec, format, etc., and enhance the video quality to Standard or High.
- Step 3
Once you are sure about the output profile, select the “Start” option to finish the video enhancement process of the uploaded video.
Filmora Verdict: Who Should Buy It?
- For beginners, YouTubers, and short-form creators: Yes, with eyes open on billing. Filmora 15's timeline is genuinely one of the easiest to learn, and the Basic annual plan is competitive for social-video output. Just decide up front whether you'll rely on credit-consuming AI tools — that's where the sticker price and the real cost diverge.
- For small businesses producing steady social content: Yes, if the Creative Assets library matches your brand needs. Add the $19.99/month asset subscription to your true monthly cost when comparing tools.
- For dedicated video enhancement: Not really. The Filmora AI Video Enhancer helps in detailed areas but softens faces and shifts colors on the source clip I tested. A purpose-built upscaler will keep more detail on the same footage.
- For professional editors: No. Advanced color grading, multi-cam interviews, and cinema-quality mastering still belong to Adobe Premiere or DaVinci Resolve.
Bottom line: Filmora 15 is a capable editor held back by its own billing complexity — the timeline earns its keep, but AI credits, Creative Assets, and the perpetual-version boundary need to be sized honestly before purchase.
Wondershare Filmora FAQ
Who owns Filmora, and is it safe to install?
Filmora is made by Wondershare, a publicly listed software company. Downloading the installer from the official Wondershare site is the safe path — third-party mirrors and any "cracked" builds are the real risk vector, since they routinely bundle unwanted software. Company ownership and software safety are separate questions: Wondershare is a real business, but that doesn't guarantee any specific build is bug-free on your machine, which is why I always test on a spare project first.
Why do Filmora reviews vary so much across websites?
Editorial reviews, user-review profiles, version numbers, and billing experiences all measure different things. Trustpilot itself has two distinct Filmora profiles — filmora.wondershare.net and filmora.wondershare.com — and they should not be blended into one brand-wide score. Treat any single headline number with skepticism and read the underlying complaint themes (billing, AI results, support) instead.
What should I check before buying Filmora's perpetual license?
Three things: whether the AI features you actually need are credit-consuming (perpetual license doesn't refill credits), whether you'll want the Creative Assets library (separate $19.99/month add-on), and how you feel about staying on the version you bought — the perpetual plan licenses one specific major version and doesn't include future major-version upgrades.
Can Filmora's AI features change after a software update?
Yes, and it's worth treating as a version-specific risk. Recent Reddit threads report that certain low-light or night-mode enhancer options changed or disappeared after major updates. When you evaluate any hands-on review (including this one), note the tested build and processing mode rather than assuming the current release behaves identically.