![How to Remove Vocals From a Song: 5 Practical Methods [2026]](https://artifact.dvdfab.me/2026/07/21/WXXY9JmXcwbRAlLBLTpSphLzkf3TR1TY/feature_cover.jpg)
To remove vocals from song files, choose a method around four things: your device, privacy needs, editing control, and final output. AI separation is usually the most direct route, while a DAW or phase-based workflow makes more sense when you need manual control or cannot use an online service.
The key point is that no method cleans every mix perfectly. Dense harmonies, reverb, clipping, and instruments that share the vocal range can leave vocal removal artifacts, so the practical workflow is to separate, preview, compare, and export the fullest usable instrumental.
Why Remove Vocals From a Song?
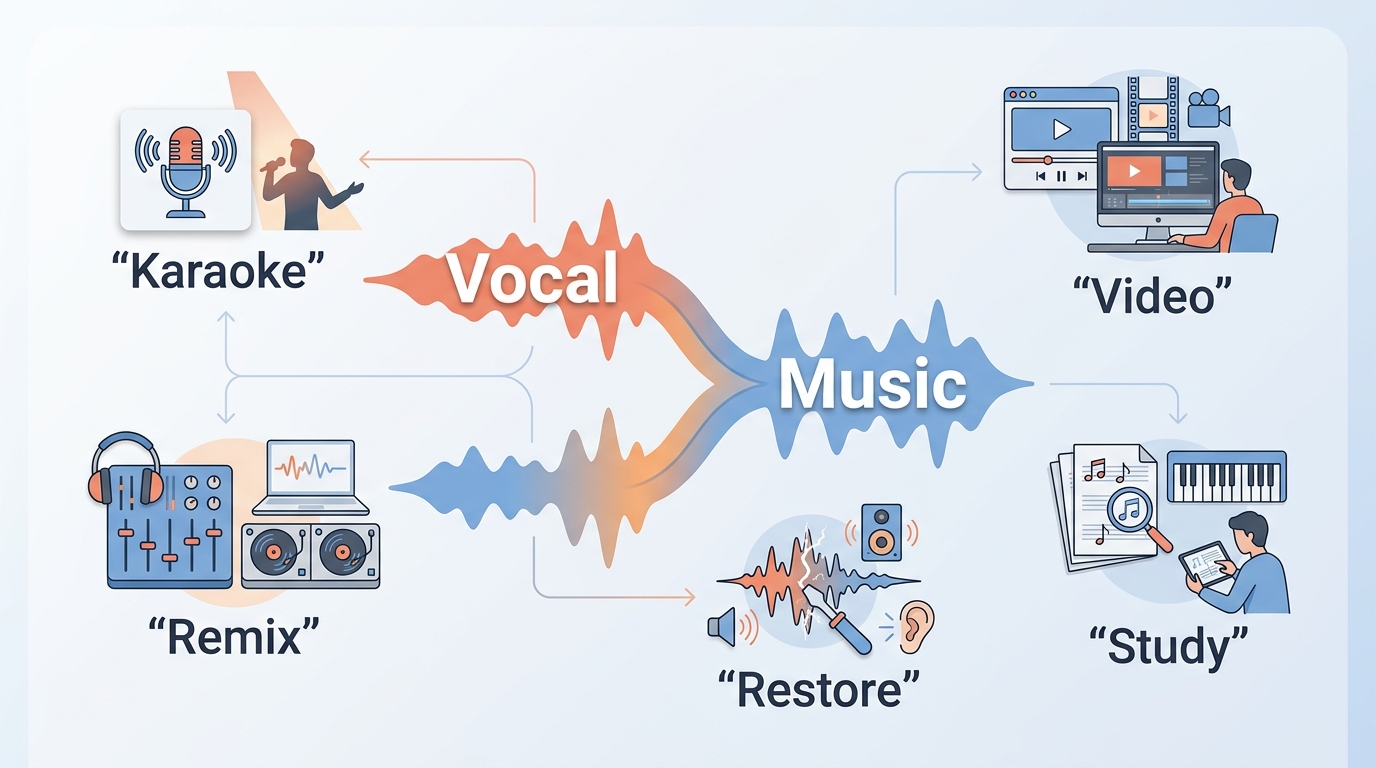
People remove singing from song recordings to create a backing track, study an arrangement, rebalance music under dialogue, or prepare audio for an authorized remix or video project.
- Karaoke and rehearsal: Save an instrumental that leaves room for a new performance.
- Production and editing: Extract instrumental from song audio for a remix, sample, or revised mix.
- Video work: Reduce a lead vocal so narration or replacement vocals sit more clearly.
- Music study: Hear chord movement, percussion, bass, and arrangement details with less vocal masking.
- Restoration: Separate elements from a noisy or live recording before making careful repairs.
My editorial rule is simple: define the intended use before choosing the tool. A practice track can tolerate light vocal residue, while a public release or client project needs closer quality checks and the appropriate rights.
Quick Comparison of Vocal Removal Methods
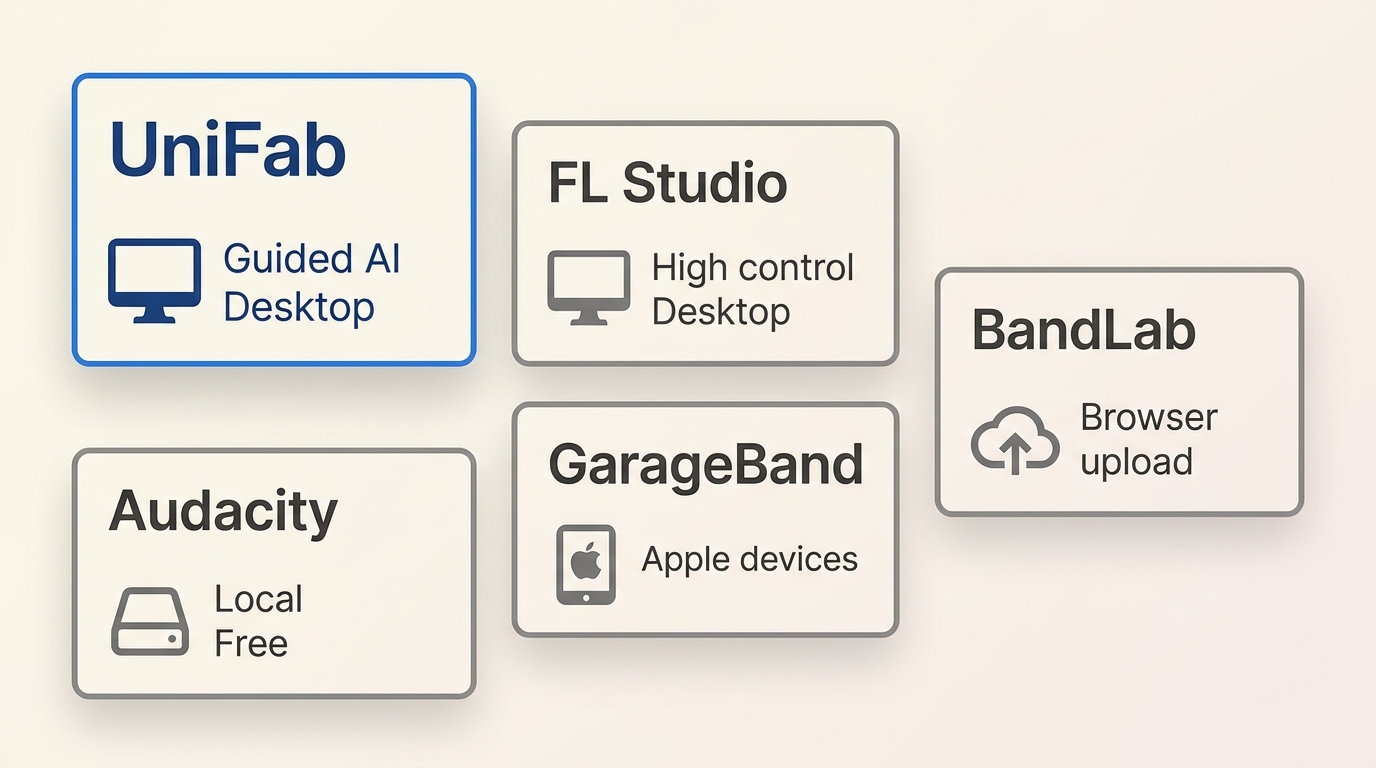
These vocal removal methods solve different problems. Pick an offline vocal remover for local control, a browser service for convenience, or a DAW when detailed editing matters more than a guided workflow.
Before uploading audio to any online service, follow its terms and process only material you own or are authorized to use. Permission for publication, distribution, monetization, or commercial use remains the user's responsibility.
| Method | Method type | Supported device | Online or desktop workflow | Verified processing location | Stem options | Video input | Export formats | Editing control | Learning curve | Best fit | Main limitation | Current price status |
| UniFab Vocal Remover AI | Guided AI separation | Windows and macOS | Desktop app | Not stated in the supplied product specifications | Vocal and instrumental preview workflow | Use supported files shown in the current app | Use available export choices shown in the app | Focused controls | Low | Readers who want a short import, preview, and export path | Less granular than a full DAW; difficult mixes can retain bleed | $0 listed for Vocal Remover AI |
| FL Studio | DAW with separation plugins or center reduction | Windows and macOS | Desktop software | Local DAW project; plugin behavior varies | Depends on the selected plugin | Audio-first workflow | WAV or MP3 from the DAW export path | High | High | Editors who want automation and detailed mixing control | Results and workflow depend on the plugin or cancellation method | Paid software with multiple editions |
| GarageBand | EQ and phase-based vocal reduction | Mac, iPhone, and iPad | Apple app | Local project | No dedicated AI stem workflow | Audio-first workflow | Project export options | Moderate | Moderate | Apple users making a quick experiment | Center reduction can thin drums, bass, and other centered parts | Included on supported Apple devices |
| BandLab Splitter | Online stem splitting | Modern browser or supported app | Online service | Uploaded service workflow | Choices depend on the live service | Audio-focused upload workflow | Download choices depend on the live service | Low to moderate | Low | Readers who value browser convenience | Requires uploading audio and follows service limits | Current service terms apply |
| Audacity OpenVINO | AI music separation plus legacy center reduction | Supported Windows and Linux systems; legacy fallback elsewhere | Desktop software | Local processing | 2-stem or 4-stem with OpenVINO | Audio-first workflow | WAV, FLAC, or MP3 | Moderate | Moderate | Readers who want a free local workflow | OpenVINO support is platform-specific; legacy reduction is less reliable | Free, open-source software |
Platform and price details reflect July 2026.
The practical choice is straightforward: use UniFab for a guided desktop route, FL Studio for detailed control, GarageBand for limited reduction on Apple devices, BandLab for browser access, or Audacity when confirmed local processing is the priority.
Method 1: UniFab AI Vocal Removal
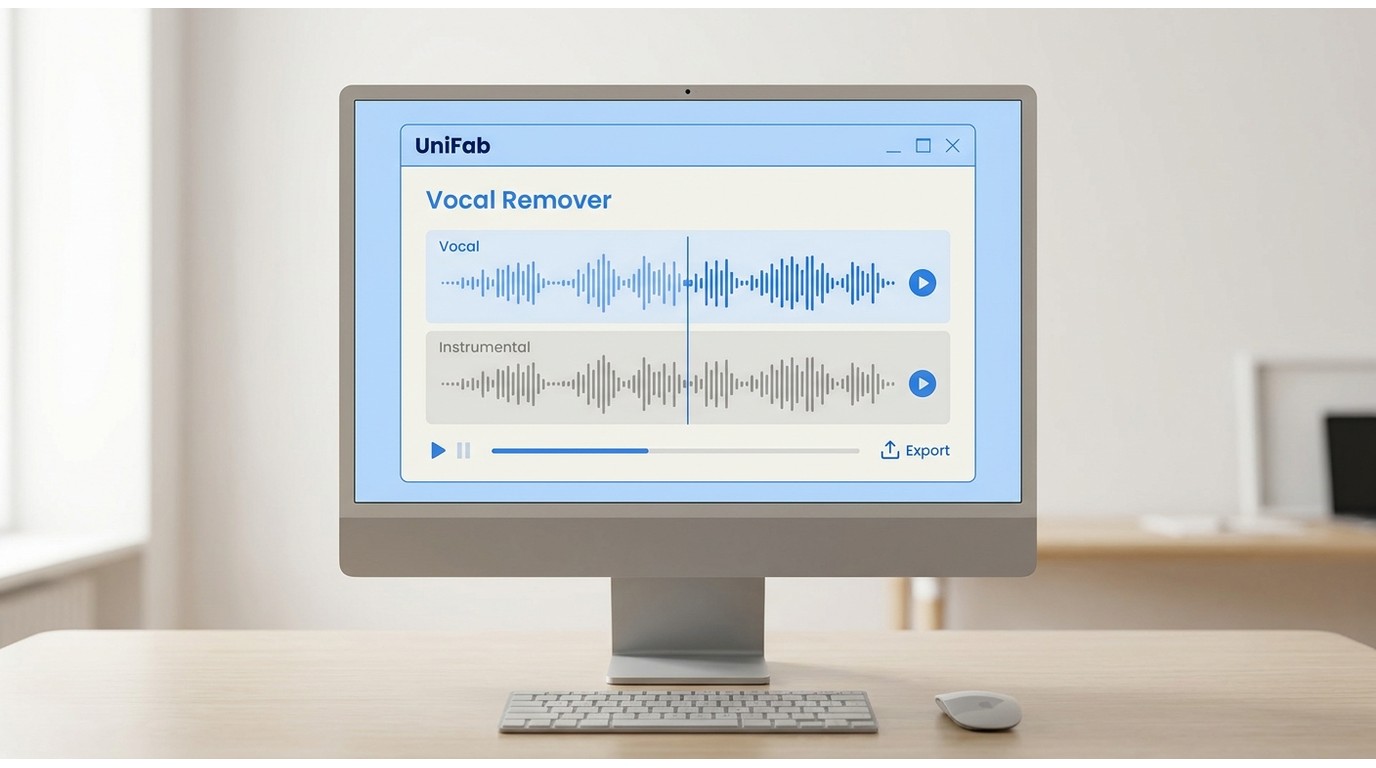
UniFab Vocal Remover AI provides an AI vocal removal workflow for readers who want to remove voice from song files without building a full DAW chain.
Remove Vocals With UniFab
100% free, fully featured, and watermark-free.
Install and launch the UniFab > Click 'All Features', and select 'Vocal Remover' from “Audio AI” > click the “+” Symbol to upload your file.
Click the dropdown menu next to "Extract Track" to choose whether to extract vocals, background music, or both. You can also select the output format or trim the footage as needed.
Click the “Start” option to remove vocals instantly and automatically.
For a reproducible workflow check on a Dell XPS 15 running Windows 11 24H2, import one clean stereo file, run separation, and confirm that the preview controls let you compare the vocal and instrumental outputs before export. This checks the task path without turning one song into a universal quality claim.
Where UniFab Fits Best
UniFab fits readers who prefer a guided import, separate, preview, and export sequence over manual routing. Its focused interface is the advantage here, not a promise that one model will suit every recording.
- Suitable for: A quick desktop workflow, straightforward previews, and users who do not need a large mixer or plugin chain.
- Less suitable for: Editors who want detailed automation, extensive plugin routing, or surgical control over each frequency region.
- Honest limits: It offers less manual control than a DAW, and layered vocals, reverb, or frequency overlap can still leave residue in the instrumental.
I would choose the guided route when the task is to get a usable practice or editing stem efficiently. If the chorus needs section-by-section repair, FL Studio or another DAW offers more room to intervene.
Method 2: FL Studio for Editing Control
FL Studio is a control-oriented route. It can host a separation plugin or use center-channel techniques, but the result depends on the selected method and the way the song was mixed.
Remove Vocals With FL Studio
- Import a copy of the source audio into the Playlist and route it to a Mixer track.
- Choose either a current stem-separation plugin or a center-reduction setup. Treat them as different workflows, not interchangeable quality settings.
- Preview the verse and chorus before committing. Center cancellation may reduce the lead vocal, but it can also weaken centered kick, snare, bass, or lead instruments.
- Use automation only where a section needs a different balance, then export the instrumental as WAV for more editing or MP3 for a smaller reference file.
FL Studio Tips and Tradeoffs
The useful part of FL Studio is not a one-click claim; it is the ability to adjust sections, blend outputs, and repair specific problems after separation.
- Keep the untouched source on a separate track for quick A/B comparison.
- Lower a processed track against the original instead of forcing maximum vocal reduction.
- Check centered instruments whenever you use phase or stereo cancellation.
- Automate a setting only when the verse, chorus, or bridge clearly needs different treatment.
On a Lenovo ThinkPad P1 running Windows 11 24H2, a repeatable DAW check is to loop one chorus while toggling the processed track against the source; if the vocal drops but the kick and bass collapse too, reduce the cancellation intensity. This is a fit check, not a speed benchmark.
Suitable for: Experienced editors who want automation and repair options. Skip it if: You want an immediate result without learning routing, plugins, or mix decisions.
Method 3: GarageBand Vocal Reduction
GarageBand vocal removal is better described as vocal reduction. EQ and phase techniques may lower a centered lead vocal, but they do not provide the same dedicated stem separation as an AI tool.
Reduce Vocals With GarageBand
- Import the song into a new project and duplicate the track so the original remains available for comparison.
- Open Smart Controls and make small EQ reductions in the vocal-heavy region rather than carving a wide, deep hole at once.
- If the source is stereo and the vocal is strongly centered, try a phase-based setup with a compatible Audio Unit. Listen for damage to centered instruments.
- Balance the processed result against the original, then export a reference version for the three-part preview test below.
GarageBand Limitations
GarageBand can be useful for a quick Apple-device experiment, but dense mixes and off-center vocals expose the limits of EQ and phase cancellation.
- It may reduce bass, kick, snare, or lead instruments along with the vocal.
- Reverb and doubled vocals can remain audible at the sides of the mix.
- A strong EQ cut can make the instrumental hollow even when the singing is quieter.
For a reproducible check on a MacBook Air with Apple silicon running macOS Sequoia, compare a quiet verse and a dense chorus after each small EQ move; the observable goal is less vocal masking without a sudden loss of center weight. Suitable for: Quick experiments. Skip it if: You need clean production stems.
Method 4: BandLab Online Stem Splitting
The BandLab remove vocals route is the browser-based option in this guide. It reduces setup, but it requires uploading audio and working within the service's current account, format, and usage limits.
Split Vocals With BandLab
- Open BandLab Splitter in a supported browser or app.
- Review the current service terms, privacy information, and upload limits before selecting a file.
- Upload only audio you own or have permission to process.
- Choose from the stem options currently displayed by the service and start the split.
- Preview the instrumental, then use the download option currently provided for that output.
BandLab Strengths and Limits
BandLab is convenient when installing desktop software is not practical. The tradeoff is that the file leaves your computer, and service behavior can change independently of your project.
- Suitable for: A quick browser workflow on a non-sensitive track.
- Less suitable for: Unreleased, client, confidential, or rights-sensitive audio that should remain local.
- Main limit: Account rules, upload limits, stem choices, and download behavior belong to the live service rather than your local editor.
I would use this option for convenience, not as the default for private material. A vocal remover app is helpful only when its file-handling model matches the project.
Method 5: Audacity AI Separation
Audacity vocal separation is the clearest confirmed local option here. On supported Windows and Linux systems, the OpenVINO workflow offers AI music separation without uploading the song to a web service.
Use OpenVINO Music Separation
- Install a current Audacity build and the official OpenVINO AI effects package on a supported Windows or Linux system.
- Import the song, select the audio, and open the OpenVINO Music Separation effect.
- Choose 2-stem mode for vocals and instrumental, or 4-stem mode when you also need separate bass, drums, and other parts.
- Run the effect, mute and solo the generated tracks, and compare a verse, chorus, and reverb tail.
- Export the selected instrumental as WAV, FLAC, or MP3 according to the next section.
On an Ubuntu 24.04 workstation, a reproducible OpenVINO check is to choose 2-stem separation and confirm that Audacity adds separate vocal and instrumental tracks to the project. Then listen for bleed at the end of a sustained vocal phrase rather than judging the result from the first few seconds.
Legacy Fallback for Other Platforms
On Mac or an unsupported system, Audacity's legacy Vocal Reduction and Isolation effect remains a fallback. It relies heavily on center placement, so it is less dependable when vocals are panned, doubled, or surrounded by stereo reverb.
Suitable for: Readers who want a free local workflow and are comfortable installing the supported AI effect. Skip it if: Your system does not support OpenVINO and center reduction damages too much of the mix.
Understanding AI Vocal Separation
AI vocal removal uses source separation: a model estimates which parts of a mixed signal belong to vocals and which belong to the accompaniment. It can also produce the reverse output, an isolated vocal, but this page stays focused on instrumental creation.
For a dedicated reverse workflow, use the site's guide to isolating vocals from a song. Readers comparing a wider set of products can use the vocal remover comparison rather than turning this tutorial into a product ranking.
Source Quality Changes the Result
The source file matters because separation cannot restore detail that clipping or repeated compression has already discarded.
- WAV or FLAC: Prefer these when you will continue editing or process the output more than once.
- High-bitrate MP3: Often workable for practice and reference tracks, but existing compression may become more obvious after separation.
- Clipped audio: Distortion can be assigned to both stems and remain audible after the vocal is reduced.
- Dense harmonies and reverb: Vocal energy spreads across the stereo field and overlaps instruments, making a clean boundary harder to estimate.
- Repeated re-encoding: Each lossy export can add artifacts that the separator may mistake for musical detail.
The cleanest-looking waveform is not necessarily the fullest-sounding instrumental. I would keep a little vocal residue before accepting a version that strips the body from drums, bass, or guitars.
Export Instrumentals and Rebuild MP4 Video
Removing vocals usually creates an audio stem, not a finished video. To remove vocals from MP4 footage, separate the authorized soundtrack, save instrumental track audio, then add it back to the video project and export a new MP4.
Choose WAV, FLAC, or MP3
- WAV: Choose it for editing, mixing, and broad compatibility when file size is not the main concern.
- FLAC: Choose it for lossless storage with smaller files, provided the next editor supports it.
- MP3: Choose it for convenient previews or sharing when another editing pass is unlikely.
Export once from the chosen stem when possible. Repeated MP3 exports can exaggerate watery textures and high-frequency smearing.
Add the Instrumental Back to Video
- Open the authorized video in a video editor and detach or mute its original soundtrack.
- Import the instrumental stem and align it with the first clear beat or waveform transient.
- Check sync near the beginning, middle, and end; correct drift before adding titles or lyrics.
- Mix any dialogue or replacement vocals, then export the completed project as MP4 using settings appropriate for the destination.
This is a reassembly workflow, not a method for obtaining videos from a platform. Use media you own or have permission to edit.
Check Quality and Fix Vocal Artifacts
A usable instrumental is the version that preserves the music while reducing the singing enough for its purpose. Compare outputs by ear instead of selecting the most aggressive setting automatically.
Run a Three-Part Preview Test
- Busy chorus: Listen for lead-vocal bleed, damaged cymbals, and missing center weight.
- Quiet verse: Check whether breaths, consonants, and low-level vocal phrases remain exposed.
- Reverb tail: Listen after a phrase ends; lingering reverb often reveals separation limits more clearly than the main vocal line.
Use the same three timestamps when comparing methods or model settings. That makes the decision repeatable and helps prevent a strong first impression from hiding a weak chorus.
Match Symptoms to Practical Fixes
| Symptom | Likely cause | Practical fix |
| Lead vocal still audible | Dense harmony, effects, or frequency overlap | Compare another separation mode or model; accept light residue if a stronger setting damages the music |
| Watery or metallic texture | Lossy source, reverb, or aggressive separation | Start from a better source and reduce processing strength |
| Hollow mids | EQ or center cancellation removed shared musical content | Blend a little of the original back in or narrow the cut |
| Thin bass or drums | Centered instruments were reduced with the vocal | Use AI separation instead of phase cancellation, or restore low-frequency content from the source |
| Reverb residue | Vocal effects extend into stereo ambience | Compare models and choose the fuller result; avoid chasing complete silence at the cost of the arrangement |
If the goal is to remove singing from song audio for karaoke, judge the result under the new performance, not in solo. A trace of residue may be inaudible once the replacement vocal is present.
Frequently Asked Questions
Can vocals be removed completely from every song?
No. Layered harmonies, stereo reverb, clipping, and overlap between voices and instruments can leave residue or damage the accompaniment. Compare a busy chorus, quiet verse, and reverb tail, then choose the version that serves the intended use.
Can I remove vocals from an MP4 or YouTube video?
Yes, if you own the media or have permission to edit it. Some tools may accept video, while other workflows extract the authorized audio, separate it, and place the instrumental back into a video editor. This guide does not cover downloading media from a platform.
Which free method can keep my audio on my computer?
Audacity with OpenVINO is a free local option on supported Windows and Linux systems. Its 2-stem mode creates vocal and instrumental tracks, while 4-stem mode adds bass, drums, and other parts. Unsupported systems can use the less reliable legacy center-reduction effect.
Can I use the instrumental for covers or karaoke videos?
Private practice and public use are different. Uploading, distributing, monetizing, or using an instrumental commercially may require permission or a license from relevant rights holders, even when you created the stem yourself.