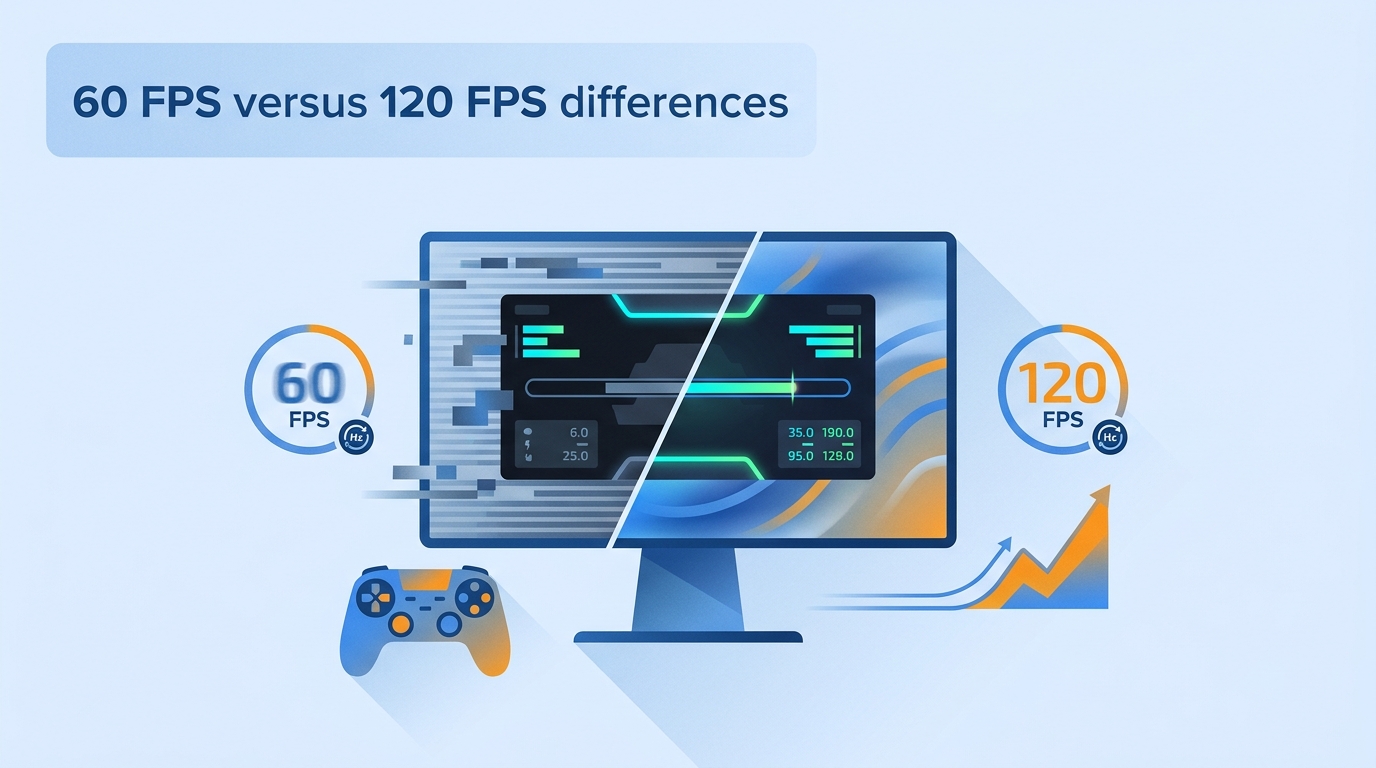
What 120 FPS Means
Quick answer: 60fps vs 120fps should be chosen or configured by matching the source, viewing device or platform, quality target, privacy needs, and export limits. Test a representative clip, compare the result at full size, and avoid settings that add artifacts or unnecessary recompression. The latest GSC comparison shows that the optimization priority is visibility remained comparatively stable, but fewer impressions converted to clicks, consistent with stronger serp features or less competitive snippets.
Here's the short answer: 120 FPS can feel noticeably smoother and more responsive than 60 FPS, but the upgrade is only worth it when your display, hardware, content type, and image-quality trade-offs actually line up. If you're weighing a new monitor, a console performance mode, or converting older footage, the deciding factor isn't the number itself — it's whether the rest of your setup can deliver those extra frames. For 60fps vs 120fps, verify this point on the actual source before processing the complete file.
"120 FPS" stands for 120 frames per second: the number of distinct images produced every second. It's a core part of how smooth, sharp, and responsive a video, game, or stream feels. For 60fps vs 120fps, verify this point on the actual source before processing the complete file.
When frame rate rises, more images are shown each second, which can make motion appear more fluid. At 120 FPS a new frame is produced roughly every 8.3 milliseconds, compared to every 16.7 milliseconds at 60 FPS. From my perspective as an editor who has compared plenty of source footage side by side, that halved frame time is the mechanical basis for the smoother feel — but frame time is not the same thing as total end-to-end input latency, which also includes the display, the input device, and the render pipeline. A shorter frame time helps; it doesn't guarantee a snappier system on its own. For 60fps vs 120fps, verify this point on the actual source before processing the complete file.
It's also worth distinguishing FPS (how many frames the source/game produces) from refresh rate (how many times per second your display can redraw, measured in Hz). A 60Hz panel will only ever show 60 of those 120 frames per second — to actually see 120 FPS, you need a 120Hz (or higher) monitor or TV. For 60fps vs 120fps, verify this point on the actual source before processing the complete file.
Where 120 FPS Makes a Difference
- Smoother motion in fast content: Movement can look more fluid at 120 FPS, and the gain is most visible in fast-moving scenes such as racing, sports, action gameplay, and quick camera pans. In slow, dialogue-driven footage the improvement is much smaller.
- Comfort for some viewers: Some people find high-refresh motion more comfortable to watch, but visual comfort varies and cannot be attributed to frame rate alone.
- Responsiveness in fast games: A shorter frame time can shrink the gap between input and rendered response, which competitive players tend to notice most. It helps only when the rest of the chain — display, input device, and stable performance — keeps up.
- Cleaner motion edges: Higher frame rates tend to produce sharper individual frames during motion, which can reduce the smeared trails visible on 60 FPS displays during quick pans.
My take: 120 FPS earns its keep in competitive shooters, racing and fighting games, VR, and fast sports footage. For story-driven games and most cinematic video, the payoff is much smaller. For 60fps vs 120fps, verify this point on the actual source before processing the complete file.
Professional Smoother AI
- AI frame interpolation for smoother playback
- 30-day Free Trial without watermark
UniFab Smoother AI
Professional Smoother AI
- AI frame interpolation for smoother playback
- 30-day Free Trial without watermark
UniFab Smoother AI for Mac
60 FPS vs 120 FPS Compared
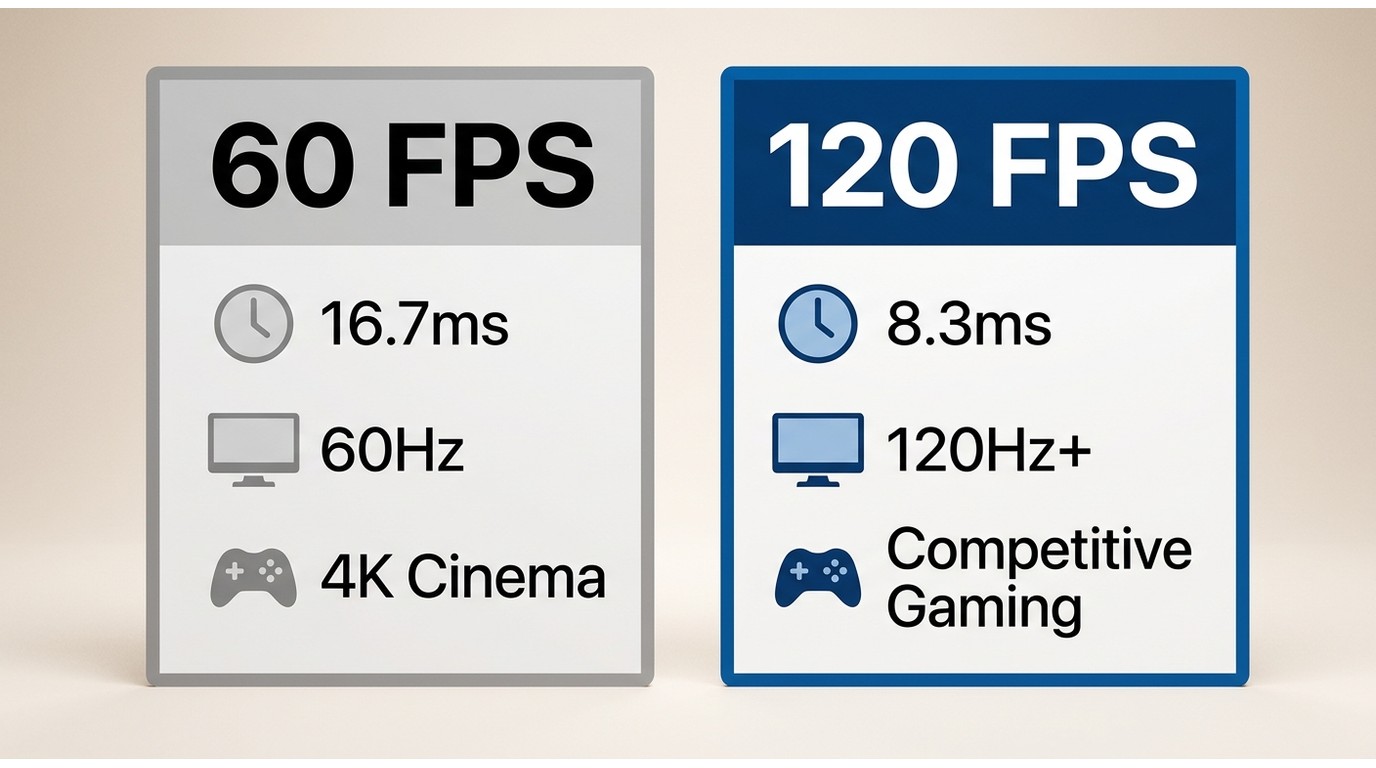
60 FPS has been the working standard for streaming, console gaming, and most consumer video for years. Moving to 120 FPS can add noticeable fluidity, but only on a high-refresh display and only when the rest of the setup — GPU, cable, content — can sustain it. The trade-offs matter more than the raw number, so the table below covers the dimensions that actually shape the decision. For 60fps vs 120fps, verify this point on the actual source before processing the complete file.
| Dimension | 60 FPS | 120 FPS |
| Frame time | 16.7 ms per frame | 8.3 ms per frame |
| Perceived motion | Smooth for most content | Smoother in fast scenes; subtle in slow ones |
| Display required | 60Hz or higher | 120Hz or higher (144/240Hz also) |
| Resolution / graphics trade-off | Easier to sustain 4K, ray tracing, or higher settings | Often means lowering resolution, ray tracing, or effects to keep frames stable |
| Hardware load | Standard | Higher — varies by codec, settings, and content |
| Battery use on mobile | Normal | Higher; noticeable on phones and handhelds |
| File size (same codec) | Baseline | Larger; exact ratio depends on codec and scene |
| Best fit | Cinematic content, story-driven games, mobile playback, high-fidelity 4K | Competitive shooters, racing/fighting games, VR, fast sports footage |
| Not ideal for | Fast competitive play on a 120Hz+ setup | Slow narrative content, tight power budgets, weaker hardware |
The editorial verdict I keep coming back to: pick 120 FPS when responsiveness and fast motion matter and performance stays stable; stick with 60 FPS when resolution, ray tracing, battery life, or a cinematic look matters more. On a 60Hz display you'll see no benefit from the extra frames — the panel physically can't show them.
Can You See 120 FPS?
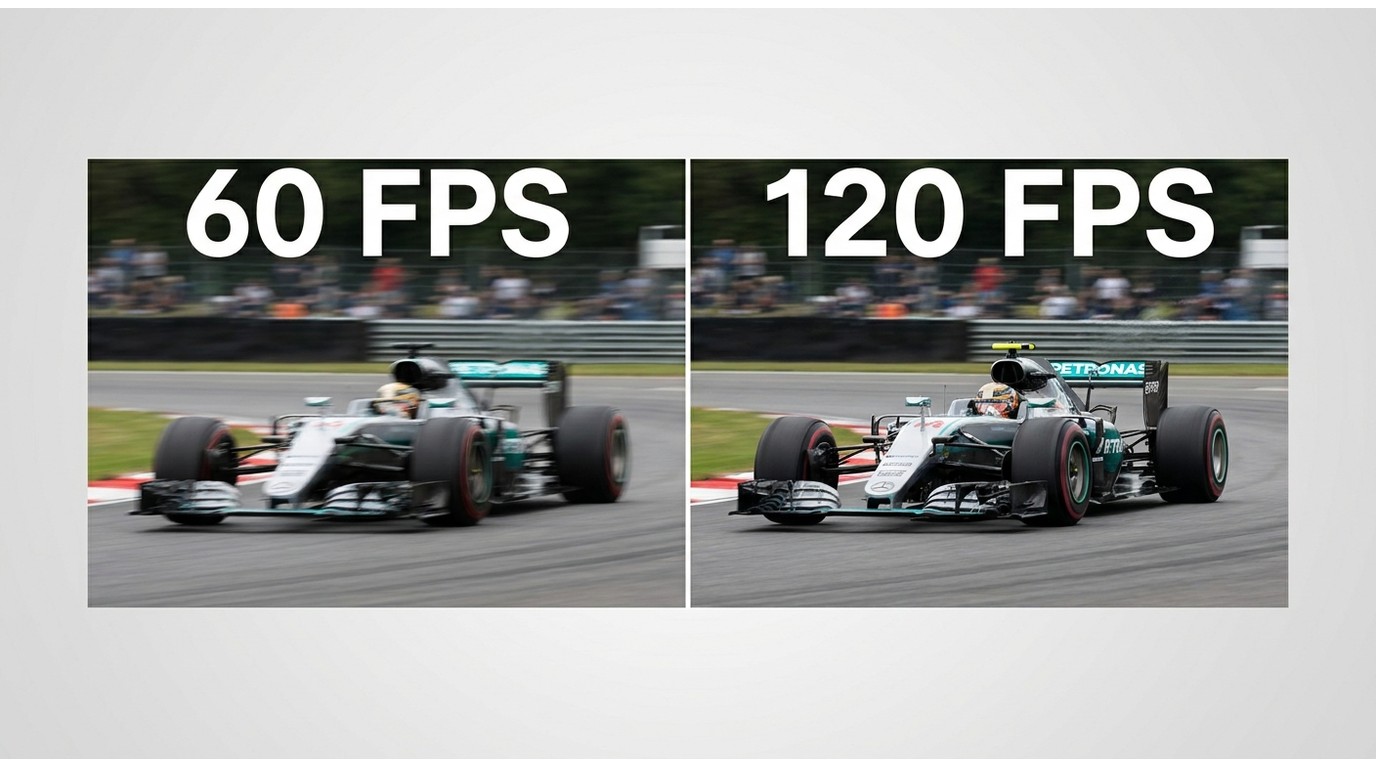
The "eye can't see past 60 FPS" line is a myth, but the opposite claim — that everyone instantly notices 120 FPS — is also overstated. In practice, many viewers see a clear boost in fast content: quick camera pans, first-person motion in FPS games and VR, dashcam footage, high-contrast moving edges in sports and racing. Others find the difference subtle, especially in slow cinematic scenes, and some even prefer the more familiar 60 FPS cadence for narrative content.
If you want to judge for yourself, run a controlled same-scene test on a 120Hz display with a browser or player that isn't capping frames, then compare the same clip at 60 and 120 FPS. Without a 120Hz-capable panel and matching settings, any test is comparing two 60 FPS outputs and won't tell you anything useful. Past roughly 144 FPS in everyday content, the perceived gain gets much smaller for most viewers.
What 120 FPS Hardware Requires
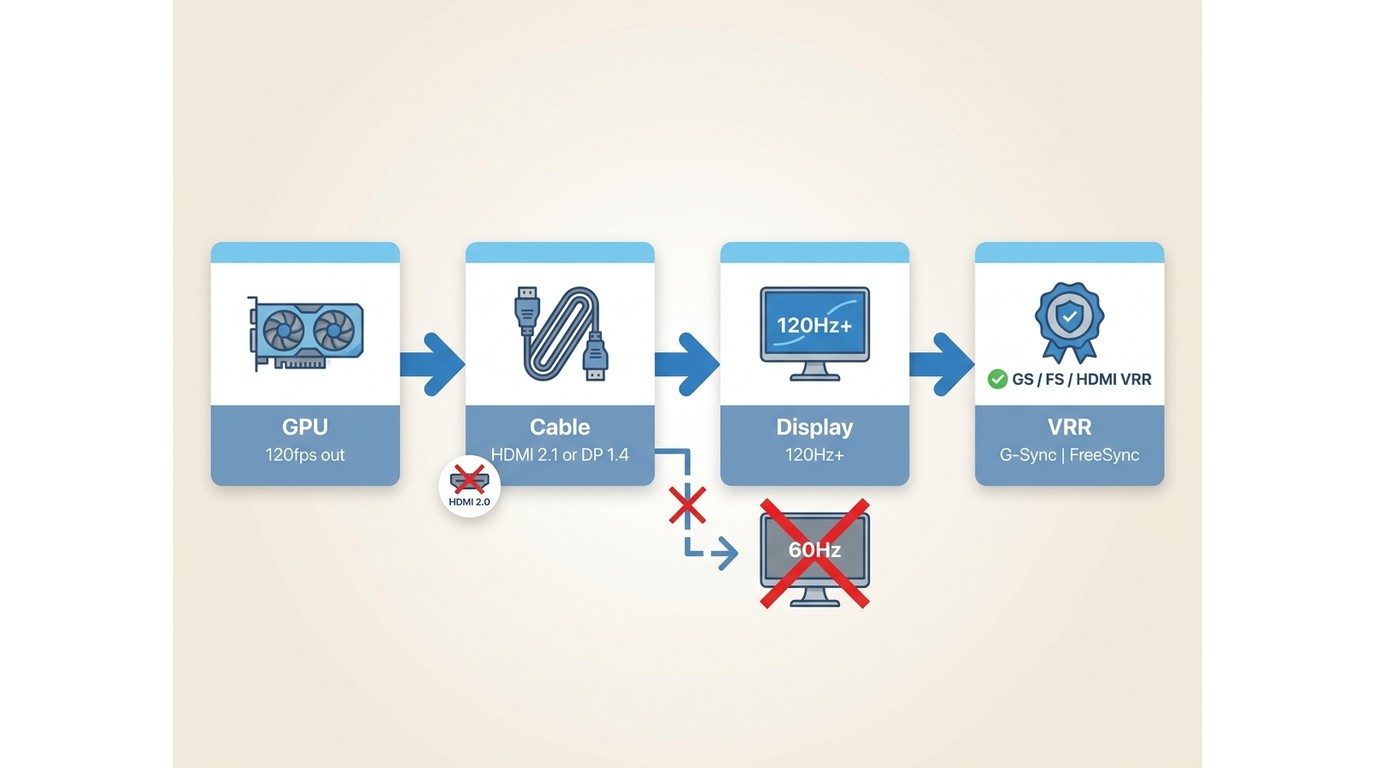
This is where most people get tripped up: producing 120 FPS, displaying 120 FPS, and sending 120 FPS through a cable are three different problems, and a 120Hz screen alone won't guarantee a stable 120 FPS experience.
Display (you can't skip this one). You need a monitor or TV with a refresh rate of 120Hz or higher. Most modern OLED TVs, gaming laptops, and recent iPhone/iPad Pro and Galaxy S devices support 120Hz. A 60Hz panel will cap whatever you feed it.
GPU and settings. Sustaining 120 FPS depends on target resolution, graphics settings, the specific game or video workload, and whether upscaling or frame-generation features are enabled. A card that easily hits 120 FPS at 1080p may struggle at native 4K with ray tracing on. Rather than aim for a single GPU tier, look at benchmarks for your actual resolution, settings, and titles — and be ready to trade resolution or effects for stability if the frame rate dips.
Cables and ports. For 4K @ 120 FPS, you need HDMI 2.1 or DisplayPort 1.4 (with DSC) or DisplayPort 2.1. Older HDMI 2.0 cables top out around 4K @ 60 FPS. Make sure both your source device and your display support the same standard end-to-end.
Variable refresh rate. To eliminate screen tearing at high frame rates, enable VRR — branded as G-Sync (NVIDIA), FreeSync (AMD), or HDMI 2.1 VRR (consoles and modern TVs). This syncs the panel refresh to the actual frame output, which is especially valuable when your real-time FPS fluctuates between 80 and 120.
When 60 FPS Is the Better Choice
Plenty of experienced players and viewers deliberately choose 60 FPS, and not because they haven't seen 120. Before chasing a 120 FPS setup, weigh the trade-offs honestly:
- You care more about resolution or ray tracing: A stable 4K/60 with effects on often looks better than 1080p or 1440p pushed to 120 with settings cut.
- Cinematic and narrative content: Films and most TV are mastered at 24–30 FPS; 120 FPS playback doesn't help, and some viewers actively prefer the more traditional cadence.
- Story-driven and turn-based games: RPGs, adventure, and strategy titles gain little from a shorter frame time.
- Battery and hardware cost: Running a phone or handheld at 120Hz drains the battery faster, and PC or console hardware capable of sustained 120 FPS at higher settings costs meaningfully more.
- Streaming: Most platforms still cap streams at 60 FPS, so a 120 FPS upstream gets discarded.
My verdict for anyone weighing a display or console upgrade: outside fast competitive play, a stable 60 FPS with better image quality is often the more balanced choice. 120 FPS is a real upgrade in the right context, not a universal "better."
Converting 60 FPS Video to 120 FPS
Native Capture vs AI Interpolation
Before touching a tool, it's worth being clear about what you're actually creating. Footage captured natively at 120 FPS records real motion samples 120 times per second. AI frame interpolation, by contrast, analyzes an existing 60 FPS clip and generates new in-between frames using a deep-learning model. The output can be encoded at 120 FPS and often looks smoother, but it isn't equivalent to a native 120 FPS recording and can introduce artifacts around fast motion, occlusion, or complex edges. Always preview a tricky scene before treating the interpolated file as final.
Choosing an Interpolation Tool
Once you've accepted that trade-off, the tool choice comes down to your workflow, budget, and how much control you want. For a broader field guide, see our roundup of AI frame interpolation tools; readers comparing dedicated apps can also look at our review of FPS converter tools. A quick fit comparison of the main options:
1. UniFab Video Smoother AI: A desktop app for Windows and Mac that interpolates 24 or 30 FPS sources up to 60 or 120 FPS using a dedicated AI frame-interpolation engine, with support for integer multiples (2x, 4x) and specific target frame rates. Best for users who want a local workflow with a straightforward interface. Not ideal for weak hardware or footage full of fast occlusion unless the preview looks clean.
2. Adobe After Effects (Timewarp): Best for existing Adobe users who want frame-by-frame control. Flexible but has the steepest learning curve of the group.
3. Topaz Video AI: Best for users who already own it and have the GPU headroom. Produces strong quality but sits at the highest price point in this list.
4. FlowFrames + RIFE / DAIN: Best for tech-savvy users who want full control over model choice. Free and open source, but requires more setup and command-line comfort.
5. SVP (SmoothVideo Project): Best for viewers who want smoother playback without re-rendering. It interpolates on the fly inside mpv, MPC-HC, or VLC rather than exporting a new file.
Converting Video with UniFab Smoother AI
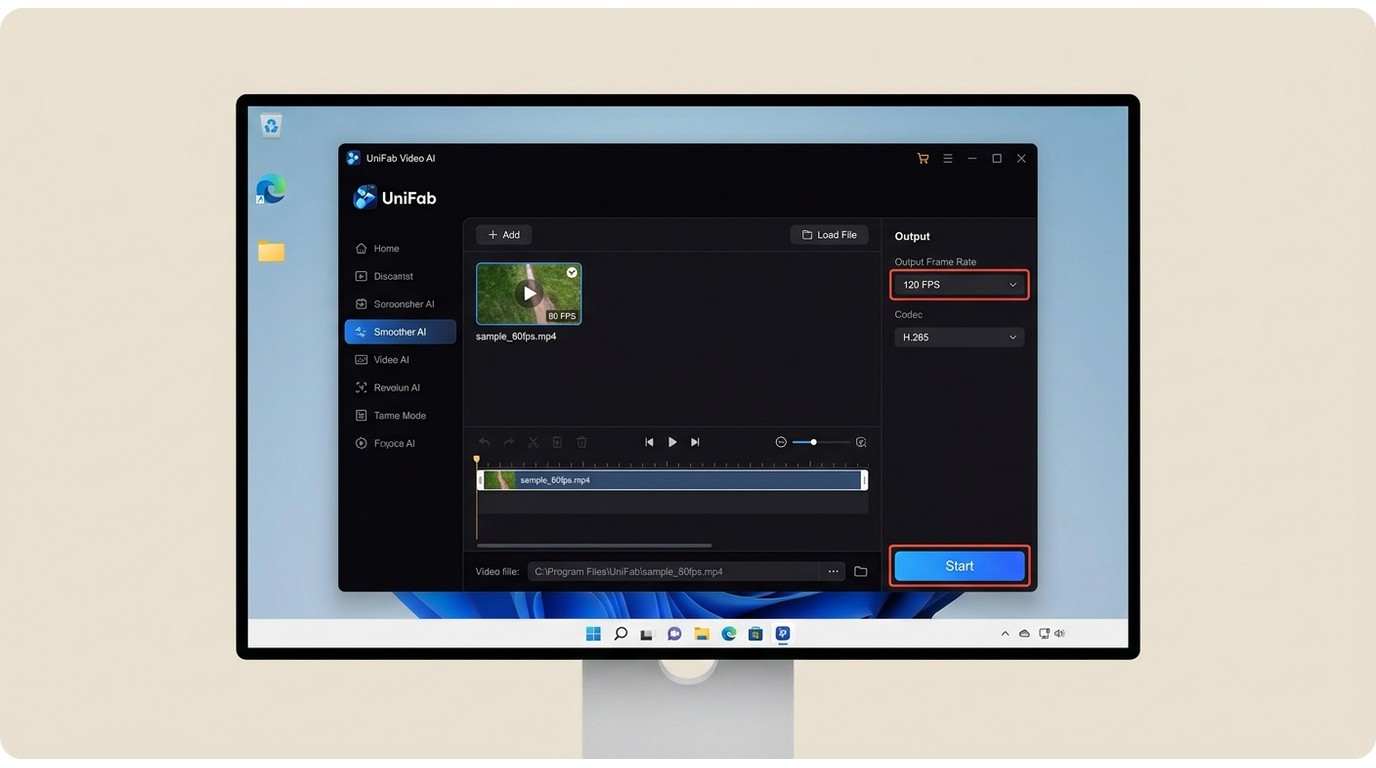
As noted above, an interpolated 120 FPS file is not the same as a native 120 FPS recording, so the steps below assume you want a local desktop workflow and are willing to preview the output before treating it as final. If your goal is instead to increase FPS in a live game rather than convert an existing file, that's a different problem.
30-day Free Trial with full feature access!
Launch UniFab and Select Mode
Open UniFab, go to "All Features" , and select the "Smoother" module from "Video AI".
Load Source and Edit Output Settings
Import the video you want to smooth and adjust settings such as frame rate, output quality, codec, and format.
Begin Video Editing
Click the start button to initiate the editing process and get smooth results.
The 60 FPS vs 120 FPS Verdict
120 FPS is most worthwhile for fast motion and responsive play on compatible hardware — a 120Hz-or-higher display, adequate GPU headroom, and the right cable end to end. 60 FPS remains the better balance when image quality, ray tracing, battery life, hardware cost, or a cinematic look matters more than maximum responsiveness. For readers who already own 60 FPS footage and want to try a 120 FPS output locally, a tool like UniFab Smoother AI or a dedicated 60fps video converter can interpolate the extra frames, with the caveat that the result isn't a substitute for native capture.
Frequently Asked Questions
What is the best way to use 60fps vs 120fps?
Start with the source quality, target platform, privacy requirement, and final export settings. For 60fps vs 120fps, use a short representative clip first, compare the result at 100% view, and keep the original file so you can revise the workflow without generation loss. This also applies to 120fps vs 60fps.
Is 60fps vs 120fps free?
Some 60fps vs 120fps workflows are free, while others limit file size, duration, resolution, credits, watermarks, or export formats. Verify the current plan on the provider's official page because free allowances can change. This also applies to is 120fps better than 60fps.
Does 60fps vs 120fps reduce quality?
60fps vs 120fps can reduce quality when it adds unnecessary recompression, aggressive enhancement, or incorrect output settings. Match resolution, frame rate, codec, and bitrate to the source and delivery platform, then inspect motion, edges, audio sync, and fine detail. This also applies to high frame rate video.
Which formats or devices support 60fps vs 120fps?
Support depends on the chosen application and workflow. Check operating system, input and output formats, hardware acceleration, browser upload limits, and whether the destination platform accepts the selected settings before processing a full project. This also applies to 120fps vs 60fps.
How long does 60fps vs 120fps take?
Processing time varies with duration, resolution, codec, AI model, hardware, and export settings. A short test provides the most reliable estimate; online tools also add upload and download time, while local tools depend more heavily on CPU and GPU performance. This also applies to is 120fps better than 60fps.
Can beginners use 60fps vs 120fps?
Yes. Beginners can use 60fps vs 120fps by following a conservative workflow: duplicate the source, choose an appropriate preset, process a short sample, compare before and after, and only then export the complete file. This also applies to high frame rate video.
What should I check before choosing a tool for 60fps vs 120fps?
Compare source fit, output quality, privacy, platform support, batch capability, watermark policy, free limits, price, and control. Do not choose a 60fps vs 120fps tool only because it advertises the highest resolution, frame rate, or AI label. This also applies to 120fps vs 60fps.
Is desktop or online processing better for 60fps vs 120fps?
Online processing is convenient for short, non-sensitive files, but it can impose upload, retention, watermark, credit, and resolution limits. Desktop processing is usually better for private, long, high-resolution, or batch 60fps vs 120fps work. This also applies to is 120fps better than 60fps.
What are the main limitations of 60fps vs 120fps?
The main limits are source quality, missing detail, motion artifacts, incompatible formats, hardware demand, upload constraints, and generation loss. 60fps vs 120fps cannot always reconstruct information that was never captured, so results should be described realistically. This also applies to high frame rate video.
How does 60fps vs 120fps compare with manual editing?
Automated 60fps vs 120fps is faster and easier to repeat, while manual editing gives more local control and may avoid overprocessing. A practical workflow uses automation for the first pass and manual review for difficult scenes, transitions, faces, text, and audio sync. This also applies to 120fps vs 60fps.